You might have come across a member of the elusive ‘ultralight’ gang while you’ve been out on the trail. These hikers will take great pride in telling you how they have cut the handle off their toothbrushes to save those precious ounces and how they have streamlined their packing with the best ultralight equipment. Next time you meet one of these hikers, check their feet. You might be talking to a member of the fastpacking community.
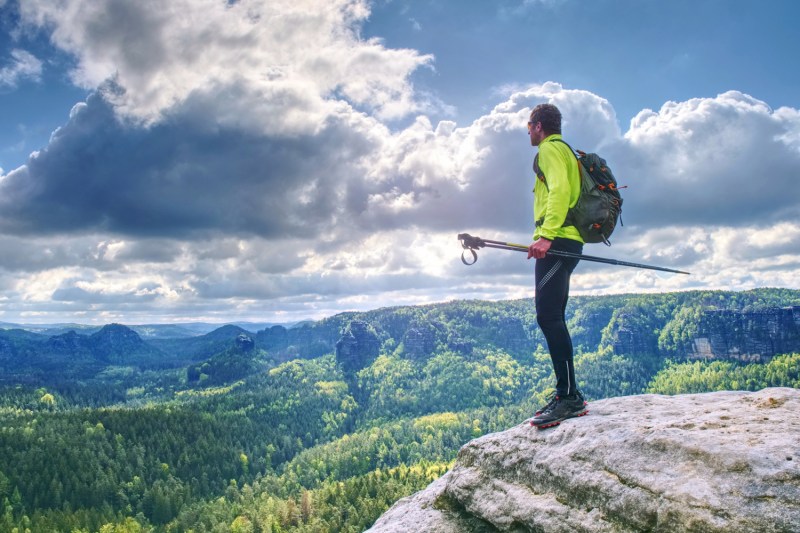
Fastpacking isn’t a new concept, but since it’s been given an official name and hit the mainstream, it has begun to take off. Fastpacking blurs the lines between ultralight backpacking and trail running and is best summarized with the mantra that most fastpackers live by — fast and light overnight. Fastpacking lets you complete a trail that should be hiked in five days, in just two to three days, so you can travel farther and explore more. It’s not all about speed though, so let’s get into what it is, and what it isn’t, with our guide to fastpacking.

What Is Fastpacking?
Fastpacking sits somewhere between ultralight backpacking and trail running. Where it sits on that sliding scale is completely up to you. There are fastpackers out there who set out to break the self-supported FKT — fastest known times — as Joe “Stringbean” McConaughy did on the Appalachian Trail. While your average hiker would take around five months to complete the hike, Joe fastpacked it in just 45 days.
You don’t need to be a record-breaker though. Fastpacking is all about efficiency, not out-and-out speed. Push too hard, too early, and you’ll burn out with a long trail ahead of you. Most fastpackers will find themselves hiking the uphills, running the downhills, and regularly changing between the two on the flats.
How to Plan a Fastpacking Trip
The good news is that fastpacking doesn’t have a minimum distance. It also doesn’t have a recommended speed, elevation, or, well, anything. How far and fast you go is completely up to you. Like most outdoor sports, though, it pays to start off easy. Your first trip probably won’t be a 45-day push on the AP trail, more likely it will be a quick-and-dirty overnight near your home. That way, if you get things wrong — as they do occasionally — you have time to find a fix for the future.
Calculate your trail time at a more relaxed pace than you usually run at — remember that you will have a backpack on and you’re aiming to run for consecutive days, so don’t head out the door too fast. Think about water refill points at the time of year, and what the weather is going to be doing. Strong winds and intense heat can affect how fast you move, while cold weather and heavy rain might mean you need to carry more gear with you.

What Equipment Do You Need for Fastpacking?
Fastpackers thrive on minimalism. This isn’t the Marie Kondo approach of joy-ifying your life, but it’s more a constant battle of weight vs essentials. Some experienced fastpackers pride themselves on running hard and sleeping hard, which basically translates as not taking all the essentials for a comfortable night’s sleep. Sure, you might be able to do without a camping tent, and your sleep mat might be so light that it barely exists, but is that the sort of experience you want?
Over time, you will streamline your equipment. You’ll take out what you don’t use, add what you missed out, and find yourself making small alterations depending on the weather, trail, distance, and any other number of factors. As you’re heading out for multiple days on the trail, we still recommend sticking to the backpacking essentials, but these can all be found in lightweight, and ultralight models.
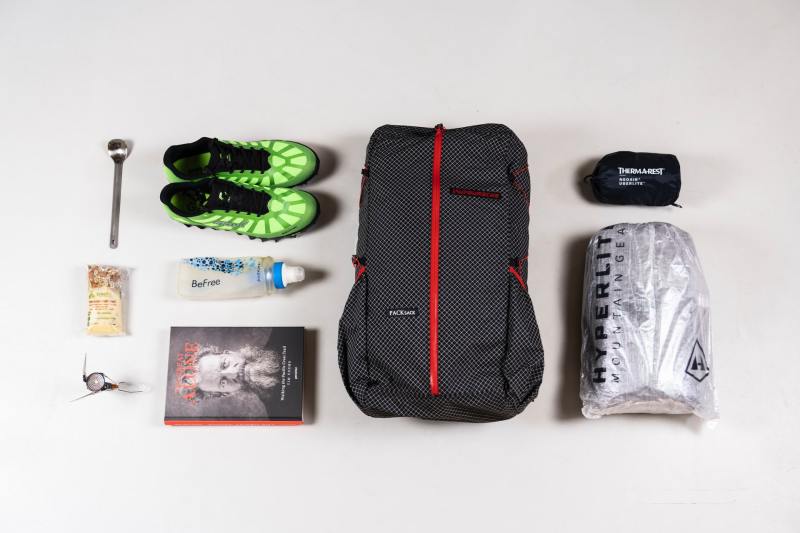
Here’s our list of fastpacking equipment that you need to head out for a fast and light adventure.
- Trail Running Shoes: There is a limit to how fast you can move in hiking boots, no matter how light they are. The best trail running shoes will give you grip and dexterity on the trail and will dry out quickly if you run through rivers or get caught in a rain shower. The fit is crucial, as you’re going to be pounding these against the trail for hours at a time.
- Wicking layers: You probably already have your favorite outdoor clothing or running gear, which might work for fastpacking. You’re going to sweat a lot out on the trail, so your layers need to wick effectively to keep your body dry and regulate your body temperature. As with all hiking, no cotton is allowed!
- Lightweight Backpack: These aren’t going to be your normal hiking packs. In fact, you might be mistaken for thinking that fastpackers are running with day packs. Fastpackers will do everything in their power to avoid going above a 35-liter backpack, with most keeping their gear under 30-liter. You need a well-fitted and stable backpack that you can comfortably run with for many hours at a time.
- Spare layer(s): When you get into camp, you’re going to want a layer that you can put on to stay warm. Most fastpackers will carry an insulated jacket that uses either down or synthetic insulation. These offer a good warmth-to-weight balance, but a fleece layer could be sufficient. If you have the space, a spare pair of hiking socks can be a gamechanger on an overnight trip.
- Sun Protection: If you’re running in summer, it’s always worth carrying a lightweight running hat or visor, as well as outdoor sunglasses and ultra-protective sunscreen.
- Hat and Gloves: Weather and temperature can change in minutes on the trail. A lightweight pair of gloves and a hat are worth their weight when the temperature drops overnight. A lot of runners will choose to use a more versatile neck gaiter rather than a hat. These can be worn on your head as sun protection, or to stay warm, and can also be used to create a baffle to prevent warm air from escaping from your waterproof jacket.
- Waterproofing: Unless the forecast can guarantee that you won’t encounter rain, you’ll need full waterproofing with you. How light you can go is directly impacted by your budget on these we’re afraid, with some jackets and pants weighing just a few ounces each.
- Sleeping Bag: First and foremost, your sleeping bag needs to be rated for the right temperature to keep you warm. Then you can think about the size. If you’re not warm, you won’t sleep well, and if you don’t sleep well, you won’t want to run the next day.
- Sleeping Pad: When you’re shedding weight, it can be tempting to leave the sleeping pad at home. Don’t do it. You lose a huge amount of heat to the ground when camping and without a sleeping pad, you’re going to be cold and uncomfortable.
- Sleeping System: Whether you choose to sleep under the stars, in a camping hammock, a bivy bag, under a tarp, or go for the full protection of a tent, is up to you. There are benefits to each system, and all are available in lightweight options. This is going to be the biggest bit of kit in your bag, so aim for packability where possible.
- Stove: Some purists will survive off purely cold, dry food. Unless you’re a real masochist, we would recommend a lightweight camping stove so you can have a proper meal at the end of the day and of course, a coffee in the morning. Remember your lighter!
- Food: Food can be tough. You’re going to burn a load of calories, but you don’t want to carry too much weight. We recommend dehydrated meals and plenty of trail snacks to keep you going. Try to eat little and often.
- Water: You won’t want to carry all the water you need for multiple days. Carry enough to keep you going, and use either a lightweight water filter or purification tablets to make sure you have plenty of clean water available.
- Headlamp: The best headlamp you have, and perhaps a spare headlamp. You can never have too much light when you need it.
- Navigation equipment: A map and compass are preferable and should always be carried. A lightweight GPS could also be used but don’t rely on them alone.
- Communication: A mobile phone or satellite phone that has a battery and signal is essential.
- First Aid Kit: You won’t want to carry a full kit, but try to include a few essentials, and don’t forget the blister plasters.
Ultralight kits don’t come without the price tag and we aren’t advocating that you hit the shops and buy all of this outright. You can start fastpacking with whatever you have already and over time, you can lighten your load. As long as you have the right attitude and a pair of running trainers, you can hit the trail and call yourself a fastpacker.