
Learn to tie a square knot to secure loads when you’re out camping

Securing a bundle of wood, lashing up a backpack, or just tying your shoes, the square knot is essential

A reef knot is tied against a tree
Tom Kilpatrick / The Manual

The square knot is one of many useful knots that every outdoorsman should know for when they're in the backcountry. The square knot is a binding knot designed to connect two ends of a rope that are the same diameter and style. This means it works best with the same rope — tied around an object, for example — or, failing this, using the same type of rope to connect together. While a square knot is secure, it should never be entrusted with your bodyweight or a key load, as it can capsize and fail. But that doesn't mean that the square knot isn't a key outdoor knot.

Recommended Videos

Difficulty

Easy

Duration

5 minutes

What You Need

  • Any type of rope

Believe it or not, most people already know how to tie a square knot — or are at least close to it — thanks to years of tying your shoelaces. In reality, what most people use to tie a shoelace is a version of the granny knot, which is what we get when we don't quite tie a square knot properly. While the granny knot is a secure enough knot for a pair of shoelaces, if you learn to tie a square knot, you'll find that your boots won't come untied when you're pounding the trail. The square knot is flat and sits flush against whatever you're tying up, allowing you to tie it close up to your package and make sure your bind stays secure. Here's how to tie a square knot in six easy steps.

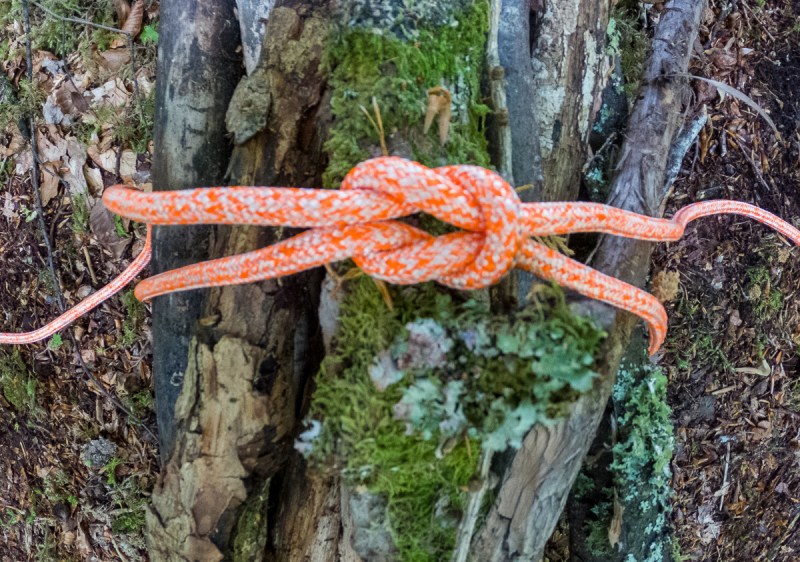
How to tie a square knot

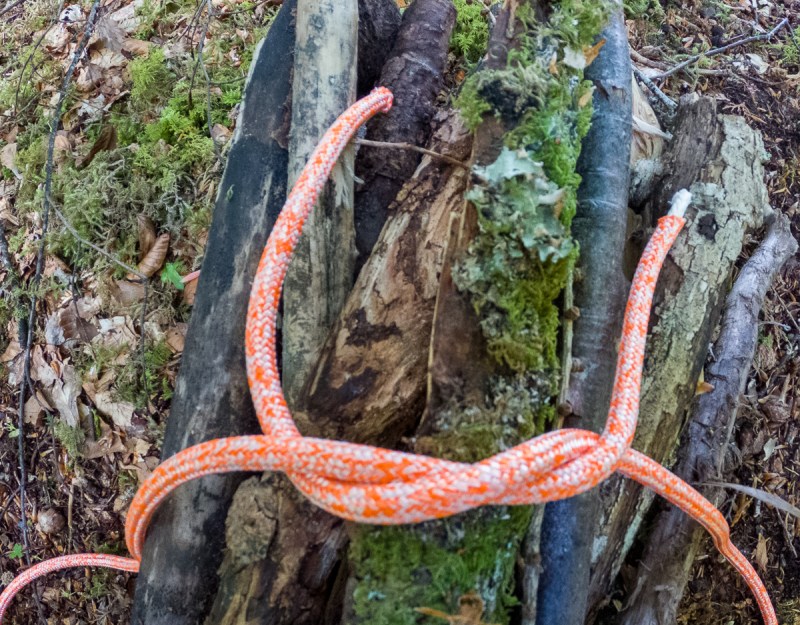
Step 1: Hold the two ends of the rope in either hand. Place the left-hand end of the rope over the top of the right-hand piece.

Step 1 of tying a square knot around a bundle of wood
Image used with permission by copyright holder

Step 2: Twist that same end under the right-hand piece of the rope.

Step 2 of tying a square knot around a bundle of wood
Image used with permission by copyright holder

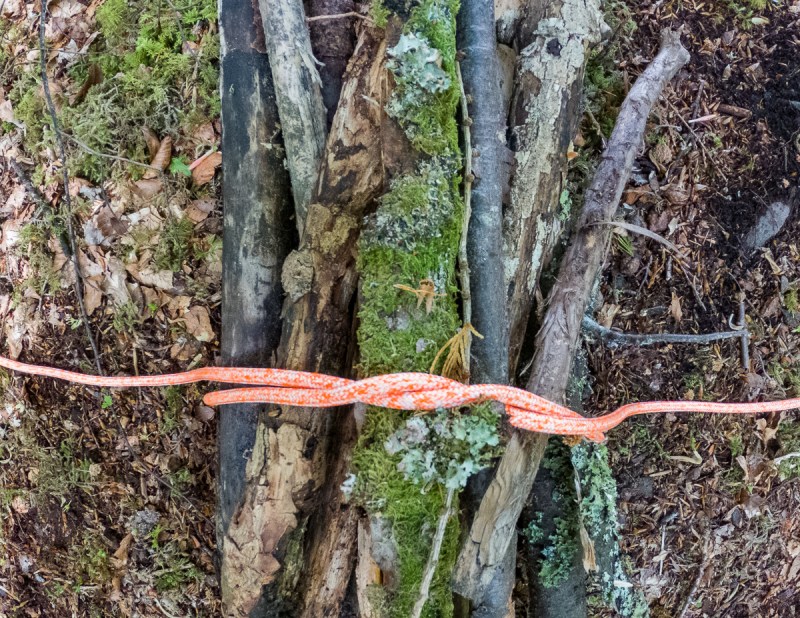
Step 3: Pull the rope tight around the bundle or package and keep some pressure on the working portion of the knot.

Step 3 of tying a square knot around a bundle of wood
Image used with permission by copyright holder

Step 4: Take both ends of the rope in your hands again and place the right-hand end over the left-hand piece.

Step 4 of tying a square knot around a bundle of wood
Image used with permission by copyright holder

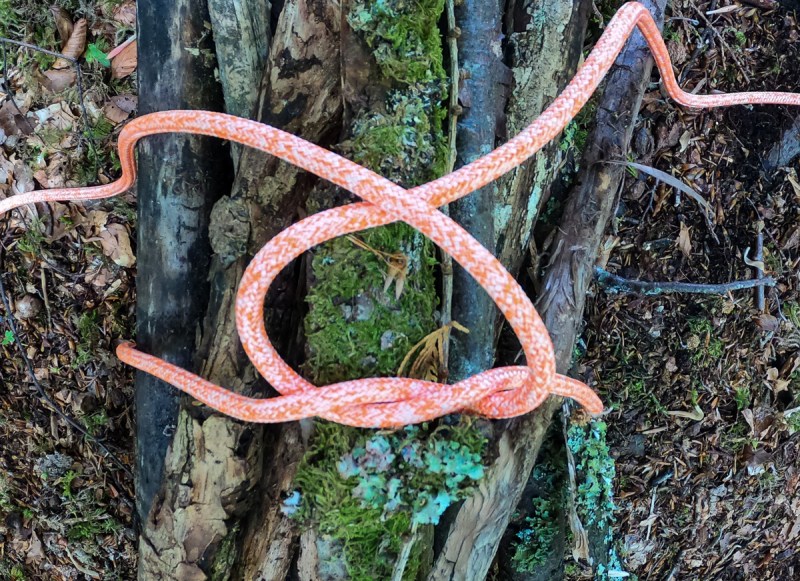
Step 5: Wrap the right-hand end under the left-hand piece of rope.

Step 5 of tying a square knot around a bundle of wood
Image used with permission by copyright holder

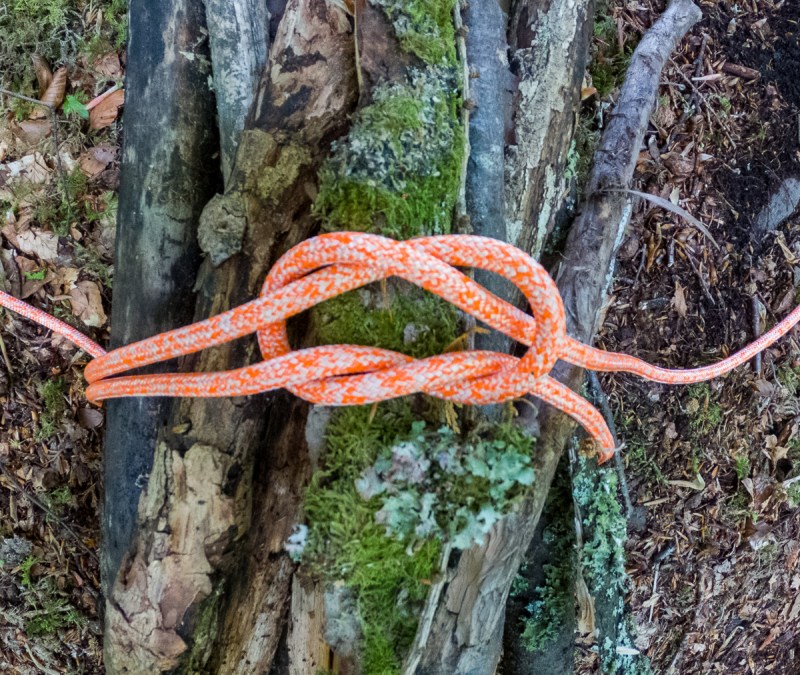
Step 6: Pull your square knot tight and ensure that it's seated correctly to prevent it from twisting over itself.

A finished square knot tied around a bundle of firewood
Image used with permission by copyright holder

When to use a square knot

As we said earlier, you shouldn't be using a square knot for any situation where you need to secure a heavy load or when loading the rope with your body weight. But there are situations where it's the perfect knot, and these are just some of the many outdoor uses for this knot:

  • Securing a cord of firewood. It's much easier to haul your wood collection back to your campsite if it's properly tied at either end, and the square knot is the perfect way to secure your load.
  • Tying the ends of a bandage together. Every outdoorsman should have a first aid kit and basic first aid knowledge. The square knot keeps the pressure on your wound and stems bleeding while you tie your bandage.
  • Tidying away camping gear. Once you've wrapped up your tarp, bedding roll, blanket, or even your tent, you need to secure them to stop your gear from unraveling in your bag or the trunk of your car. Use the square knot for a secure package.

Next time you tie your shoes in the morning, take a moment to remind yourself that you're practicing a valuable skill for the next time you're outdoors and remember, you're an outdoorsman every day of the week.

Tom Kilpatrick
Former Digital Trends Contributor
A London-born outdoor enthusiast, Tom took the first ticket out of suburban life. What followed was a twelve-year career as…
How to calculate hiking time and plan for being away
Calculating your hiking speed isn't as hard as you think
Two people hiking together

To most people, planning a hike can be tedious, but for me, packing my bag gets me even more excited for the adventure ahead. One of the most important aspects of preparing for my hike is determining how long it will take to complete it. This is important for several reasons. First, you'll be able to determine what kind of equipment you'll need during that timeframe, and second, you'll be able to tell someone when to expect you back in case you go missing. About 600,000 hikers get lost every year in the U.S., so if you're one of them, calculating this could mean your survival. Here's how to calculate hiking time.
How to calculate hiking time accurately

If you’re an experienced hiker, you might have noticed that sometimes there is an estimated time listed for a hike in a guidebook or app, which is termed "book time." Almost across the board, these hike time estimations are calculated using Naismith’s (Time Estimation) Rule, which essentially says that it takes about 1 hour to hike 3 miles plus an additional hour for every 2,000 feet of elevation gained.

Read more
Try these lunch ideas the next time you go backpacking
Got a rumbling tummy on the hiking trail? Try one of these backpacking lunch ideas
Hiker with a backpack in front of a mountain lake background

Trail mix has to be one of my personal favorite snacks while backpacking. That said, you can't live on it, especially when you're hiking for miles every day. I'll be honest — dinner is my favorite meal while out on the trail, mostly because there's a higher chance that I can start a safe fire and simmer something delicious. Lunch, however, has been a challenge. Not only do backpacking lunches have to be delicious and satisfying, but they also need to be easy to prepare. Hopefully these backpacking lunch ideas will help.
Things to consider for backpacking lunch ideas

When planning backpacking lunch ideas, it's more important than ever to choose foods that are nutritious, lightweight, nonperishable, high in energy, and most importantly, easy to prepare. You might not have access to a campfire while you're out backpacking, so here are a few considerations to keep in mind.
Easy preparation
I love preparing a hearty meal while backpacking or camping, but not during prime daylight hours when I could be making better time. That's why I always reach for easy-to-prepare meals. Sometimes, I even do a lot of the prep work while I'm still at home. That way, all I need to do is find a nice view.
Weight and packability
I've made the mistake of packing a huge cooler with sandwiches. Not only do you have to lug the entire thing up the mountain, but you've got to bring it down, too. Plus, on a multiday backpacking trip, no ice pack is going to last that long. Be careful that the food you take is lightweight, and avoid foods that require excess packaging or bulk.
Caloric density
Since backpacking is a high-energy sport, you'll want to select foods based on nutrients. High calories are one thing, but to get the most energy from your food, aim for a balance of carbohydrates, proteins, and fats. Make sure you're incorporating proteins so your muscles can repair after a long day of hiking.
Shelf stability
A lot of backpackers plan their trips for the summer, which means having to deal with the heat. This can definitely play a part in what kinds of foods you bring. Backpackers aim to bring as light as possible, so foods that don't spoil and don't need excessive cooking are going to be your best friend.
Our favorite backpacking lunch ideas

Read more
Why you need a good merino wool base layer
Here's how merino wool fits into your layering system
The best Merino wool clothing is soft, breathable, odor-resistant, and temperature-regulating.

In Nordic regions, they have an old proverb that says: There's no bad weather, only bad clothing. As it turns out, there's actually some truth to the saying! As someone who loves the winter, I've had my fair share of borderline-frostbitten toes, but ever since I discovered the merino wool base layer, I've been able to stay out longer than ever. Here's everything you need to know about merino wool base layers and how to make the most of your gear.

For those unfamiliar with the layering system, a base layer is the innermost part of your gear. Think long underwear and socks. After that, you'll wear an insulating mid-layer followed by a rain or wind-resistant outer shell. Believe it or not, the base layer is the most important layer because of moisture management. Fail to nail this step, and you're probably going to be shivering out there on your bucket list adventure far sooner than you'd like.
What is merino wool, and why do I need it?

Read more