
How to tie the alpine butterfly for a secure midline knot

This is a multi-purpose midline knot with almost endless uses around camp

The Alpine Butterfly knot is recognized as the most effective outdoor knot for tying an attachment point in the middle of a rope. This is one of the more difficult knots to get right, and many people find it confusing to start with. Once you've got to grips with the twists, though, I can guarantee that the Alpine Butterfly will become your go-to midline knot.

Difficulty

Moderate

Duration

10 minutes

What You Need

  • A piece of rope

  • Patience

Sure, you can always tie your midline knot using a figure-eight knot, but only the alpine butterfly can give you a secure attachment point that can still be untied after being subjected to weight. But it's even better than that. The alpine butterfly knot is specifically designed for three-way loading, so you're not significantly weakening the rope like you would with alternatives. The alpine butterfly can take some practice to get right, so grab a rope and follow these steps.

This Knot is a GAMECHANGER! - The Alpine Butterfly Knot.

Alpine butterfly knot
Image used with permission by copyright holder

How to tie the alpine butterfly knot

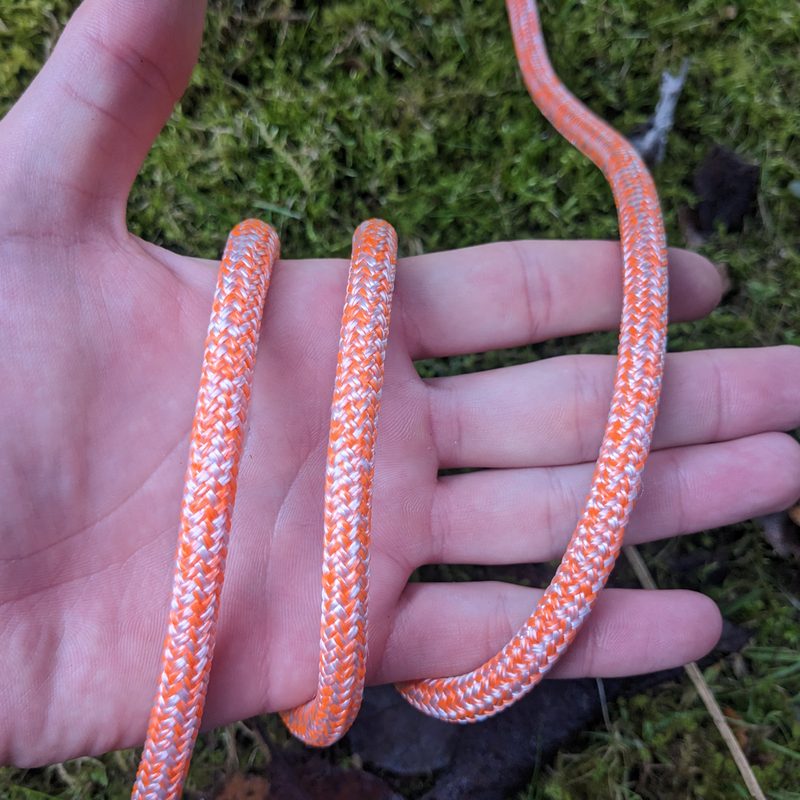
Step 1: With one end of the rope toward you and the other going away, wrap the rope around your hand three times. Starting from your wrist, number these loops 1, 2, and 3.

Step 1 tying an alpine butterfly knot
Image used with permission by copyright holder

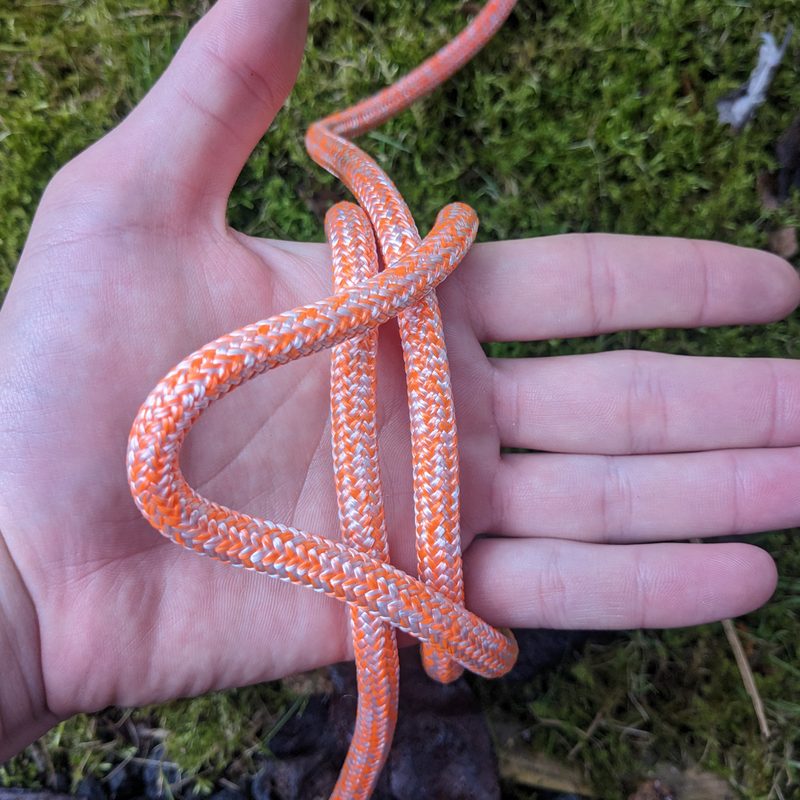
Step 2: Loop 2 — the middle loop — will be your working loop and is the only loop you should need to move. The alpine butterfly knot can also be remembered as the under, over, under knot. Begin by tucking loop 2 underneath loop 3.

Step 2 tying an alpine butterfly knot
Image used with permission by copyright holder

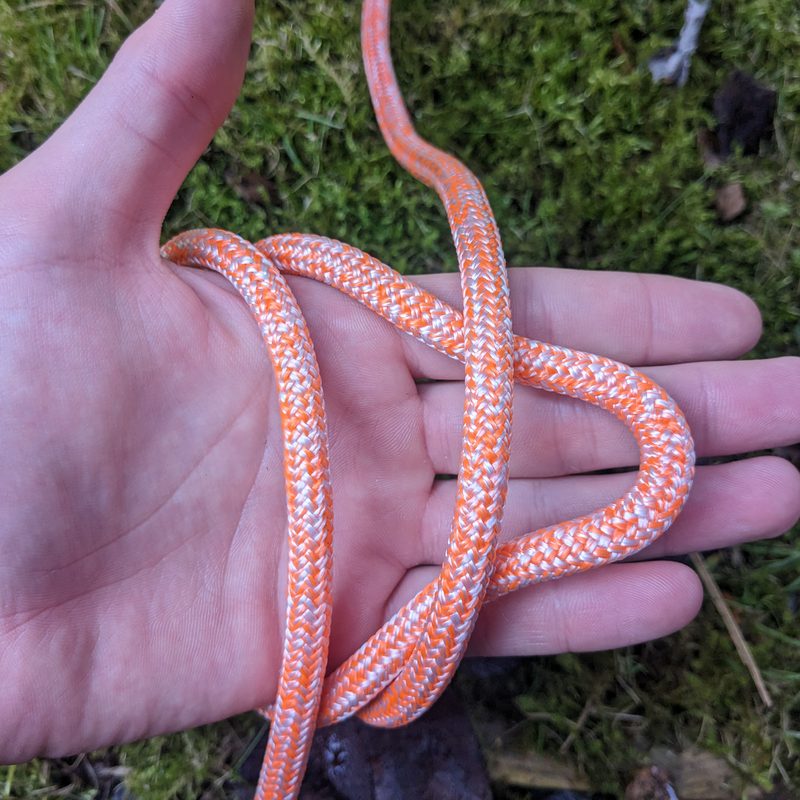
Step 3: From here, take that loop back over the top of the other loops for the over section of the knot.

Step 3 tying an alpine butterfly knot
Image used with permission by copyright holder

Step 4: Now take loop 2 back underneath loops 1 and 3 for the final under section.

Step 4 tying an alpine butterfly knot
Image used with permission by copyright holder

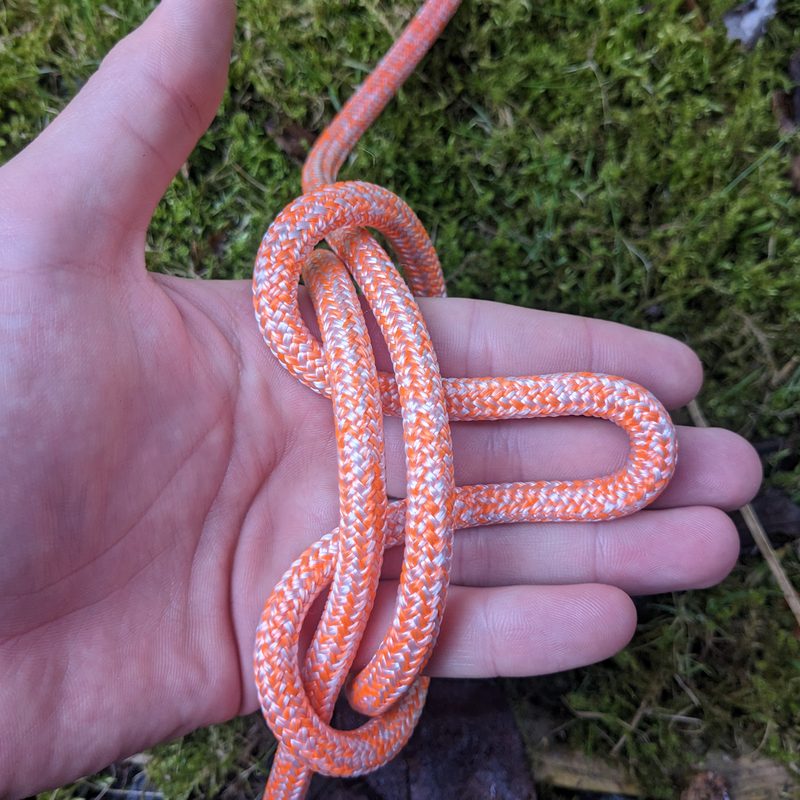
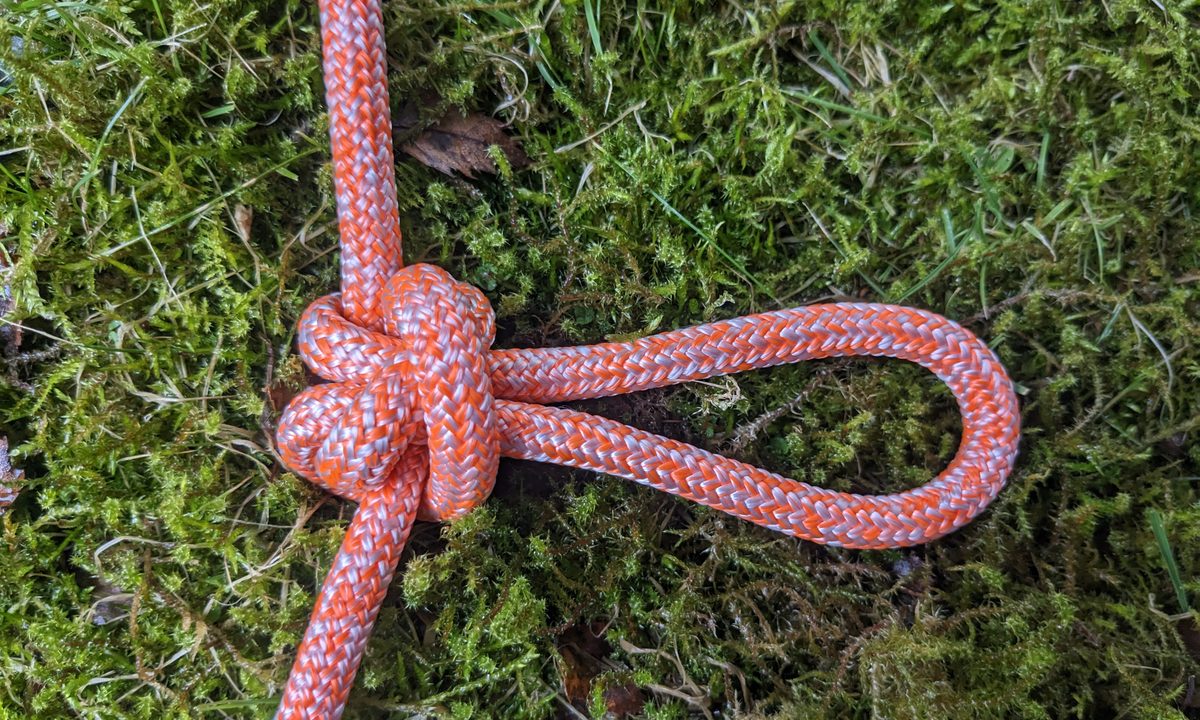
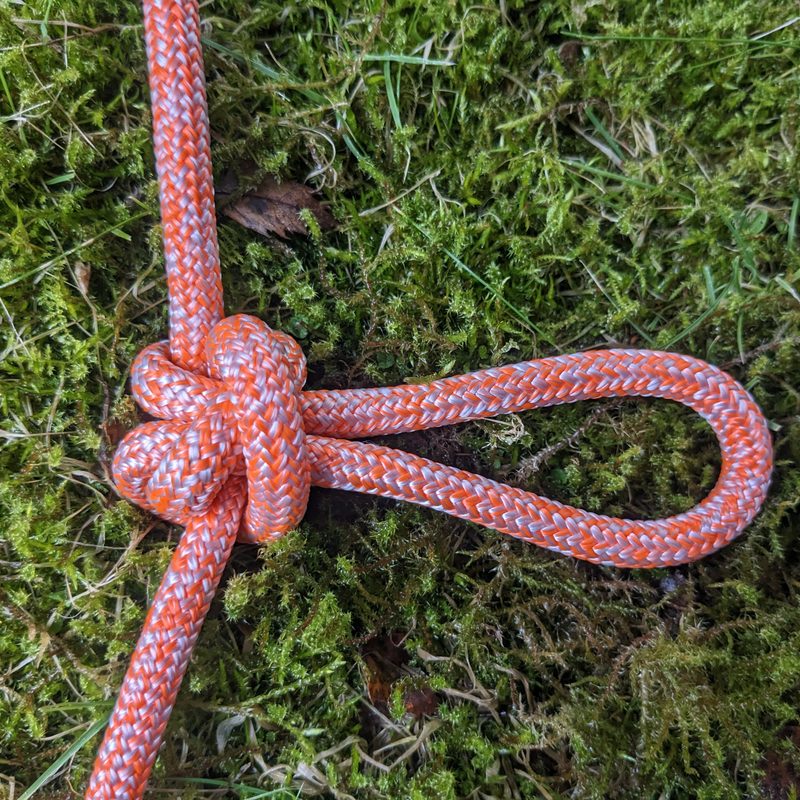
Step 5: Hold the end of loop 2 and slide the knot from your hand. Pull on both ends and on the loop to dress your knot.

Step 5 tying an alpine butterfly knot
Image used with permission by copyright holder

Step 6: You can adjust the size of your loop by feeding the rope through the knot in either direction.

Step 6 tying an alpine butterfly knot
Image used with permission by copyright holder

When should you use the alpine butterfly?

As a secure midline knot that can be subjected to heavy loads, the alpine butterfly knot has any number of outdoor uses. Here are some of the most common:

  • Suspending your tarp shelter in camp.
  • Attach a line across your campsite to suspend lanterns and lighting.
  • As your midline knot when tying a trucker's hitch.
  • Tying multiple hikers or rock climbers into one rope. This is common practice for crossing glaciers, advanced rock climbing, or keeping groups together in poor weather conditions.
  • Isolate a damaged section of cord or rope while not limiting the strength of the rest of the rope — great for hanging bear bags securely if a rope becomes worn on a trip.

Once you've mastered the alpine butterfly knot, you'll suddenly find a lot of uses for it that you never thought of. As with all outdoor knots, it might not be used too regularly, but when it's the right knot for a task, no other will suffice.

Editors' Recommendations

Topics
Tom Kilpatrick
A London-born outdoor enthusiast, Tom took the first ticket out of suburban life. What followed was a twelve-year career as…
This rooftop tent kit will turn your van into a pop-top camper for about $12K
Transform your two-person rig into a legit, four-person, family-friendly chariot
Camper van outfitted with Super Pacific's CloudCap pop-up roof tent parked among a stand of trees.

Van life usually means sacrificing comfort and living space for maximum portability. There's no denying that it's tight packing most of the amenities of home into the back of a hollowed-out work van. So, anything you can do to make the space feel a little roomier feels like a luxury. Super Pacific's clever CloudCap does just that by converting the unused space on your camper van's roof into a legit two-person "bedroom" with a view.
The details on Super Pacific's CloudCap pop-up rooftop tent for camper vans

Super Pacific bills the  as "a private bunk house for the kids, a guest room for friends, or a panoramic Crow's Nest for you." Bottom line: It expands the living space of many two-person camper vans into four-person road-trip wagons. The simple kit includes the rooftop tent itself, plus all the instructions and mounting hardware you need to install it on the most popular Mercedes-Benz and Ford Transit vans on the road.

Read more
Remote Vans drops 3 new camper van models designed for luxury living on the road
Complete with Starlink internet and enough battery power to keep you going off-grid indefinitely
Side view of a Remote Vans camper van with its sliding door open.

Camper vans have come a long (long) way since the OG models your parents and their parents grew up with. Many of today's rigs are built not just for living on the road but for living and working in style — some offer premium features that rival most modern studio apartments. Case in point: Remote Vans. The company's latest three camper van models are designed for modern digital nomads with enough amenities to make you at least consider trading in your house keys for a life on the road.
Get the details on Remote Vans' three camper van models

Each of the three camper van models — Friday, Oasis, and Aegis—is born from a stock Mercedes-Benz Sprinter van. Straight off the production line, it's arguably the most capable and tech-forward platform on the market, designed for easy living on the road. But Remote Vans goes well beyond the stock platform, customizing each of the three models to within an inch of its life.

Read more
These are the essential outdoor knots every outdoorsman should know
A well-versed arsenal of knots is a must-have for any outdoorsman
A reef knot is tied against a tree

There's almost no end to what you can achieve armed with a length of rope and an arsenal of outdoor knots to tie it together. If heading into the backcountry, you should always be prepared for survival. While part of that is carrying the right gear, you must know how to use it effectively. You wouldn't take your woodcutting axe without giving it a few practice swings at home, so why would you expect to tie the right knot without practice?

There is an adage among those who don't know what to do with rope: if you can't tie knots, tie lots. If you don't know what you're doing, keep tying until your rope feels secure. It works, sometimes. But in a significant way, these people are missing out. Knots, like backcountry navigation skills or making a fire, are part of being an outdoorsman. Outdoor knots come in different shapes and perform various tasks; some are quick, some secure, and others are designed to be untied quickly. These eight are the essential outdoor knots to learn first, so grab a rope and upskill your outdoor self.
Bowline knot

Read more