According to the Purity Law of 1516, the famed Reinheitsgebot, beer brewed in Germany and associated states of the Holy Roman Empire could be produced using only three ingredients: Water, barley, and hops. (Contrary to common misconception, brewers of the day did have some understanding of how yeast works in the brewing process; this essential ingredient was initially left out, however, because it was usually transferred from one batch of brew to the next naturally through equipment contact, not intentionally added.)
Later, the Purity Law was expanded to allow certain other ingredients, such as wheat, but the best beers really are produced using a rather simple ingredient list, namely yeast, water, barley, and hops. How can these basic ingredients make for such a diverse range of rich, complex brews? Everything from a light and refreshing Kölsch to a big, bold, Russian imperial stout? Part of it is about how the barley is kilned. A bigger part is all about hops.
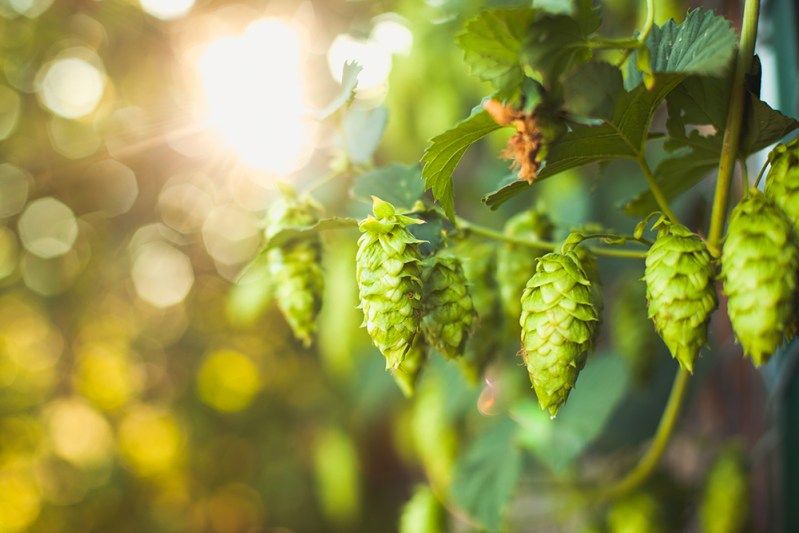
What are hops? Basically they are the flower (or cone) of the vine-like hop plant of the Cannabaceae family, which yes includes the cannabis plant, but no, hops can’t get you high. What they can do is add that blissful bitterness to beer that balances out malt sweetness to keep you coming back for sip after sip. Hops can impart flavors as varied as pine, citrus, floral, spice, and on it goes. Initially used by early brewers because they helped prevent spoilage thanks to their natural antimicrobial properties, today hops are all about the flavor. And aroma, for that matter.
Hops grow best in cool, temperate, and moist climates, thus a high number of hop growing regions are near the 48th parallel north latitude. Around the world, the leading hops producing regions include the Hallertau area of Bavaria, the Saaz region of the Czech Republic, Kent in the U.K., and in America, world’s lead producer of hops, the states of Washington, Oregon, and Idaho lead in volume.
Stan Hieronymus, author with Brewers Publications and writer of the book of For the Love of Hops, knows a thing or ten about this wonderful plant, so we checked in with him and were happy to learn that people outside the sweet zone can indeed still grow hops themselves.
“Hops grow best in the North, particularly between the 35th and 55th parallel,” Hieronymus explained. “This is the reason why commercial hops are usually grown in the Northwest and New York areas. For the hobbyist and homebrewer, hops can be grown further south, but the yield will not be as high.”
We also checked in with the font of knowledge that is the American Homebrewers Association, so with encouragement from Stan and expert knowledge on hand, let’s do it.
DIY Hop Growing at Home 101
First, pick your plant. With so many types of hops to choose from, this one is on you. Reverse engineer a beer you love, or ask your local brew shop guy for advice. Then read up to make sure it will grow OK in your climate. Then purchase your hop rhizome, the little bit of root that will grow into a mighty plant.
The best time to plant is early spring — April is ideal in many places. Hop plants take about 120 days to grow and reach harvesting time, so adjust your planting by region to let them start out in mild weather and mature before frost.
Pick a spot that’s relatively shaded, and where you can set up wires or very durable ropes pulled taut from the ground to a point at least 20 feet in the air. You can secure the top of the wire to a frame, a branch, your roof, whatever works that will give the hop plant plenty of space to grow and that you’ll be OK with becoming a pretty permanent part of your property — hop bines (yes bine, not vine) can live for two decades or more. (And you should raise at least two bines, by the way, a male and female.)
Hops thrive in well-drained soil, and Stan Hieronymus warns that “people often over water hops.” Make sure your rhizomes will be going into soil that dries out well after rains or watering. To improve drainage, you can add some sand to the soil, explains AHA writer John Moorhead, and it’s a good idea to check the soil pH, too. Kits are cheap and easy to use and you can add specific nutrients to aim for that ideal pH of 7.0.
Turn the soil and add nutrients (compost, e.g.) down to about one foot near the base of your secured wire, and then plant four or five rhizomes per wire about a finger’s depth under the soil with their little shoots aiming skyward. Spreading a thin layer of mulch over the planting site can help protect the young plats, says Moorhead.
Now water regularly, but also remember to let the soil dry out between watering. You should fertilize when you see shoots, and then again after a month, then again about six weeks later.
The first year of hop growing you probably won’t get a huge yield, but by year two you probably will. In year two you’ll have to learn about proper hop pruning, but in year one let the plants grow free. And once those cones are ready, don’t mess up the retrieval!
“Knowing when to harvest is very important when growing hops,” says Hieronymus “You can get technical on knowing when to harvest, but there are also some cues you can look for. Some tips are to feel the hops…it should feel papery if it is ready to harvest. Also make sure to break open the hop and if it is ready to harvest there should be a yellow matter in there called lupulin, this lupulin is what makes the hop flavor. Without it, you just have a green thing’s cones in your beer that will not produce any flavor.”
So you’ve grown and harvested hops? Congratulations! Now take proper care of them!
“After you harvest your hop it is key to dry right away,” Stan Hieronymus says. “[Not drying] is a common mistake for a first-time hop grower to make. When you harvest a hop it typically contain 80-90% moisture, you want to get that down to 10% as quickly as possible. Good storage is also key. Once dried you want to put your hops in a sealed container, like a Ziplock bag, and place in freezer that is at least 26 degrees so you can retain all the essential oils in the hop.”
Oh, and don’t forget to brew some beer, too.


