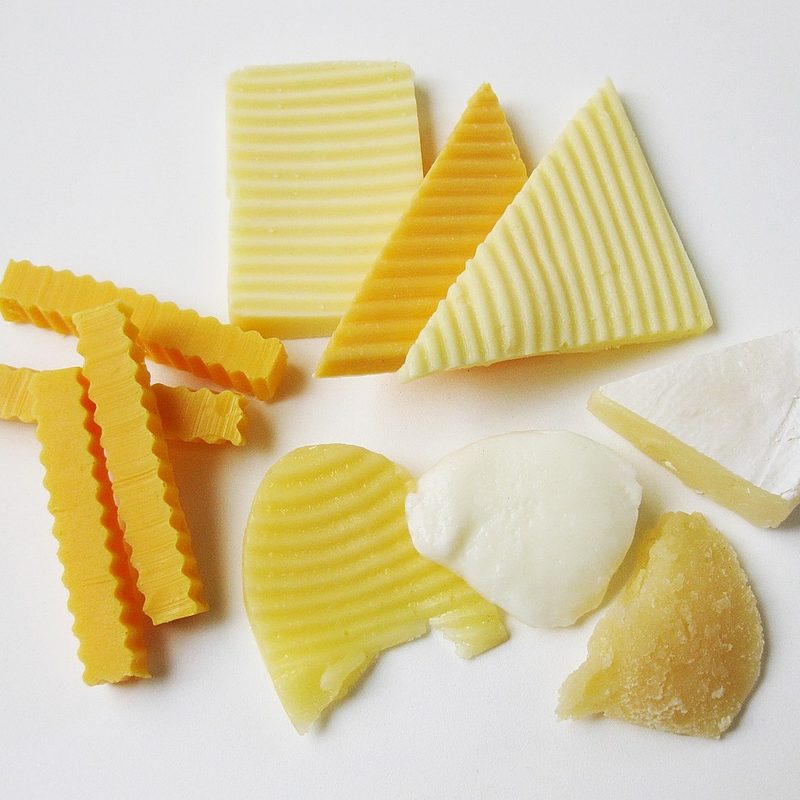
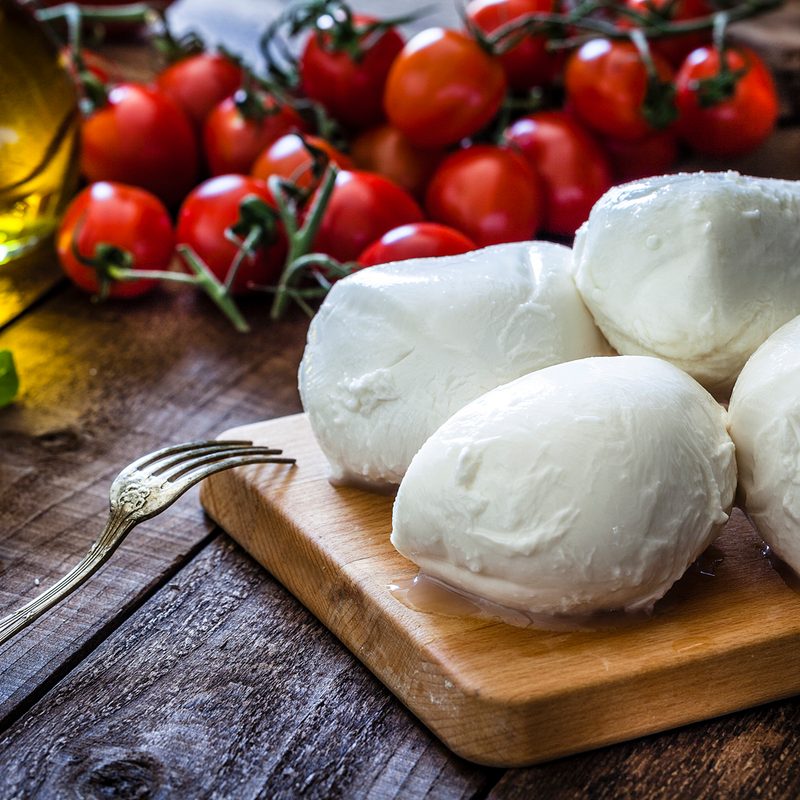
The art of cheesemaking is a time-honored tradition that is far less complicated than one might think. Knowing how to make your own at home can unlock a world of unpasteurized possibilities if you are a cheese connoisseur like I am. For the beginner cheesemaker, I found starting with a soft cheese like Chevre or mozzarella is best, which requires fewer steps and minimal aging. Once you have mastered the basics, the combinations are endless.
Want to impress next time you’re pairing up wine (or beer) and cheese? I’ve found there’s no better way than with some tasty dairy you made yourself with your own bare hands. You can create the cheese of your wildest dreams, from the sheep to cow’s milk to added herbs and even dairy-free versions. To help you embark on your cheesemaking journey, here are the fundamentals you need to know on how to make cheese to begin making the freshest, most delicious cheese right at home.
The basics of cheesemaking

The basics of cheesemaking have been the same since the process began. While the depth of the process will vary by type, all cheese goes through the steps of coagulation, curding, shaping, salting, and aging.
Coagulation
The first step in cheese making is coagulation, the process of turning milk from a liquid into a solid. Depending on the type of cheese, coagulation can be achieved by either acidification or with a rennet.
Rennet
The most common type of coagulation, used for “semi-hard” or “hard types” of cheese, is the addition of rennet. A rennet is an enzyme that causes the proteins in milk to combine. These enzymes are typically extracted from the stomach of young calves but can also be microbial, from fungus or plant-based to milk thistle sap.
Acidification
Creating “fresh” or “soft,” unpressed cheeses uses the process of acidification for coagulation. Acidification happens by combining milk with a starter culture (living bacteria), citric acid, lemon juice, or vinegar to increase the milk’s acidity level. This turns the lactose in the milk into lactic acid and begins the curding process.
Curding
Once the milk begins to solidify, it separates into curds and whey. The milk solids or curds are then cut into pieces to release more of the liquid or whey. The size of the cut curds will affect the amount of liquid retained, which determines the texture of the resulting cheese.
For a softer cheese, the curds are cut into larger pieces or minimally scored. When making a harder cheese, curds are nearly shredded and then further processed by stirring or cooking to create a drier, more tender texture. Once the curds have reached the desired texture, the whey is drained away, leaving the remaining curd, which will move on to the next steps of salting, shaping, and aging into a cheese.
Salting, shaping, and aging

The final stages of cheese making will vary based on the final cheese texture but each includes some form of shaping, salting, and aging.
Shaping
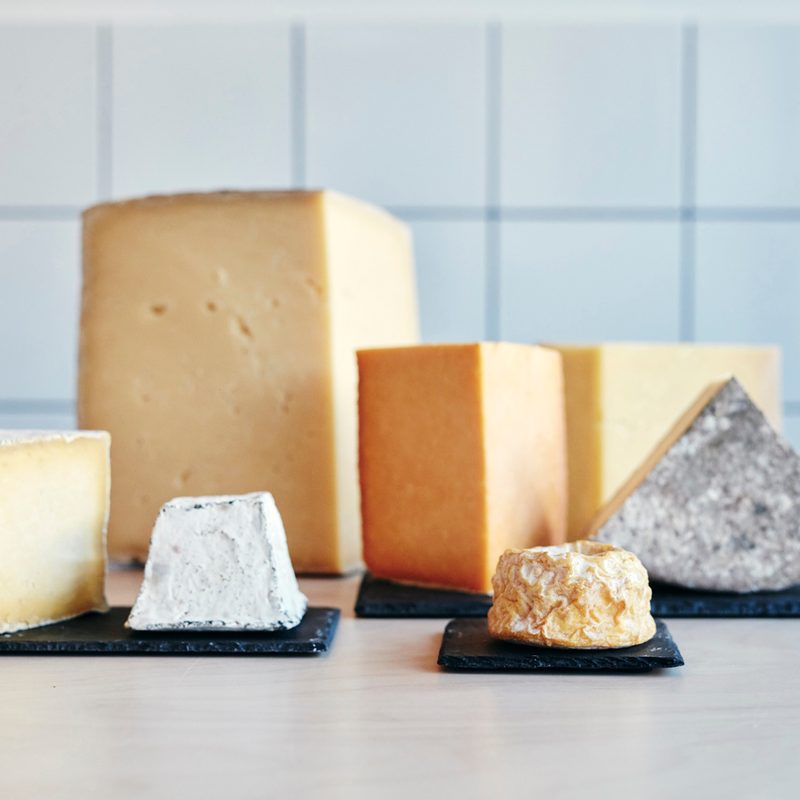
Each type of cheese has its own distinct shape, from a wheel, ball, block, or log. The pressed curds are put into a mold, removing any excess liquid and forming it into its desired shape.
Salting
Salt is added to the cheese for flavor, but it also serves as a preservative and the base for a cheese’s natural rind. Salt can be added to the curd, rubbed on the outside of the cheese once it has been pressed into a mold, or mixed into a brine for the cheese to soak in.
Aging

The amount of time a cheese is left to ripen depends on the type of cheese and the texture. It can either be eaten immediately after making or allowed to go through affinage, which is the process of aging cheese for several months to years until it reaches the desired ripeness.
What do you need to make cheese?

Not a whole lot, at least for the more straightforward cheeses. You may already have these kitchen supplies tucked away in your kitchen. Beyond the usual suspects, like pots and pans and storage containers, you’ll need a few other items. A good thermometer, as is a good set of measuring cups or spoons, is key in the cheesemaking process. An offset spatula is helpful, but any slim tool can work when it comes time to cut the curds. A slotted spoon is quite helpful, as are rubber gloves. Cheesecloth and skimmers can be helpful, too, but are not as important.
Once you go pro, you can get a commercial-grade pasteurizer or convert your basement into a cellar for aging cheese. But for now, you likely have enough tools as it is to make a decent batch of cheese.
Keep things clean
One more tip for the beginning cheesemaker is one that all home cooks should know. When making cheese (or any food, really), make sure your work surfaces and tools are clean and sanitary. You don’t want to make a batch of cheese and then watch people get sick after they eat it!
“Proper preparation and attention to sanitation will make good-tasting cheese that is safe for the whole family to enjoy,” wrote the USDA on its website. The USDA recommends cleaning and sanitizing your work area before you start. And yes, they are two different processes. According to the USDA’s website:
- Cleaning removes soil from surfaces
- Sanitizing reduces the microbial population on clean surfaces
So make sure you have everything spic and span before getting out your ingredients. And now, on to the cheesemaking!
Cheesemaking recipes for beginners
Homemade goat cheese

(from Spruce Eats)
Ingredients
- 1 quart goat’s milk (pasteurized is fine, but don’t use ultra-pasteurized)
- 1/3 cup fresh lemon juice (no pulp or seeds) or vinegar
- Salt (to taste)
Method
- Slowly heat the milk in a stainless-steel or another non-reactive pot on the stove until it reaches 180 to 185 degrees Fahrenheit (use a thermometer). Gentle bubbles should be forming, and the surface will look foamy. Turn off the heat.
- Use a long-handled stainless steel or wooden spoon and stir in the lemon juice. Let the mixture sit for 10 minutes. The milk should curdle and become slightly thicker on the surface. If you don’t have lemons on hand, white vinegar also can be used to make homemade goat cheese (check out our goat cheese guide). It will alter the flavor slightly.
- Line a colander with two layers of damp cheesecloth. Gently pour the milk into the cheesecloth, then gather the cheesecloth up around the curds and tie it into a bundle. A rubber band or butcher’s twine is also a good way to hold the cheesecloth together at the top.
- Hang the bundle over a pot or jar so the liquid can drip out. (You can do this by attaching the bundle to a wooden spoon or a ladle and setting the spoon over the top of the pot.)
- Let the cheese drain for at least 1 1/2 hours.
- Untie the bundle and transfer the cheese to a bowl. Stir in salt to taste.
- Use your hands to pat and shape the cheese into a small wheel or log. You also can use a cookie cutter as a mold to shape the cheese.
- The flavor and texture of the cheese usually improve a little bit if you refrigerate it for a few hours before serving. The goat cheese should stay fresh in the refrigerator for 1 week.
Recipe variations
- Herb variation: When you add the salt, mix in fresh herbs, spices, or garlic to enhance the taste. Goat cheese with chives is a great combination, as is garlic and thyme.
- Sweet variation: Stir in a drizzle of honey and dried cranberries with a sprinkle of cinnamon.
- Nut variation: Once shaped into a log or disc, coat the outside of the cheese with chopped fresh herbs or chopped toasted nuts.
Homemade 30-minute mozzarella cheese
(From The Kitchn — adapted from New England Cheesemaking Supply Company)
Ingredients
- 1 1/4 cups water
- 1 1/2 teaspoons citric acid
- 1/4 rennet tablet or 1/4 teaspoon liquid rennet
- 1 gallon milk, whole or 2%, not ultra-pasteurized
- 1 teaspoon kosher salt
Equipment
- 5 quart or larger non-reactive pot
- Measuring cups and spoons
- Thermometer
- 8-inch knife, off-set spatula, or similar slim instrument for cutting the curds
- Slotted spoon
- Microwavable bowl
- Rubber gloves
Method
- Prepare the citric acid and rennet. Measure out 1 cup of water. Stir in the citric acid until dissolved. Measure out 1/4 cup of water in a separate bowl. Stir in the rennet until dissolved.
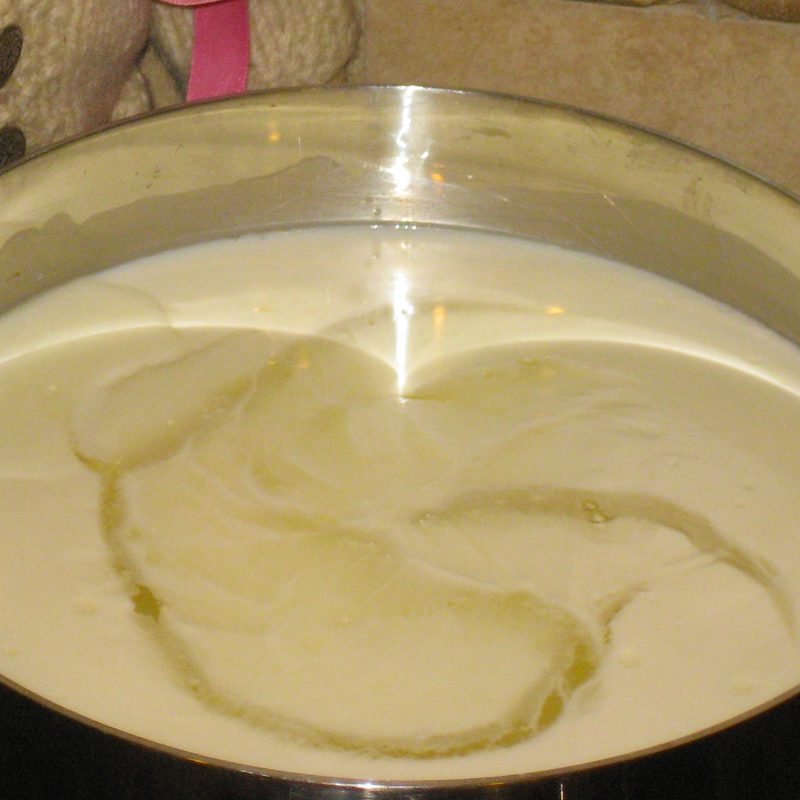
- Warm the milk. Pour the milk into the pot. Stir in the citric acid solution. Set the pot over medium-high heat and warm to 90 degrees Fahrenheit, stirring gently.
- Add the rennet. Remove the pot from heat and gently stir in the rennet solution. Count to 30. Stop stirring, cover the pot, and let it sit undisturbed for 5 minutes.
- Cut the curds. After 5 minutes, the milk should have set, and it should look and feel like soft silken tofu. If it is still liquidy, recover the pot and let it sit for another 5 minutes. Once the milk has set, cut it into uniform curds: make several parallel cuts vertically through the curds and then several parallel cuts horizontally, creating a grid-like pattern. Make sure your knife reaches all the way to the bottom of the pan.
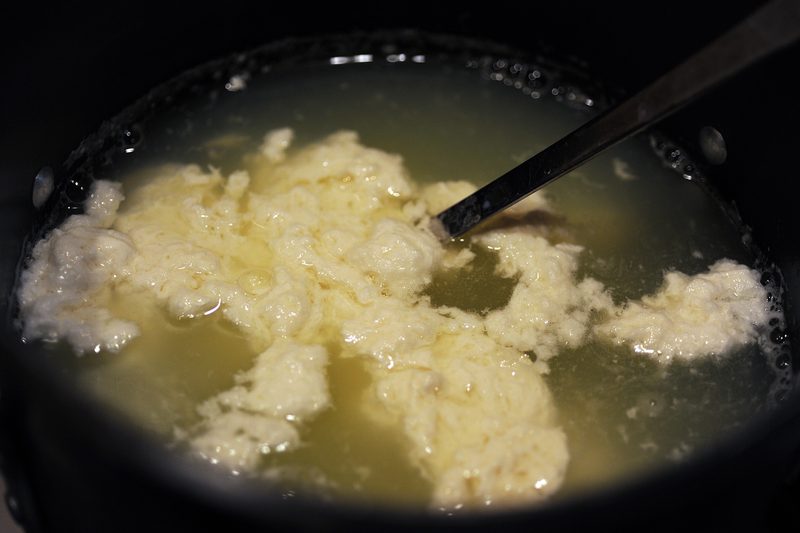
- Cook the curds. Place the pot back on the stove over medium heat and warm the curds to 105 degrees Fahrenheit. Stir slowly as the curds warm, but try not to break them up too much. The curds will eventually clump together and separate more completely from the yellow whey.
- Remove the curds from heat and stir. Remove the pan from the heat and continue stirring gently for another 5 minutes.
- Separate the curds from the whey. Ladle the curds into a microwave-safe bowl with the slotted spoon.
- Microwave the curds. (No microwave? See the Notes section below for directions on making mozzarella without a microwave.) Microwave the curds for 1 minute. Drain off the whey. Put on your rubber gloves and fold the curds over on themselves a few times. At this point, the curds will still be very loose and cottage cheese-like.
- Microwave the curds to 135 degrees Fahrenheit. Microwave the curds for another 30 seconds and check their internal temperature. If the temperature has reached 135 degrees Fahrenheit, continue with stretching the curds. If not, continue microwaving in 30-second bursts until they reach temperature. The curds need to reach this temperature in order to stretch properly.
- Stretch and shape the mozzarella. Sprinkle the salt over the cheese and squish it with your fingers to incorporate. Using both hands, stretch and fold the curds repeatedly. It will start to tighten, become firm, and take on a glossy sheen. When this happens, you are ready to shape the mozzarella. Make one large ball, two smaller balls, or several bite-sized bocconcini. Try not to overwork the mozzarella.
- Using and storing your mozzarella. The mozzarella can be used immediately or kept refrigerated for a week. To refrigerate, place the mozzarella in a small container. Mix a teaspoon of salt with a cup of cool whey and pour this over the mozzarella. Cover and refrigerate.
Recipe notes
Instead of microwaving the curds to make mozzarella, warm a large pot of water to just below boiling (about 190 degrees Fahrenheit). Pour the curds into a strainer and nestle the strainer into the pot so the curds are submerged in the hot water. Let the curds sit for about 5 minutes.
Wearing rubber gloves, fold the curds under the water and check their internal temperature. If it has not reached 135 degrees Fahrenheit, let the curds sit for another few minutes until it does. Once the curds have reached 135 degrees Fahrenheit, lift them from the water and stretch as directed. Now, go make pizza like a pro.
Storing homemade cheese
These fresh cheeses have a limited shelf life and should be kept refrigerated. Check each recipe. In general, you should plan to use them within a few days. To be sure you are using your cheese while it is still of the best quality, you may want to label it with the date you made it and your own “use by” date based on the recipe. It may seem like complex stuff, but you can certainly make cheese at home. Moreover, you can whip up homemade cheese that you can be deservedly proud of.