Water, it’s essential to everything we do. Around 60% of the human body is made up of water. It helps to maintain our core temperature, lubricate our joints, clear toxins from our body, and maintain brain function — the list goes on. Sounds pretty good, right? Out in the backcountry, whether hiking a trail, skiing a mountain, or in a life-or-death survival situation, water is vital for keeping you focused, alert, and, well, alive. It can literally make or break your success.
But carrying enough water to keep you adequately hydrated over multiple days — or even one long day — is rarely in the cards. After all, with every liter of water adding another kilogram of weight to your pack, you soon feel the effects. The alternative, then, is to collect water on the go.
Collecting water is not as easy as it might seem, with bacteria like giardia — well known for causing giardiasis, a horrendous gastroenteritis-style illness — lurking in even the cleanest-looking water. The last thing you need on a long trek is, well, that happening. But there are plenty of ways to make your drinking water safe anywhere, anytime. So here are our top tips for how to purify water when you need it the most.

How to purify water: The boiling method
By far the cheapest method and one that people around the world have been relying on for thousands of years is boiling your water. All you really need for this is a container for boiling your water in and either a portable camping stove or the knowledge and means for making a campfire.
It’s important to get your water to a steady rolling boil and leave it for at least 10 minutes to ensure all the bacteria have been thoroughly killed. Plenty of impatient water boilers have still felt the effects of badly treated water the next day — ask us how we know.

How to purify water: The chlorination method
Of all the methods for how to purify water, this is the simplest, with near-zero effort required on your part. Chlorination tablets are cheap and readily available on the internet. They’re a quick and easy way to treat reasonable quantities of water. These tablets can be dropped into a Nalgene or other easily sealed water bottle — generally one tablet per 500 ml, but check the packaging — and left to work for 30 minutes. This means you can collect and treat your water, then cover some ground while it purifies in your pack.
A word of warning here: Even the apparently “tasteless” chlorination tablets can taste a little like your summer camp swimming pool, so a small bottle of diluting juice is a good idea — if you have the option, of course.
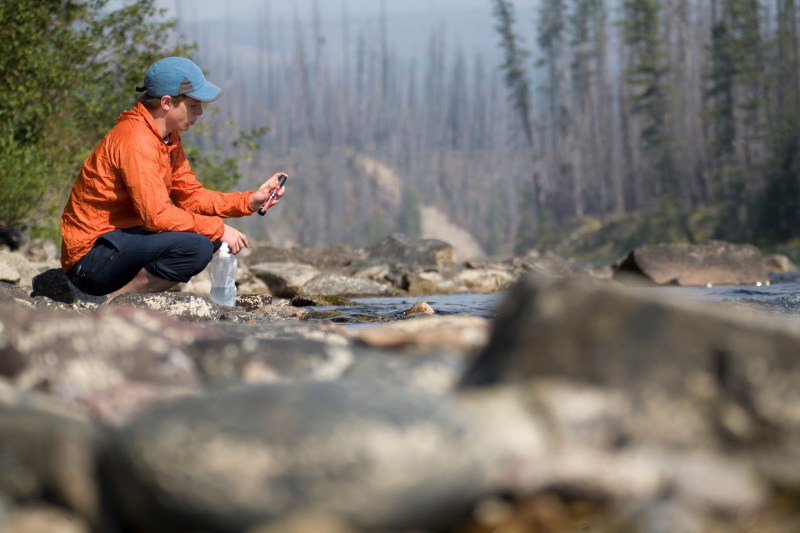
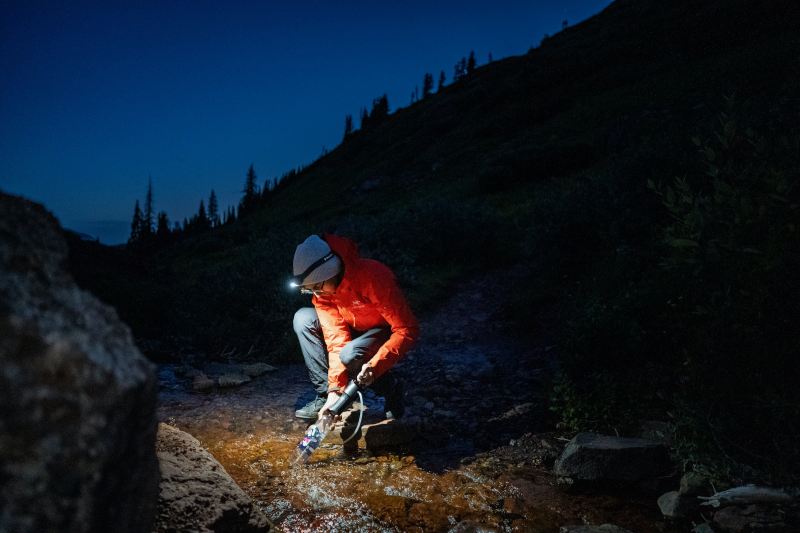
How to purify water: The filtration method
Filtering water was traditionally used to remove large particles and sediment before treating it another way. A simple filter for sediment removal can be made using items from your camp essentials kit, like clothing, a bandana, or a neck scarf. Once you’ve filtered out the large sediment, you can boil the water to kill off the bacteria — as we’ve already discussed above.
But filtration now goes further than this. Proper outdoor portable water filters don’t just filter out sediment; they also remove harmful bacteria. These filters are light enough now that you can throw one into your pack and take comfort in the fact that you’re always going to be able to collect safe drinking water.

How to purify water: The reverse osmosis method
Did you know you can use reverse osmosis to purify saltwater for consumption? This process also removes lead, viruses, bacteria, and a whole lot of other contaminants. It’s a bit complicated, but in layman’s terms, reverse osmosis is made up of three canisters: A membrane and two carbon filters.
The pre-filtration step gets rid of large sediments using the first carbon filter. The second step forces water through the membrane using pressure (contaminants are left behind). Finally, the filtration step involves water passing through the second carbon filter, where any excess contaminants are removed. Reverse osmosis units are expensive to purchase, but worth it if you want ultra-clean water.

How to purify water: SODIS
SODIS (short for “solar water disinfecting”) might sound like a scam, but it’s been proven to work and is relied on by thousands around the world who know how to purify their drinking water. The process is simple: Just collect your water in a clear bottle and leave it out in the sun for six hours or more until the UV rays kill off the bacteria.
While this method has been proven to work, we’d only really recommend it if you are really short on options and have nothing else to hand. It relies on strong, direct sunlight to work, and unlike other methods, you have no direct control over the outcome. This one is probably best as a last-ditch effort in a survival situation.

How to purify water: Distillation
This method also needs some equipment to work, but it’s a great option to consider if you’re in an area like the tropics or near the ocean where even a freshwater source could have high levels of salt and other minerals. And if you drink water that contains a large amount of salt; it can actually make you more dehydrated.
To distill water, you need two containers, one larger than another and a cover. Fill the larger container with the salt water, leave it in the sun, and cover it. Lean the container toward the smaller one so the condensation from the larger one runs into the other container. The distillation process removes the salt and other minerals, but it doesn’t purify it. So make sure to run the distilled water through a filter to ensure it’s safe to drink.
The bottom line is: Water is heavy. Water purifiers aren’t. That’s why packing a water purification system on the trail can save on weight, but it also allays some of that fear that you might run out of water. If you know you can always top up, you don’t have to ration your water and you can stay properly hydrated along the way.
All these methods work, but they’re going to be more effective if you start with cleaner water. Stay away from stagnant bodies of water like ponds and puddles. Instead, try to find flowing streams and remember to check upstream from your collection point for any animals, waste, or other obvious pollutants.


