
How to build a campfire in 6 simple steps

Get your campfire burning quickly and easily with this guide

A man sits on the far side of the campfire while smoke rises in front of him.
Tom Kilpatrick / The Manual / The Manual

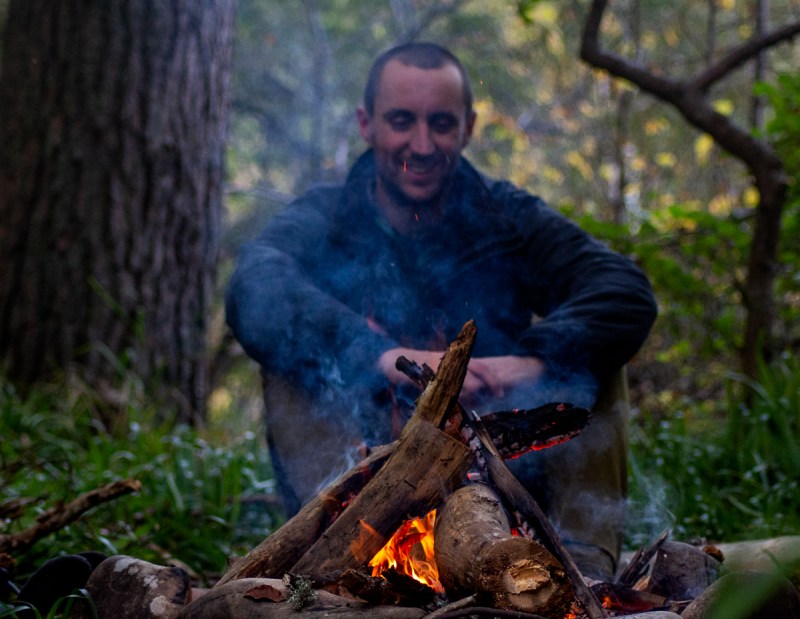
The campfire is a mainstay of heading out into the backcountry. For many outdoorsmen, there is no feeling quite like sitting around under the stars and watching the flames dance around. They keep you warm, they can be used for cooking on, and they deter predators. The campfire is essential.

Recommended Videos

Difficulty

Easy

Duration

15 minutes

But there are plenty of people who head into the outdoors who don't know how to properly build a campfire. Whether it's inefficient, unsafe, or irresponsible, a badly built campfire has detrimental effects on you or the environment around you. This quick-and-dirty campfire building guide will get you building a safe and effective campfire every time.

A man sits on the far side of the campfire while smoke rises in front of him.
Tom Kilpatrick / The Manual / The Manual

How to build a campfire

Before you leave to have a campfire, check local guidance on their permittance in your area. Wildfires are increasingly common and fires are regularly banned — especially in the summer — for this reason. You should also always have a bucket of sand or water on hand to extinguish your fire before you start building.

Step 1: Clear your campfire area of any flammable debris — leaves, pine needles, etc. — and check for overhanging branches that may catch. Even leaves high above campfires are susceptible to drying out and burning. Alternatively, set up your fire pit if you're going to raise your fire off the ground.

Step 2: Collect dry firewood. Ideally, you want three piles of wood here. Having your wood pre-collected stops you from having to run off and find firewood while your fire burns down.

  • A small pile around the thickness of your pinky — or thinner.
  • A mid-size pile around the thickness of your thumb.
  • A larger pile around the thickness of your wrist.

Step 3: Start your campfire with some small kindling — or firestarters. If you're not sure how to start a fire, there are loads of different fire starters available to you. These range from lighters or matches, to the more historic flint-and-steel strikers.

Step 4: Add small sticks in a pyramid shape around your kindling. Be careful not to add too many at once as this can smother your fire and put it out.

Step 5: When the smaller sticks are burning, add a few from the larger pile. Be sure to still add smaller sticks too, as this helps the budding fire retain enough heat to start burning the larger sticks.

Step 6: Repeat step five — moving onto larger sticks — until your campfire is self-sufficient and you only need to add a larger log periodically. At this point, you can choose to keep adding wood for a hot and bright fire or allow your fire to burn down to embers for cooking.

It can take a couple of attempts to get your campfire going, so don't be disheartened if you have to dismantle it and try again. Remember, don't leave a campfire unattended, and always have plenty of water or sand close at hand to extinguish your campfire or douse embers that fall overboard.

Tom Kilpatrick
A London-born outdoor enthusiast, Tom took the first ticket out of suburban life. What followed was a twelve-year career as…
How to use a compass for navigation when GPS fails
Don't get lost this hiking season: try out a compass!
Baseplate compass on top of a map

In the days since GPS was invented, many of us have lost the skill of navigating by a good old compass and map. As a family on the road in a 1991 Airstream Motorhome, we were early adapters to the GPS, but I still remember a time when we had to navigate New York with the crinkled old maps in the glovebox. Out in the wild, things are a little bit different. Milestones don't often sweep you by while you're busy using a magnifying glass to figure out what intersection you're on, but it can still be a challenge. Today, compasses are still considered to be a top 10 safety item by the National Park Service, but it's a shame how many people don't know how to use a compass. Here's how to get started.
Parts of a baseplate compass

There are so many compasses to choose from, but if you're just starting out, I highly recommend using a simple baseplate compass. These are attached to a ruler, so you'll be able to easily take your bearings. Experts from REI do a great job of explaining the basic parts of a compass and how to use them, but here is the breakdown:

Read more
How to adjust ski bindings in 10 easy steps
Your ski bindings are the link between you and the snow, so set them once and set them right
Ski boot clipping into binding from behind

When you’re riding the chairlift or gondola up your favorite ski mountain and picturing your next great run, there’s a good chance you’re not explicitly thinking about your ski bindings. I know that I really don't ever give my bindings much thought, except when I'm stepping into them. However, once you get to the top of the mountain and plant your skis in the snow to clip your boots in and start down the slope, you’ll be reminded of how crucial ski bindings are to the whole skiing experience.
After all, ski bindings attach your ski boots to your skis, allowing you to stay in control of your skis. Therefore, having properly adjusted ski bindings ensures you can ski safely and comfortably without risking injury to yourself or others by accidentally losing control due to an equipment failure.
Adjusting your ski bindings isn’t particularly complicated. Still, it must be done correctly -- and that's true if you're participating in the Winter Olympics skiing events or if you're like me, hitting the slopes for some weekend fun! With that in mind, let's get you set for the best ski season yet as we show you how to adjust ski bindings.

Can you adjust your own ski bindings?

Read more
How to stay warm outside: Essential tips for winter adventures
Don't freeze another day out there with these winter warming hacks
Skiers on Mountain Quail at Telluride Colorado

When wintertime comes around, most people put away their camping gear and spend their time bundled up indoors. But if you're one of the adventurous few, you'll know that winter time is the best time to experience the magic of our treasured outdoor locales. Snowcapped mountains, powdered trees, and the wildlife rival anything you might see in summer, but in order to enjoy it, you need to know how to stay warm outside. In my experience, staying warm is the key to your wintertime enjoyment. Those who follow these tips are sure to stay out longer than ever.
Look at your layering system

Let's start at square one: your layering system. The layering system includes three layers. First, your base layer the closest to your skin. These will be your under shirts and thermalwear. To avoid chills, avoid cotton at all costs, and choose merino wool or moisture-wicking synthetic fibers to draw any moisture away from the skin. These should be close-fitting but comfortable.

Read more