Fire. It's one of the four elements that shaped our earth, and it was the discovery that set mankind apart from the rest of the animal kingdom. In modern times, when the world is so far removed from these raw origins, fire is one of the great connectors between our ancestors and us. As outdoorsmen, we still use fire in the same way as we have for thousands of years; we cook on a fire, we get heat from the fire, and we sit around the campfire with our buddies, telling stories and drinking beer.
When it comes to starting your campfire, there are different fire starters you can use. But if you want to emulate those early days properly, you need something more rudimentary. The bow drill fire starter was one of the first methods of creating fire with friction. It's a more reliable method of the cinematic classic of rubbing two sticks together — in that it actually works — and sits alongside the flint and steel, or spark fire method, as one of my favorite ways to start a fire. This can be a time-consuming process, but starting a bow drill fire is, in my mind, a must-know skill for any outdoorsman survivalist. So how is it done?

How to make your bow drill
Before you can use your bow drill, you need to create it. This is where your folding saw and knife come in handy because you need to collect and then shape your wood. Use fallen wood where possible and avoid cutting live trees.
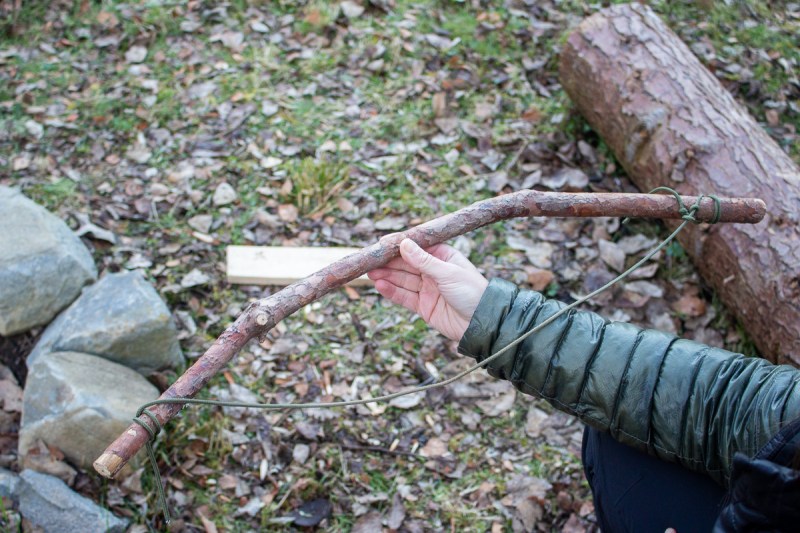
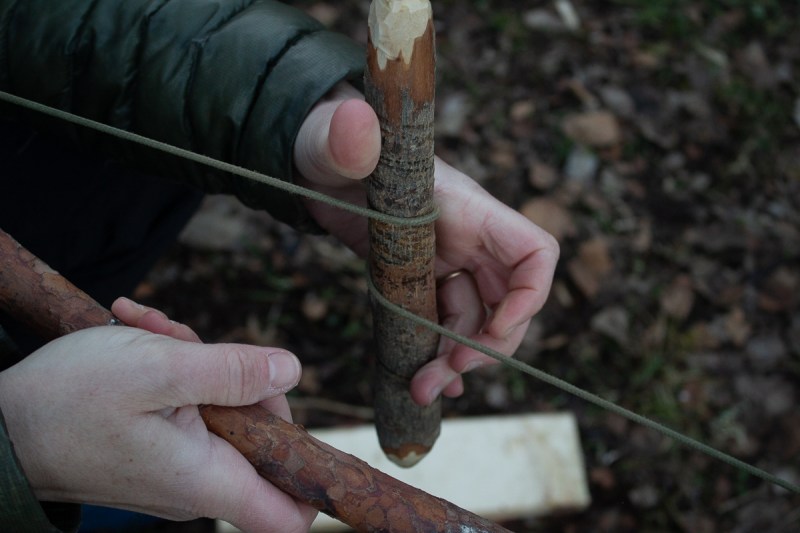
Step 1: Start with the bow. You need a stick that's roughly the length of your arm and has a slight bend to the shape, ideally with a little flex in it. Tie your paracord securely to one end and, leaving a little slack in the cord, tie the other using an easily adjustable knot. You may need to cut small notches in the end to prevent the cord from slipping.
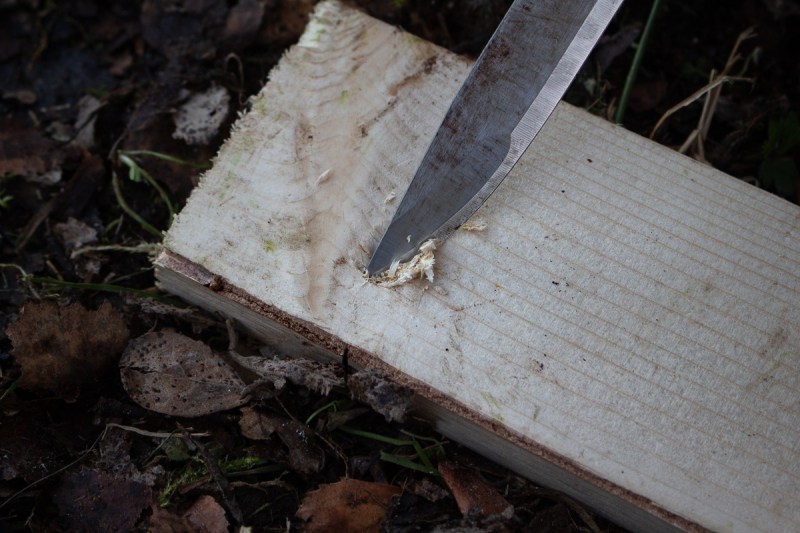
Step 2: To make your fireboard, take a dry piece of medium-hardwood about half an inch thick and make an indentation with your knife just under an inch from the edge. Turn this into a small divot that your spindle will fit into.
Find a small piece of hardwood that fits comfortably in your non-dominant hand. Carve a divot in the center with your knife as you did with your fireboard. This will be your top block.
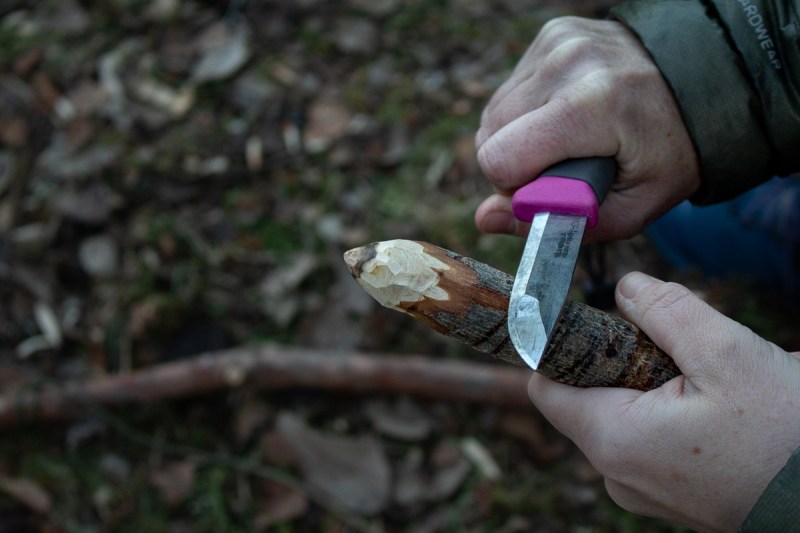
Step 3: The spindle is the friction part of the friction fire method. Your spindle should be just about a foot long, perfectly straight, as round as possible, and the same hardness as, or harder than, your fireboard. Taper off both ends to a point, then round or dull one of them off. This will be your driving end, while the sharper end will fit into your top block.
How to use your bow drill
Once you've got your bow drill made, it's time to get practicing. Fair warning: This can be a time-consuming process and takes an awful lot of patience, but stick with it.
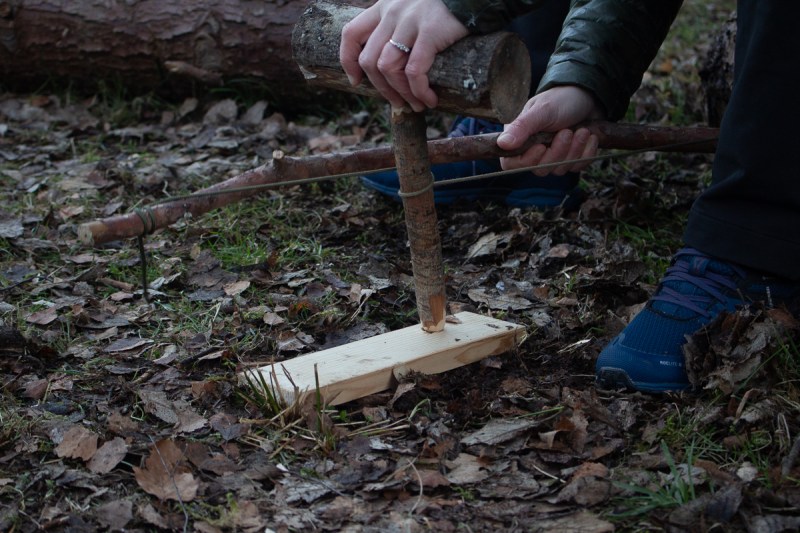
Step 1: Twist your spindle into the bow so that the more rounded end is facing downward. This should put the cord under a little tension, but it shouldn't be tight. Adjust your cord if necessary. Hold the bow in your dominant hand.
Step 2: Place the driving end of the spindle into your fireboard. Position your top block on the spindle. Apply a little pressure to your top block to hold your spindle in place, then begin sliding the bow forward and backward in a sawing motion. Don't rush this part. You're not trying to create fire yet. You're getting used to the motion and priming the fireboard. If your spindle falls out too easily, deepen the notches you carved and go again.
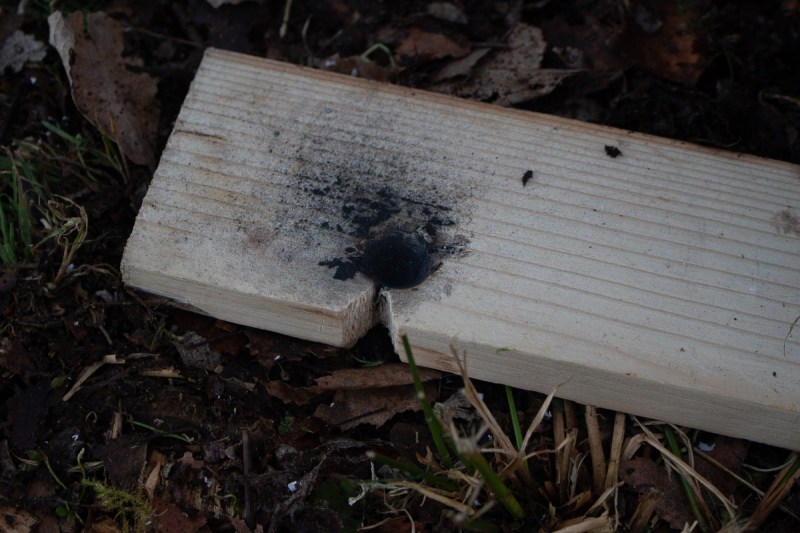
Step 3: The divot on the fireboard should start to blacken as the friction builds. Once you've successfully "drilled in" your hole and gotten the motion, stop and wait for the hole to cool. Then take your knife and carve a V-shaped notch that extends to the side of your fireboard. This is your air hole and also allows any embers that form to be easily collected.
Step 4: Make sure you have your tinder ready before you go again. A small nest of dry grass is usually best. Place a piece of thin wood or bark under the air hole on your fireboard so you don't lose any embers, and reset your bow drill system. Keep drilling and applying pressure until an ember forms.
You will see small wisps of smoke as you drill, but don't be tempted to stop and check until you're certain; you risk cooling the system down if you stop. If you're finding the spindle hard to turn, you can grease up the top with some Vaseline or something similar. Don't grease the bottom, where it contacts with the fireboard, or you'll lose the friction that you need to generate your ember.

Once you've generated your ember, carefully place it into the nest of tinder and blow on it gently. These embers tend to be small, so your tinder needs to be extremely dry and flammable to catch.
Fire by friction is a slow game, but it's perhaps the most natural way to create a fire. There are no shortcuts here, no cheat methods. It's just you, some sticks, and your own perseverance that allows you to survive. Is there anything more primitive and natural?