Summertime is coming, and that means ribs. Sweet and spicy, fall-off-the-bone, savory, meaty, delicious ribs. And while you may already have your grilled or baked ribs mastered, we bet you haven’t yet tried sous vide ribs.
Before you roll your eyes at the idea of something as primitive and macho as ribs being prepared in something as modern and geeky as a sous vide machine (how dare you), hear us out. You’re going to want to try this the next time you get that delivery from Omaha Steaks .
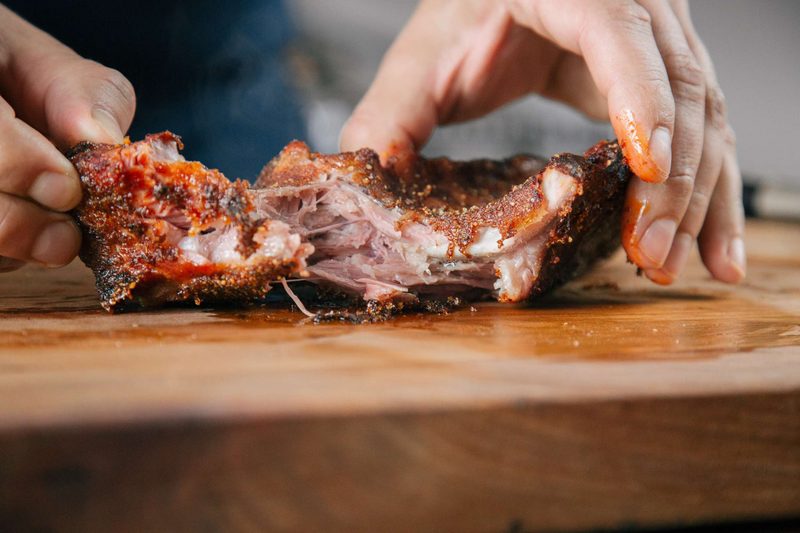
Sous vide ribs are more tender (and customizable)
We’re sure your grilled or baked ribs are tender. But not like this. Really.
When food is cooked in a sous vide machine, it cooks in its own juices, creating not only an incredible taste, but also a fall-off-the-bone tender texture to your ribs.
And if you prefer a snappier rib with a bit of bite, you can get that, too, with a slight temperature adjustment.
Sous vide ribs come out perfect
Ribs cooked in a sous vide machine are not only more flavorful, but they’re perfectly tender every single time. How often have you said to yourself, “I can’t figure out why they were so much better last time!”? It’s a frustrating feeling, to be sure. This is because, with a grill, or even an oven, temperature is unpredictable. That unpredictability can also be terribly annoying with smokers, having to time everything and cross your fingers that they’ve smoked just the right amount. There’s no hope for consistency.
With a sous vide machine, you get the exact same temperature and cooking environment every single time, so once you master perfection, you have it mastered forever.
Sous vide ribs can be dry rubbed (or sauced – or both!)
If you’re wondering how your sous vide ribs go from a water bath to your plate, there is another step in the process that works for any variety or flavor of ribs you’re making. After removing them from their bag, the ribs are finished in the oven. This step not only gives the ribs a beautiful bark, but also gives you the opportunity to slather them with your flavoring of choice, be it a sauce, a rub, or both!
Sous vide ribs don’t require a smoker
As fun as the show is to watch, we just don’t all have the time or space to be BBQ Pitmasters, complete with backyard smokers the size of trucks. Unless you’re smoking meat all the time, a smoker can be sort of a cumbersome, complicated appliance — not to mention expensive.
When you make your ribs in a sous vide machine, you can still get all the flavor with none of the heavy machinery. In fact, you don’t even need a high-end, fancy version of a sous vide machine! A simple thermal immersion circulator will do the trick. Just pop your ribs in a zip-top bag, submerge them in a large pot of water, and let the immersion circulator work its magic.
Sous vide ribs recipe
(From ChefSteps)
Ingredients:
- 150 grams salt
- 5 grams Prague powder #1
- 150 grams molasses
- 75 grams liquid smoke
- 2 racks baby back ribs
- 100 grams paprika
- 50 grams yellow mustard seeds
- 30 grams garlic flakes
- 25 grams black pepper
- 10 grams onion flakes
- 10 grams cumin seeds
- 200 grams brown sugar
Method:
- Preheat sous vide machine to your desired temperature. For a snappier rib with a bite, set temperature to 162F. If you prefer a fall-off-the-bone texture, set it to 185F.
- Mix salt and pink salt together in a bowl, making sure they’re fully combined.
- Combine molasses and liquid smoke in a bowl.
- Remove the membrane of the ribs. This is the thin, translucent membrane on the concave side of the rack. Use a paper towel to avoid slipping fingers, grip the membrane, and pull backward to remove.
- Season the racks with one percent their weight in salt mixture. Apply evenly, coating every surface. Rest for 10 minutes.
- Using a basting brush, generously cover every surface of the racks with the liquid smoke mixture.
- Put the ribs into a zip-top bag and cook for four hours. Be sure to only use one bag so that everything cooks evenly.
- In a spice grinder, blend together salt, paprika, mustard seeds, garlic flakes, black pepper, onion flakes, and cumin seed.
- Combine spice mixture with brown sugar and thoroughly combine.
- When it’s time, remove the bags from the water and allow to cool slightly. At this point, you can refrigerate for several hours or overnight and finish them later.
- Preheat oven to 400F.
- Brush ribs all over with the liquid smoke mixture.
- Dust the ribs all over with rub, taking care to get it in all the cracks.
- Place ribs on a sheet pan and bake until bubbly, about 5 to 10 minutes. If you prefer, you could also finish them on the grill.