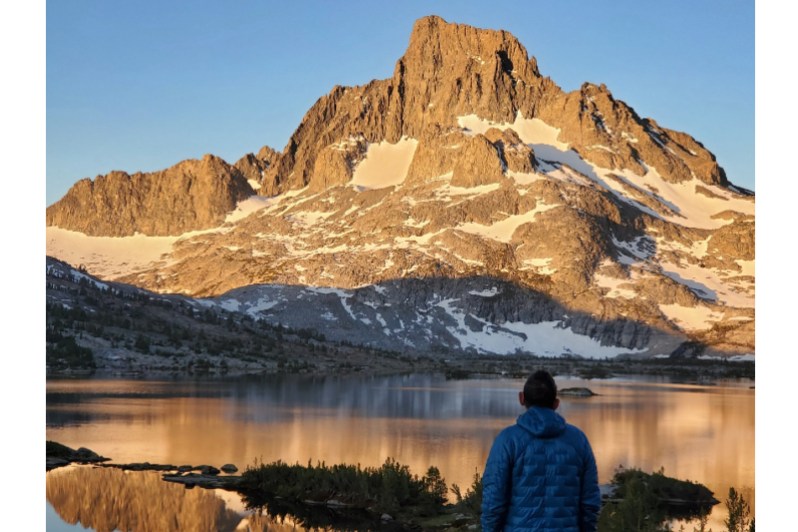
Of all the challenging long-distance thru-hikes in the U.S., few are as difficult as the John Muir Trail. Though hiking trails such as the Pacific Crest Trail or the Appalachian Trail are just as beautiful, the John Muir Trail spans 211 miles through California’s Sierra Nevada mountains.
Those who undertake the trek will traverse nearly 80,000 feet in elevation change and discover alpine lakes and grassy fields among the high-altitude peaks. However, the hike offers few opportunities for resupply stops, which means most thru-hikers must be self-sufficient and self-supported. With proper planning and preparation, anyone can tackle the John Muir Trail (JMT).
Hiking the John Muir Trail
How long it takes to hike the John Muir Trail
Many people opt to start their trek along the Sierra Nevada mountains in Yosemite Valley and wind their way to the final climb up Mount Whitney, some 14,505 feet. Over the 211 miles that the trail spans, hikers gain a total of 47,000 feet. With such a strenuous walk ahead of anyone who takes on the challenge, hikers often wonder how long it will take to complete the JMT.
That largely depends on the individual fitness of those who hit the trail. The average hiker can likely complete the John Muir Trail in about three weeks, give or take a few days. Some experienced ultra-light thru-hikers might manage the trail in just a week or 10 days. What is most important is that hikers pace themselves to avoid injury, but also to enjoy the incredible journey.
The best time to hike the JMT
Apart from getting into hiking shape and carefully planning meals, another very important yet tricky component of the long-distance trail is choosing the best time to go. Set off too early and snow and ice can make the hike slow and dangerous, while leaving too late can result in being on the trail when harsh weather returns in the fall. That’s why the period between June and September tends to be the best window of time.
Different points within the summer window present unique challenges, though. Mosquitos, heat, crowds, rocky sections, and water crossings from the melted snow are all challenges to keep in mind and prepare for. But ultimately, it is your permit that will determine exactly when you can hike the John Muir Trail.
There is now an online option to request a permit to hike the trail. It is, however, still a lottery system, and since it is online, more people will likely apply. So, have patience and apply for the dates you would like to go around five or six months in advance. Once you have received a response and have been granted a permit, you can collect it from any one of the Yosemite Valley Wilderness Centers.
The different parts of the JMT
As mentioned above, the JMT is a 211-mile-long trek that traverses some of the most spectacular scenery in the country. Here are some of the distinct sections of the John Muir Trail.
- Yosemite Valley to Tuolumne Meadows (20 miles): This section is a great introduction to the hike, with towering granite cliffs, waterfalls, and giant sequoia trees. Hikers will pass Half Dome and Cloud Rest, two of Yosemite’s most iconic landmarks.
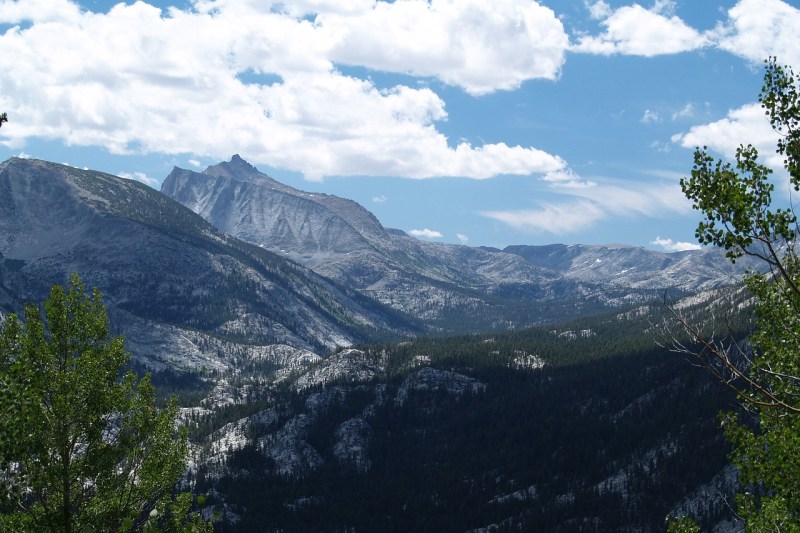
- Tuolumne Meadows to Kings Canyon National Park (70 miles): This section takes hikers through Lyell Canyon, a glacially carved valley with stunning views. The trail then climbs over Donahue Pass (11,070 feet) and enters Kings Canyon National Park, where hikers can explore towering granite walls, deep canyons, and glacial cirques.
- Kings Canyon National Park to Sequoia National Park (40 miles): This section is known for its beautiful high country lakes, including Rae Lakes and Charlotte Lake. Hikers will also climb over three passes over 12,000 feet: Glen Pass, Pinchot Pass, and Mather Pass.
- Sequoia National Park to Mount Whitney (80 miles): This section is the most challenging, with high elevations and steep climbs. Hikers will traverse the Kern River Valley and climb over Forester Pass (13,117 feet), the highest point on the trail. The trail ends at Mount Whitney, where hikers can enjoy stunning views of the surrounding Sierra Nevada.
Many people choose to hike the John Muir Trail in sections, rather than all at once. This allows them to experience the different parts of the trail at their own pace. There are also many ranger stations and resupply points along the trail, which makes it easier for backpackers to plan their trips.
Planning for the John Muir Trail

Fitness and food for the JMT
Before you select and submit your permit dates, you should start training to be in hiking shape. At least two to three months in advance, start exercising to build endurance capability and strengthen muscles for hiking-specific movements. Hikers’ fitness levels will, in turn, determine how long it will take them to complete the John Muir Trail.
That’s a key factor to approximate because it also determines how much food, and therefore weight, you will need to carry. Remember to pack plenty of food to keep you sustained, including both meals and plenty of snacks. Even though it is heavier, packing slightly more than you need is safer than not having enough food. Try to find the right balance for yourself while training. Fortunately, there are plenty of water sources along the trail, so there’s no need to pack anything other than a filter or treatment solution in that regard.
As for parking, you can plan to park at either the starting point in Yosemite Valley or at the end at Mount Whitney. From either point of the trail, hikers can hop on the shuttle to get back to their car.


