The essentials for solo camping: Gear, safety, and preparation tips

Solo camping isn't so bad. Here's how to get started!

A view from an open camping tent
Scott Goodwill / Unsplash

Camping is one of America’s favorite past times. It’s so healing to unplug from the world and get a dose of nature, but sometimes, it’s not feasible to drag all of your friends along. If you’re in desperate need of the outdoors but can’t grab the rest of your crew, why not take yourself on your camping trip? Here’s how to get started with solo camping and everything you need to know to stay safe along the way.

Choose your solo camping location
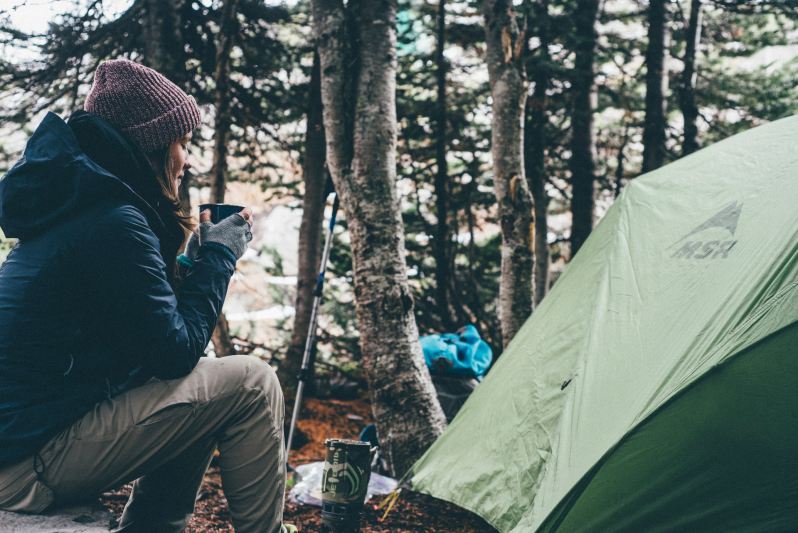
Young woman enjoying a cup of coffee, while sitting near a tent in the outdoors.
Julian Bialowas / Unsplash

When solo camping, one of the primary concerns is safety. One of the best ways to stay safe is to choose your camping location carefully. If it’s your very first time solo camping, choose a campground that you know well, preferably one that you’ve been to before. Choosing something familiar will help you acclimate faster.

Recommended Videos

If you can’t choose a familiar place, do your research. Choose a well-reviewed and established campground with park staff who can help if you run into any issues. Ultimately, set up camp in a spot that’s not too isolated so that there are people around who can help but not so exposed that everyone knows that you’re on your own.

Plan thoroughly for solo camping

Person lying in a tent looking outside toward mountains and a field of flowers.
Dominik Jirovský/Unsplash / Unsplash

Since you won’t have a second pair of hands around, it’s more important than ever to plan your trip thoroughly. Research the weather forecast, terrain, and local hazards, and prepare accordingly. The National Park Service has a list of 10 categories essential items to take with you while out in the wilderness, so here’s a short breakdown:

  • Navigation: Especially if you’re planning on hiking, don’t rely on just your phone for navigations. Bring a topographical map and a compass and know how to use it in case of emergencies.
  • Sun protection: Sunglasses, sunscreen, and hats aren’t just for the summer. Even if you’re going on a winter adventure, protect your skin and eyes from harmful rays.
  • Insulation: You never know when the temperature will take a dip, so remember to layer up and bring thermals, an insulating jacket, and a rain shell, just in case.
  • Illumination: When it starts to get dark, you’ll want all kinds of light with you. Make sure you bring a flashlight, a couple of lanterns, or a headlamp to be safe. Extra batteries will also be your best friend.
  • First aid supplies: Whether you get a standard one or modify it to suit your needs, packing a first aid kit is a must. This is definitely one of those things where it’s better to have it and not need it than to need it and not have it, so pack it along. Check all expiration dates before you go.
  • Fire: If fires are allowed at your campground, enjoy the warmth and heat of a fire. Some campgrounds have rules about whether you can forage for sticks, so make sure that you check on your location’s website. Bring more than enough firewood, matches, and fire starters to make this easy.
  • Repair kit and tools: Duct tape can do so many things, so I highly recommend taking it with you. You never know when you’ll get a tear in your tent or sleeping bag. Camping knives are also extremely useful, and multi-tools can come in handy.
  • Food: Packing extra food is a must, especially if you’re planning on leaving your campsite. You’ll burn more calories out in nature, so have some no-cook or easy-cook meals that have good nutritional value. It’s always a good idea to practice food safety if you don’t want animals coming to visit, so check the local regulations.
  • Hydration: Not bringing enough water is one of the easiest ways for a trip to go downhill. Make sure that you have more than you need, and if your campground has potable water, be sure to utilize it.
  • Shelter: Even when you are just taking a day hike, a tent, space blanket, and tarp can help protect you from a critical situation.

If it’s legal in your area, bring a canister of bear spray, an air horn, or a legal self-defense item and learn how to use it properly. You never know when it could come in handy.

Avoid drawing unwanted attention

When you’re camping solo, avoid posting real-time updates on social media about your solo trip. Be friendly, but don’t share too many details with strangers. Sometimes the camping community can be overly curious, but it’s better to be safe than sorry so if you don’t know the person, don’t make it obvious that you’re solo camping. Trust your instincts, and don’t take unnecessary risks.

That said, you should tell your direct loved ones or close friends where you are going, your itinerary, and how long you’ll stay. That way, if something goes wrong, search and rescue will have a general idea of where you might be and what you might be doing.

Ultimately, solo camping can be a ton of fun. Just make sure to have a backup plan in case of injury, bad weather, or unexpected risks.

Sarah Joseph
With a bright sense of adventure and a heart for the mountains, Sarah is always thrilled to share nature with others through…
Save your summer with this electric cooler from Anker SOLIX
Tired of melted cooler ice? Try this electric cooler instead
Anker SOLIX EverFrost 2 Electric Cooler

Traditional coolers are great if you don't mind having to drain and replenish the ice constantly. Let's be real, though. Personally, the amount of effort that it takes to haul and save ice on my camping trips is enough to make me want to choose non-perishables just so I don't have to deal with the hassle. Fortunately, it's no longer the Stone Age, so you have to check out the brand-new cooler from Anker SOLIX if you're sick and tired of traditional coolers.

Anker SOLIX just released the EverFrost 2 Electric Cooler, which is a high-tech cooler that runs like a fridge on battery power. At a glance, the specifications look to be pretty impressive. You can choose between a 23L and 40L Single Zone capacity, or even a 58L Dual Zone. With a few buttons, you can set the temperature range anywhere between -20°F to +20°F. The battery is 288Wh, but it can be expandable to 575Wh with two batteries for the 40L and the 58L models. Charge this baby up in 3.5 hours with a 95W power adapter or car socket, 100W solar input, or 60W USB-C input.  In a single charge, you can expect to have up to 52 hours of cooling. If that's not enough, just pack an extra battery. A second one will get you up to about 104 hours.

Read more
From apps to local tips: How to find the best hiking trails near you
Finding the perfect hiking trail isn't as hard as you think!
Group hiking with friends

When visiting new places, I'm always on the lookout for great hiking trails. If you're outdoorsy like me, the quality of the hike matters just as much as the surrounding town and social life. The good thing is that no matter where you are, chances are there's a hiking trail nearby. Whether you're moving someplace new or just visiting for a few hours, here's how to find hiking trails near you.
There's an app for that!

There's an app for everything these days, and that's not an understatement! As more and more people flock to the outdoors, developers have created lots of hiking and camping-related apps that can help connect you to the world around you. While you could go to Google Maps and search "hiking trails near me," one of my favorite apps for finding trails is AllTrails. AllTrails isn't just good for hikers, though! You can find mountain biking, running, backpacking, horseback riding trails, and more.

Read more
Microspikes vs. crampons: Understanding the right gear for icy trails
Ice, ice, maybe? When to use microspikes vs crampons
microspikes vs crampons inspire toud nnafqaychci unsplash

When winter hiking, one of the most essential pieces of gear will be your footwear. The right hiking boot can carry you comfortably for miles, but there are many cases where normal hiking boot lugs won't give you the traction you need. These cases become even more apparent during the wintertime when you're liable to slip on ice and dislocate your shoulder like one of my unfortunate family members — the nearest hospital was over two hours away. Microspikes and crampons can significantly reduce the risk of hospital visits while out in the winter wonderland, but how do you know which ones to pack? In this guide, we'll discuss microspikes vs crampons and how to stay safe.
Microspikes vs crampons: what's the difference?

Adventuring with microspikes
Microspikes are a flexible, rubber harness that goes over your hiking boot. The rubber is attached to several small chains that go underneath your foot, connecting multiple plates of short spikes to the bottom of your shoe. Think of it like the footwear version of tire chains. The microspikes themselves are generally a fourth of an inch to a half of an inch long, made of hardened steel. Short but sharp, these spikes are perfect for gripping packed snow and ice that might otherwise send you to the E.R.
Adventuring with crampons
Crampons are the spiked-collar version of microspikes. They have a similar rubber harness, but they will likely have additional rigid metal frames with longer spikes. The length ranging from three-fourths of an inch to even an astounding one and a half inches can look pretty intimidating once you have them strapped properly. Personally, I would resist the urge to practice karate kicks.
Choosing microspikes vs crampons
Microspikes are best for light snow, packed snow, and icy hiking trails. Ideal for winter hiking or trail running, these will serve you well on flat or moderate slopes. I love microspikes because they're lighter and less intimidating than crampons. They tend to be easier to put on and pull off, and even better, they're comfortable during long hikes.

Read more