
Don’t make this super common mistake when chilling wine in an ice bucket

Chill your wine easily without the need for any expensive equipment.

Champagne bucket
Roberto Vivancos/Pexels / Pexels

When it comes to chilling wine, there are countless ways to get the job done. The market is saturated with products made specifically for cooling wine down to the perfect drinking temperature, from luxurious wine refrigerators to elegant marble wine chillers. We can almost guarantee that the passionate wine lover in your life probably has a pantry full of these fancy contraptions, each one more exciting (and expensive) than the last. After all, wine is an art and enjoying it at the correct temperature is an absolute must. At the end of the day, though, even with all the bells and whistles, it’s hard to beat a good old-fashioned ice bath – especially when trying to cool down that wine in a hurry. But, as simple as this wine-chilling technique may be, it is possible to get it wrong. That’s why we’ve collected a few tips and tricks for getting that wine chilled exactly right every time.

Order matters when chilling wine

Rose wine in ice bucket

While the more aesthetically pleasing option may be to fill your favorite wine chilling bucket with ice and simply nestle in your favorite bottle or two, this method is actually pretty ineffective when it comes to chilling wine in a pinch. By dumping ice into a container and plopping the wine on top, only the bottom half of the bottle will actually chill. It’s important to fully cover your wine (or other beverage) bottles with ice so that the entire bottle has a chance to actually get cold. Do this by putting your bottle(s) in the bucket first, and then topping with ice – not the other way around. The more the bottle is covered with ice, the better. While this might not get you the sexiest photo shoot of your wine luxuriously resting in an ice bath, it’s the better way to get the contents cold.

Use water and…salt?

Beer in ice bucket
Mo Visual/Pexels

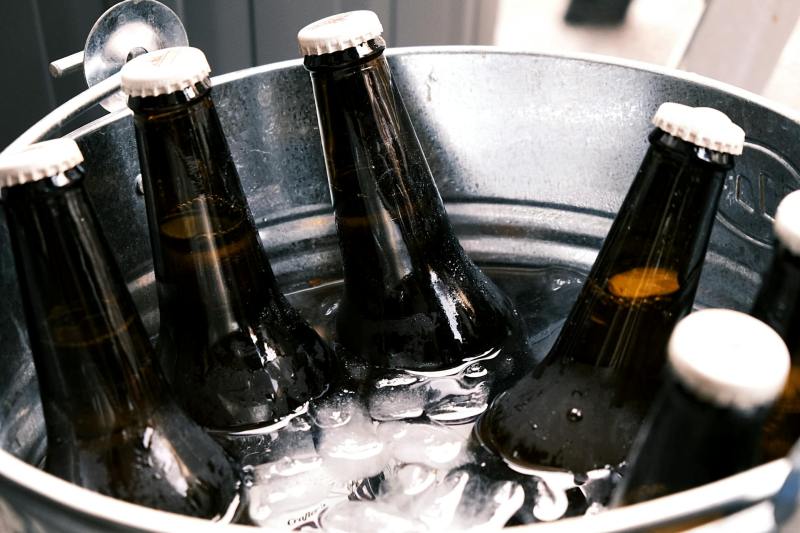
If you find yourself in a situation where you need to get your wine chilled immediately, water is your best friend. Once you’ve covered your bottles with ice, pour cold water inside the bucket, filling it to the rim. The ice water will amplify the chilling process by increasing the surface area that comes in contact with your bottles. Simply cover your bottles with ice, top off the bucket with water, stir to get everything circulating, and your favorite bottle should be perfectly chilled and ready to drink in just minutes.

If you’re really in a rush and feeling particularly scientific in your wine chilling methods, reach for your salt shaker (not really—you should never, ever use a salt shaker and use only Kosher salt, please) and add a few shakes to your chilly ice bath. Salt reduces the freezing point of water, making it colder faster, which means you can pop that bottle and enjoy it at the perfect temperature in no time at all.

Lindsay Parrill
Lindsay is a graduate of California Culinary Academy, Le Cordon Bleu, San Francisco, from where she holds a degree in…
Don’t skip this step for summer barbecues: How to clean your grill’s exterior
Know how to clean the outside of a grill so your burgers don't disappoint
Male chef grilling and barbequing in garden. Barbecue outdoor garden party. Handsome man preparing barbecue meat. Concept of eating and cooking outdoor during summer time.

Even if you don't like cooking, you'll jump to man a grill to show off your barbeque skills. But what about the cleanup after? Scraping off the food is the easy part, but when was the last time you cleaned the rest of the grill? If you have no idea, to the point you aren't sure if you ever have, put the tongs down and listen. Here's how to clean the outside of a grill so it lasts more than a few summers.
How to clean the outside of a grill

It doesn't matter what kind of grill you have; you need to know how to clean the outside of it, and you actually need to do it.
What you'll need

Read more
Stop making this mistake when cooking with onions
Which is your favorite?
Onions

It isn't easy to think of a dish that doesn't start with - or at least include - cooking onions in one way or another. Unlike most vegetables, some form of onion is used in every cuisine across the globe, in millions of dishes in countless forms of preparation. Raw, sauteed, fried, braised, or grilled, these beautiful bulbs provide dimension and a sweet, spicy, umami flavor that you just can't replicate with any other ingredient.
The thing about onions, though, is that there are many, many kinds, and knowing which variety to choose can be confusing. From long and papery green onions with their signature spice to more mild and sophisticated shallots with their hint of garlic, onions are diverse in their culinary gifts, and it's essential to take advantage of that. Too often, home cooks make the mistake of gravitating toward a bag of yellow onions at the grocery store and call it a day, using these for salsas, pasta sauces, stir-fries, and every dish in between. And while yellow onions are fabulous (more on this in a moment), they are simply one type in a whole family of onions that provide their own signature flavors and enhance dishes in their own unique ways.
The next time you find yourself at the grocery store, consider the meals you have planned for the week, and take a minute to ask yourself - which onion is best for your dish? Are you serving them raw or cooked? How you cook onions greatly depends on the type you choose, so are you planning a braise? A deep fry? A saute?
Put down that bag of yellow onions (maybe), and read on to find out which onion you want to use for your dish.

Yellow onions

Read more
How to make food less salty: 5 easy fixes when you make this common cooking mistake
Don't toss it just yet, you can probably save it with...a potato?
Happy man adding salt while cooking for his friends in the kitchen.

Over-salting food is one of the most common culinary blunders, falling perhaps only just below one more common cooking crime - under-salting food. It's a finicky art, to be sure, and finding just the right balance can be tricky. After all, every palate is different, every dish unique, and recipes are often inconsistent. What does "season to taste" mean anyway, many wonder. While this term may be frustrating to those who prefer to follow a recipe down to the letter, it's really just a common phrase that means, "Everyone likes it differently, so just use your best judgment."
The problem with that mentality is that if you're new to cooking or really need to follow that recipe, mistakes can be made - often in the form of over-salting. After all, it's easy to get carried away when in chef mode, slicing and dicing away, fingers sinking into the briny granules inside the salt cellar, and dramatically raining the mineral down with skilled - albeit heavy-handed - expertise.
Over-salting food has gotten the better of us all, even those of us who are professionally trained, so there's no shame in the matter. Still, the mistake can be embarrassing and ruin all of your hard work in the kitchen. Nobody wants to spend hours lovingly preparing a meal only to be choking it down with a gallon of water because of a silly mistake.
If you're wondering how to make food less salty after you've already been too generous in your seasoning, there are some handy hacks you can use. So don't toss that dish just yet. Reach for one of these ingredients, and you'll be back on track in no time.

Acid

Read more