
We’re fortunate to get to review a lot of products here at The Manual. In the realm of the kitchen, we’re not sure if we’ve ever been more excited to review a product than the Brava. We’ve had the chance to live with the Brava for around a month and got to do a lot of experimenting, and we were very impressed with the results.
What is a Brava?
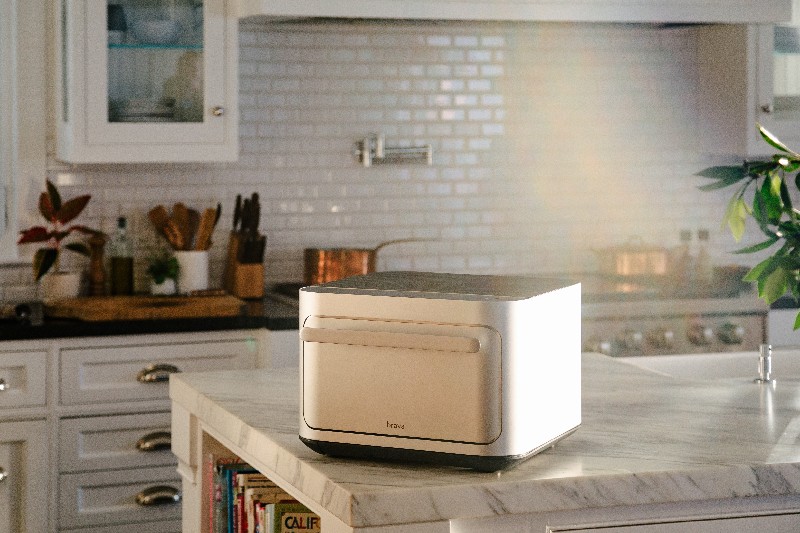
If you’re unfamiliar with the Brava, it’s a powerful cooking device that lives on your countertop much like a toaster oven and is around the same size as a large-capacity air fryer oven. The major difference is the tech behind the device.
The brilliance behind the Brava innovation is that it utilizes patented Pure Light Technology that harnesses the power of light for energy. Using this Pure Light Technology, you can cook food in record time. You can cook foods 2 to 4 times faster than your oven, with no heating element, just light.
The experts at Brava compare the cooking process to that of disco with a choreography of light. The lights pulsate at different intensities and speeds depending on the programmed food setting or cooking style. The six-light lamps let you cook proteins and veggies simultaneously on the same tray, and everything comes out perfectly cooked through zone cooking.
The lights can brighten and dim to provide pizza-oven-level “heat” to one specific zone. They also pulse to provide searing without overcooking the food. Pure Light Technology also makes for healthier cooking, eliminating the need for much oil. The great thing about cooking with light means no pre-heating is necessary. You can go from 0-500 degrees in under a second! When using some manual cooking modes, you’ll notice that the Brava is able to “pre-heat.” However, this is used to simulate specific cooking conditions (most specifically baking), so the cooking surfaces of doughs don’t get shocked.
If food replicators from the classic Star Trek series come to mind, you’re not far off. The Brava is currently equipped with 6,669 recipes, and more are added regularly by the Brava recipe development team. The Brava app also connects you with a community of other Brava owners who provide hundreds of different custom cook recipes that you can download to your machine with the push of a button.
It comes with nine preset cooking functions for general cooking, including Pro Cook, where experienced Brava chefs can program one-tray meals and cook different ingredients to their liking. You can even monitor your cooking through an internal camera that is insanely difficult to stop watching. Finally, like any new-fangled cooking machine these days, you can conveniently control (and watch) everything from your smartphone app.
Here’s the Fun Part: The Testing
As you’ve likely gathered, the Brava is a complex cooking gadget. Although the product design team at Brava did a great job making the control panel very user-friendly, it can still be pretty overwhelming out-of-the-box. That’s why Brava offers individual onboarding calls with each of its customers to go over cooking functions, accessories, and techniques in detail. This is an area where Brava goes above and beyond and really stands out in terms of creating a community between the brand and its customers.
Bacon, Poached Eggs & Toast

After our onboarding session, we were ready to get cooking—and we were in the mood for breakfast. The bacon test was one we were anxious to conduct, in order to see if the Brava could replicate the same results as the good ol’ traditional oven (but faster).
So, we searched for bacon in the control panel, and the recipe popped right up. You get to select between standard slices, bits, or weave. After making your selection, it takes you to the recipe guide, which you can access at any point. You select the number of slices/number of zones where the cooking will take place. Then you choose between chewy or crispy bacon, after which you have the option to customize your dish by adjusting the cooking time.

With this being the very first thing we cooked, we were conservative and decreased the time. We popped the bacon in, and it was done in 7 minutes. It wasn’t as crispy as we like (and we should have just trusted the initial time), so we touched it up for two more minutes, and it came out perfect. Each cooking function has a “touch up” option to increase the cooking time by 30-second increments.
So, we achieved perfectly crispy bacon in around 9 minutes with no pre-heating. Brava-1 Oven-0

Next on the breakfast list was toast. Toast is another simple food item often attempted by kitchen gadgets that fall short of a plain-Jane toaster. We selected the toast function and chose a lighter, level-2 toast, and in under 3 minutes, we had some great toast. We’d say that the Brava ties a traditional toaster in terms of time and quality. Unlike some kitchen gadgets that replace your toaster oven (like an air fryer oven), Brava provides a nice toast on both sides of the bread without having to flip it over. It was good to know the Brava can take over the countertop real estate of our old toaster oven without any regrets.
The last breakfast item on the menu was poached eggs. This was one item we’ve seen advertised and were excited to try out. After we found poached eggs on the menu, the guide directed us to add three tablespoons of water to the Brava egg pan, and then add our eggs. We popped the tray into the Brava, and 5 minutes later, out came perfect poached eggs. Without a doubt, way faster, easier, and less messy than poaching eggs the old-fashioned way.

Spatchcocked Chicken and Veggies

The next meal we chose to prepare was another that we’ve seen promoted on the Brava website. This recipe was the first one in which we got to use our temperature probe. The directions were pretty straightforward. We chopped up our veggies and laid them evenly in the pan. After that we spatchcocked our 4lbs chicken, seasoned it, and spread it over the veggies. We inserted the probe into the thickest part of the breast, positioned the probe chord appropriately (explained in the onboarding), and pressed play.

Overall the chicken and veggies came out wonderfully. The skin was crispy (and would have been crisper if we had taken the time to brine the chicken), the veggies were not overcooked, and had added deliciousness thanks to the chicken juice. The cooking time for this recipe was about 80 minutes, which is on par with a standard oven. But, with an oven, we would not have been able to do everything all at once without the veggies getting overcooked. For that reason, Brava receives the point.

Picanha Steaks with Asparagus

The next meal we decided to tackle in the Brava was one to test its precision cooking. We acquired some beautiful picanha steaks from the butcher’s counter at Marrow Detroit. We chose asparagus to go with these tasty cuts and try out the Brava’s zone cooking.

We didn’t turn up any recipes for picanha steak and asparagus, but there was one for NY strip and asparagus, so we went with that. The instructions were straightforward; We sprayed a little olive oil over the steaks and asparagus and added salt and pepper. We injected the probe into one steak, and after about ten minutes, we had a perfectly mid-rare steak with a great sear that you can’t get by just popping a steak in the oven. The asparagus was tender yet not overcooked.
Pro Cooking with the Brava

After experimenting with the Brava, we felt confident enough to try out the Brava Pro Cooking function. The Pro Cooking function allows you to set up customized cooking by zone. Per zone, you set the light intensity level, where the light is directed(top, bottom, or both), and searing preference. The light settings alternate per zone every 12 seconds per the total cooking time you select.
We decided to cook a salmon filet (medium-light level from top), some broccoli florets (medium-light level on top and bottom), and fingerling potatoes (high light level from top and bottom). We set it for 20 minutes and went with the glass tray, hoping that the potatoes would cook more quickly than they would in the metal tray.

Overall, the result was pretty much as expected. The broccoli and salmon were cooked well with a nice sear on the broccoli. The potatoes did need a bit more time, so we removed the salmon and broccoli and air-fried the potatoes at 450 for another 8 minutes, and they came out great.
As you can probably tell, if you’re going to test your skills (or, more appropriately, the Brava’s) in the Pro Cook setting, you should expect that this will most likely involve some trial and error until you perfect the cook times and styles for all ingredients. However, consulting with the Brava communities via the App, Facebook, and YouTube can provide a lot of excellent cooking insights and advice to get it right the first time.
Final Impressions and Considerations
In the end, we were very impressed with the Brava’s cooking performance and how user-friendly the device is considering how complex the cooking tech is. Its vast recipe database and ease of use can help novice home cooks level-up their cooking game without much effort. It also lets the experienced cook experiment and make their own creations while acting as a complementary kitchen tool to expedite cooking time when working with other appliances.
There’s no getting around that this is an expensive gadget; however, we believe that you’ll find yourself using it much more than most others out there, thanks to its thoughtful, user-first design. Also, the Brava cook-cam will have you marveling at the Pure Light Technology and it brings an added element of fun to the overall cooking experience. If you have any questions or issues with the unit, the customer care team and community are quick to help out and resolve any problem you may have. Long story short, we believe the investment is well worth it.
Some considerations are that this is a large, heavy device, so plan to dedicate some countertop real estate to it and then leave it there. A smaller kitchen may struggle with such an accommodation. Also, the accessories to the Brava aren’t cheap either. The Chef’s Choice package includes all cooking accessories, but it runs an extra $400 more than the starter set. Many of the recipes in the Brava call for things like the egg, chef’s, and square pan, which aren’t included in the starter set. So if you want to ease into the accessories, know that your recipe options will be limited, and you’ll have to invest more down the line. The Brava is compatible with other cookware, but Brava accessories are strongly recommended.
In the end, if you’re someone who wants a kitchen tech and requires a gadget that has the capability of many others like an air fryer, toaster oven, microwave, and more—the upfront investment of the Brava is worth it. We can attest that the Pure Light Technology the Brava utilizes is not a novelty, and we predict it will be something other brands will be trying to catch up to for years to come.


