
Learn to tie a highwayman’s hitch in under a minute

This releasable hitch knot is easy to tie and even easier to release

A highwayman's hitch tied around a log
Tom Kilpatrick / The Manual

When picking the right outdoor knot, you probably want one that ticks the following boxes — secure, easy to tie, and easy to untie. While many knots can lay claim to being easy to undo, the highwayman’s hitch is one of a select band that can lay claim to being quick-release. This means that with the pull of a cord, the highwayman’s hitch knot will come loose from the spar it’s tied around, and — unlike knots such as a clove hitch tied with a bight — there’s no loop around the spar to slow down your release.

This knot allegedly gained popularity among thieves and robbers, who would utilize the quick-release nature of the highwayman’s hitch to make a quick getaway on their horses. It makes for a great story, and while its authenticity can be questioned, this story likely has a lot to answer for why the highwayman’s hitch remains one of the most popular quick-release hitch knots. This knot is easy to tie — but also easy to get wrong — and takes seconds to learn, giving you an accessible and retrievable way to secure loads temporarily.

Step one of tying a highwayman's hitch
Tom Kilpatrick / The Manual

How to tie a highwayman’s hitch
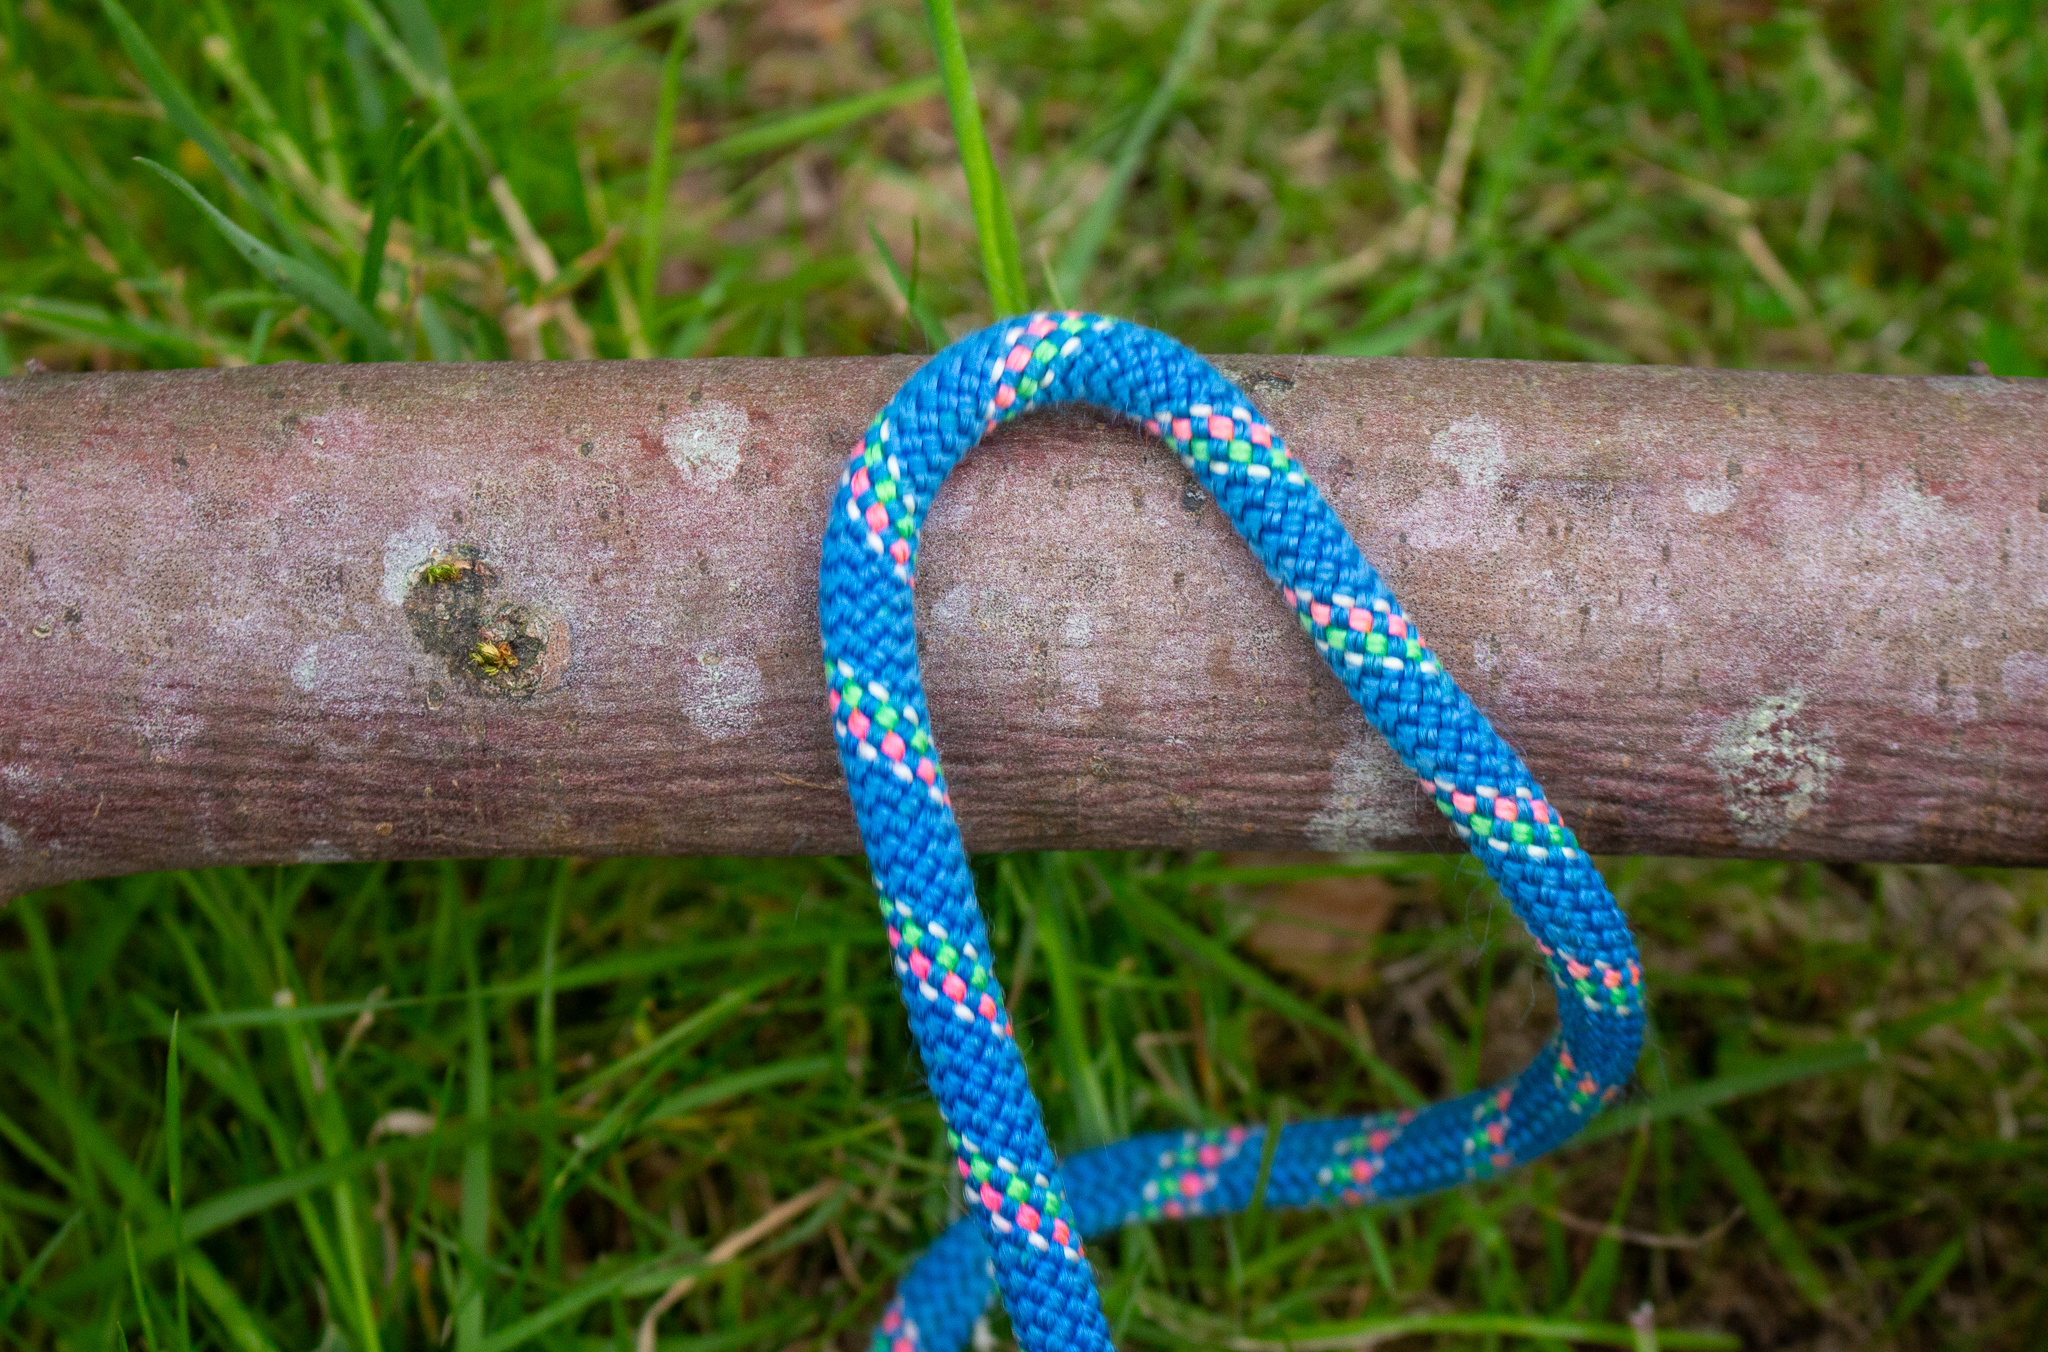
Step One

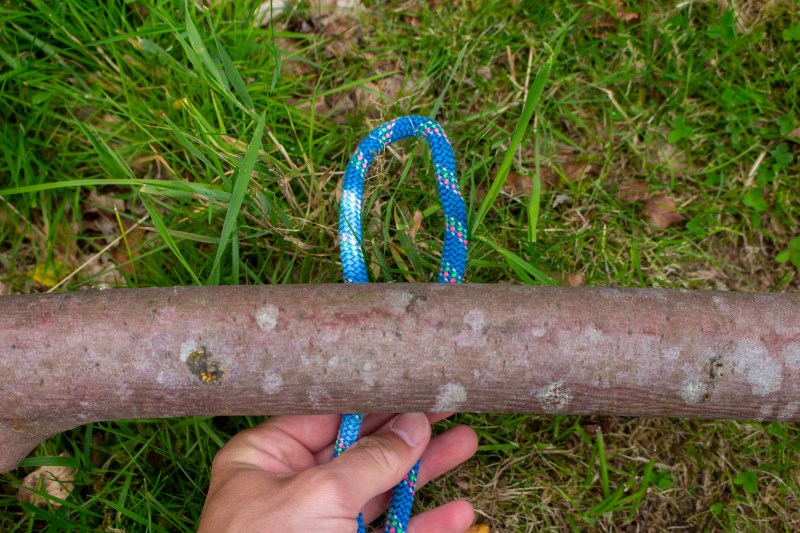
Create a bight near the end of your rope. Push this bight underneath your spar or branch. Here, the highlighted end of the rope is the working end, while the darker end will be the standing rope — the end connected to your getaway horse if you were a highwayman.
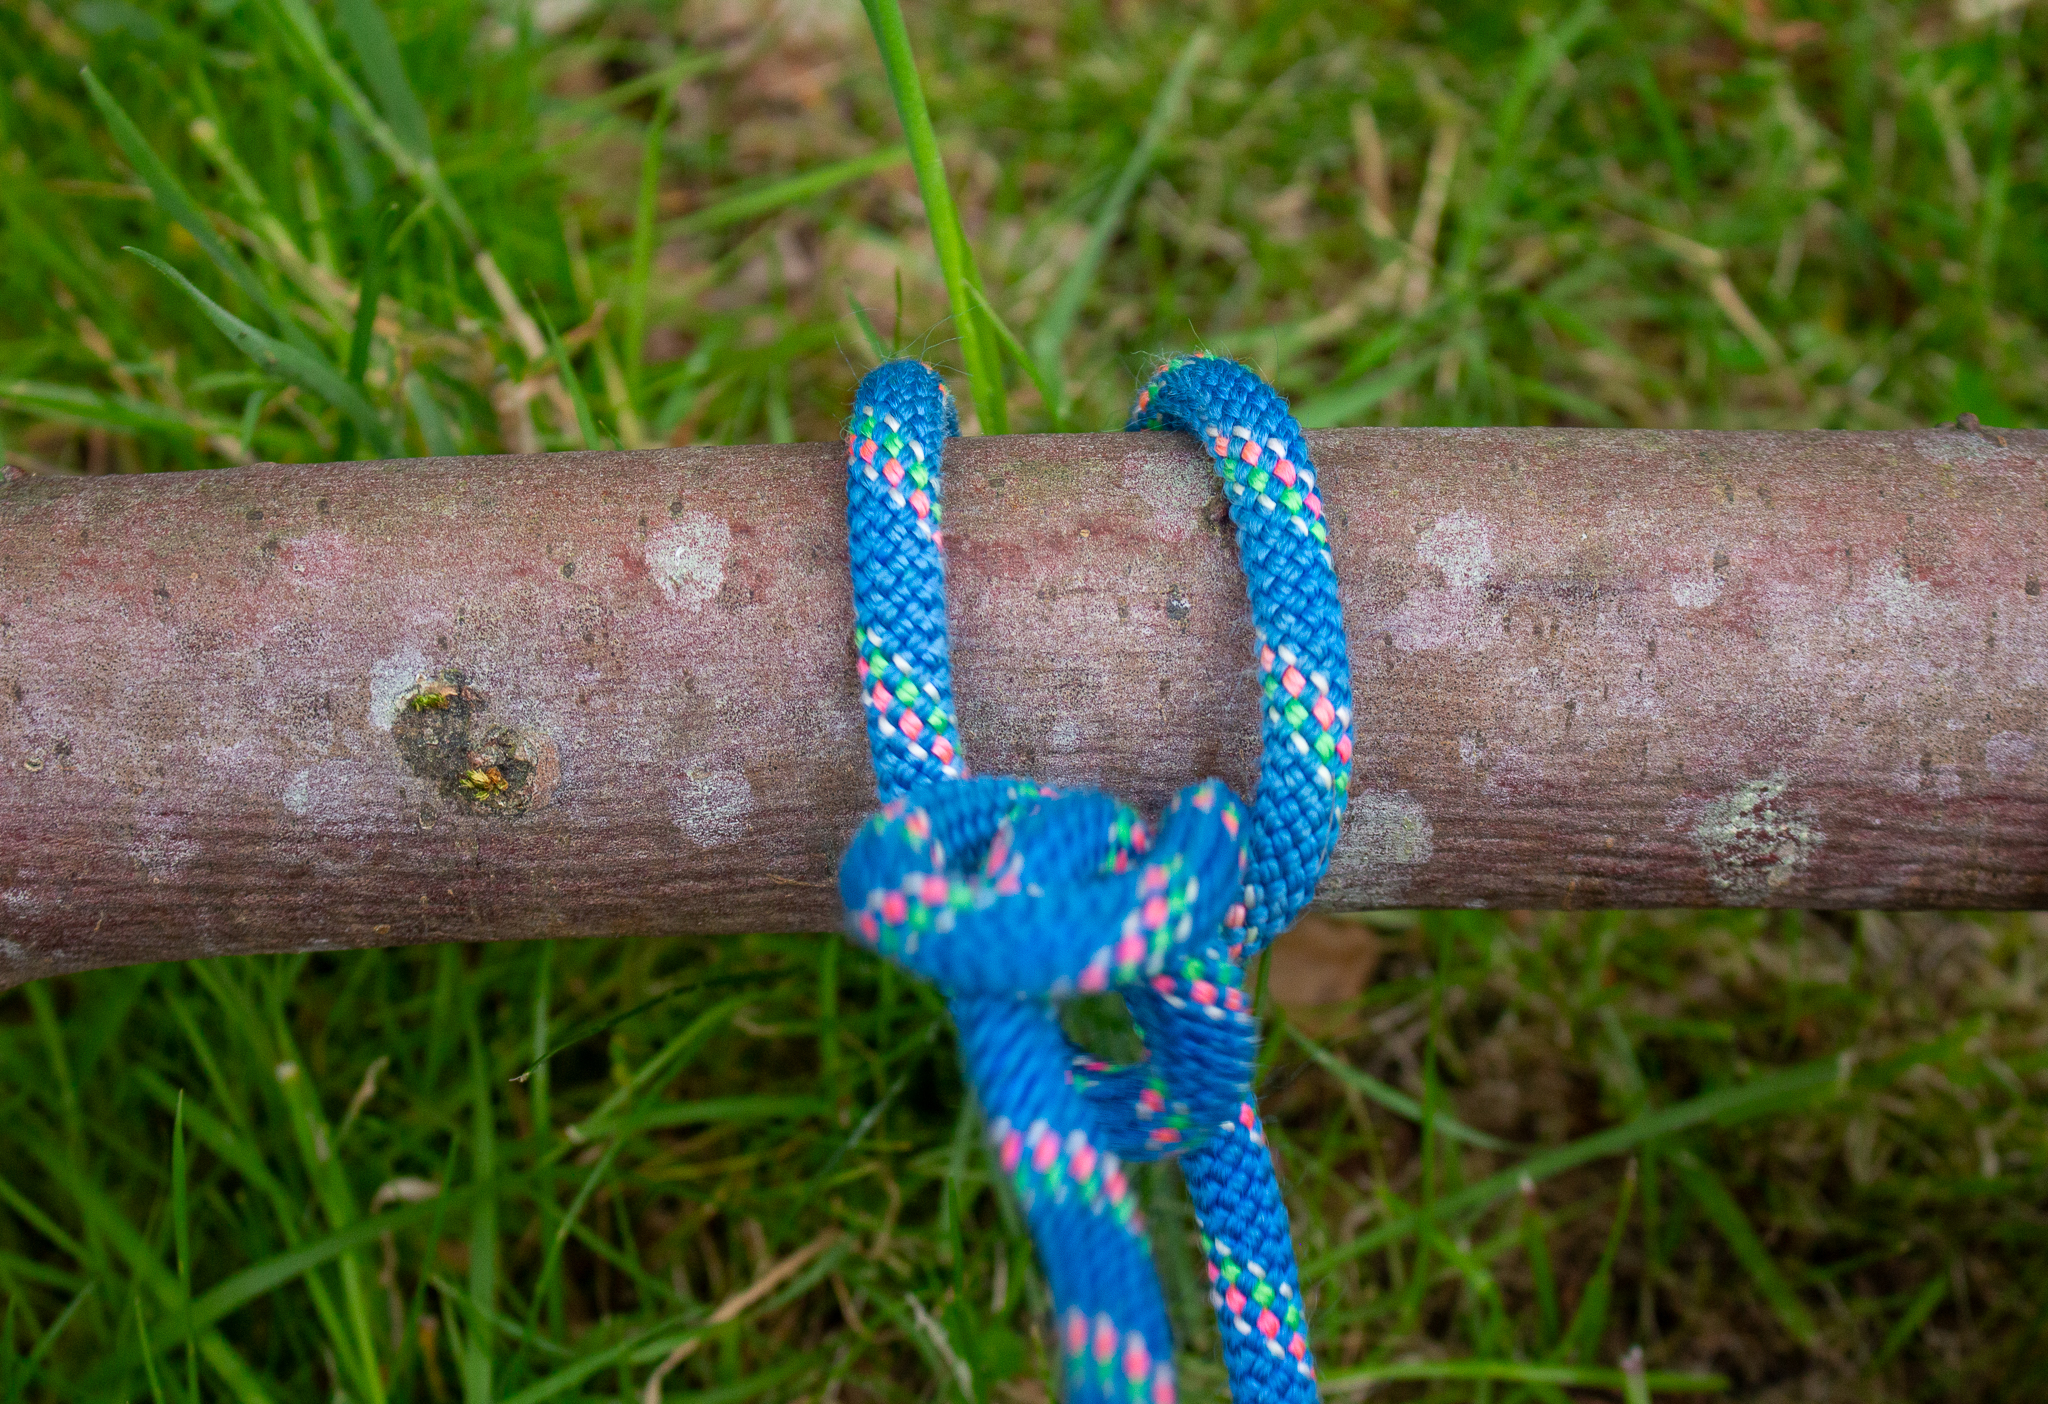
Step two of tying a highwayman's hitch
Tom Kilpatrick / The Manual

Step Two

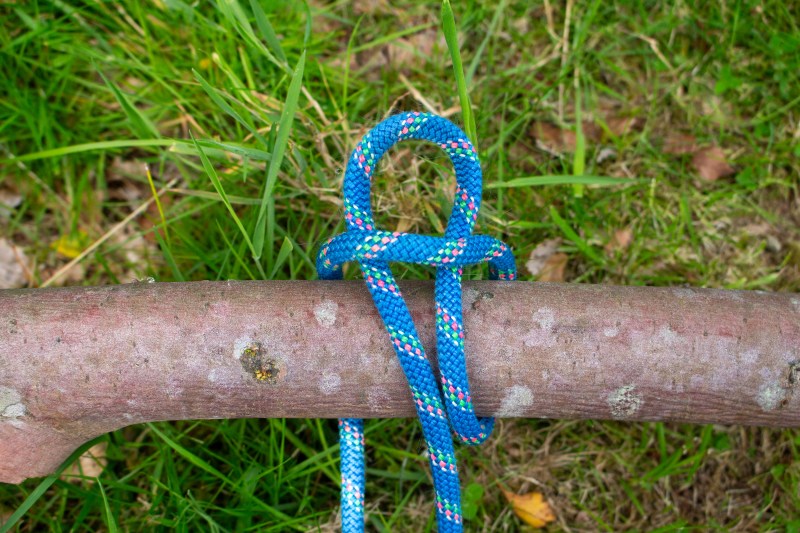
Make a loop in your standing rope. Take this loop over the top of your spar (or log) and push it through your previous loop. Make sure you use the standing end. Otherwise, this hitch knot will not bind on itself — this is where most mistakes are made.
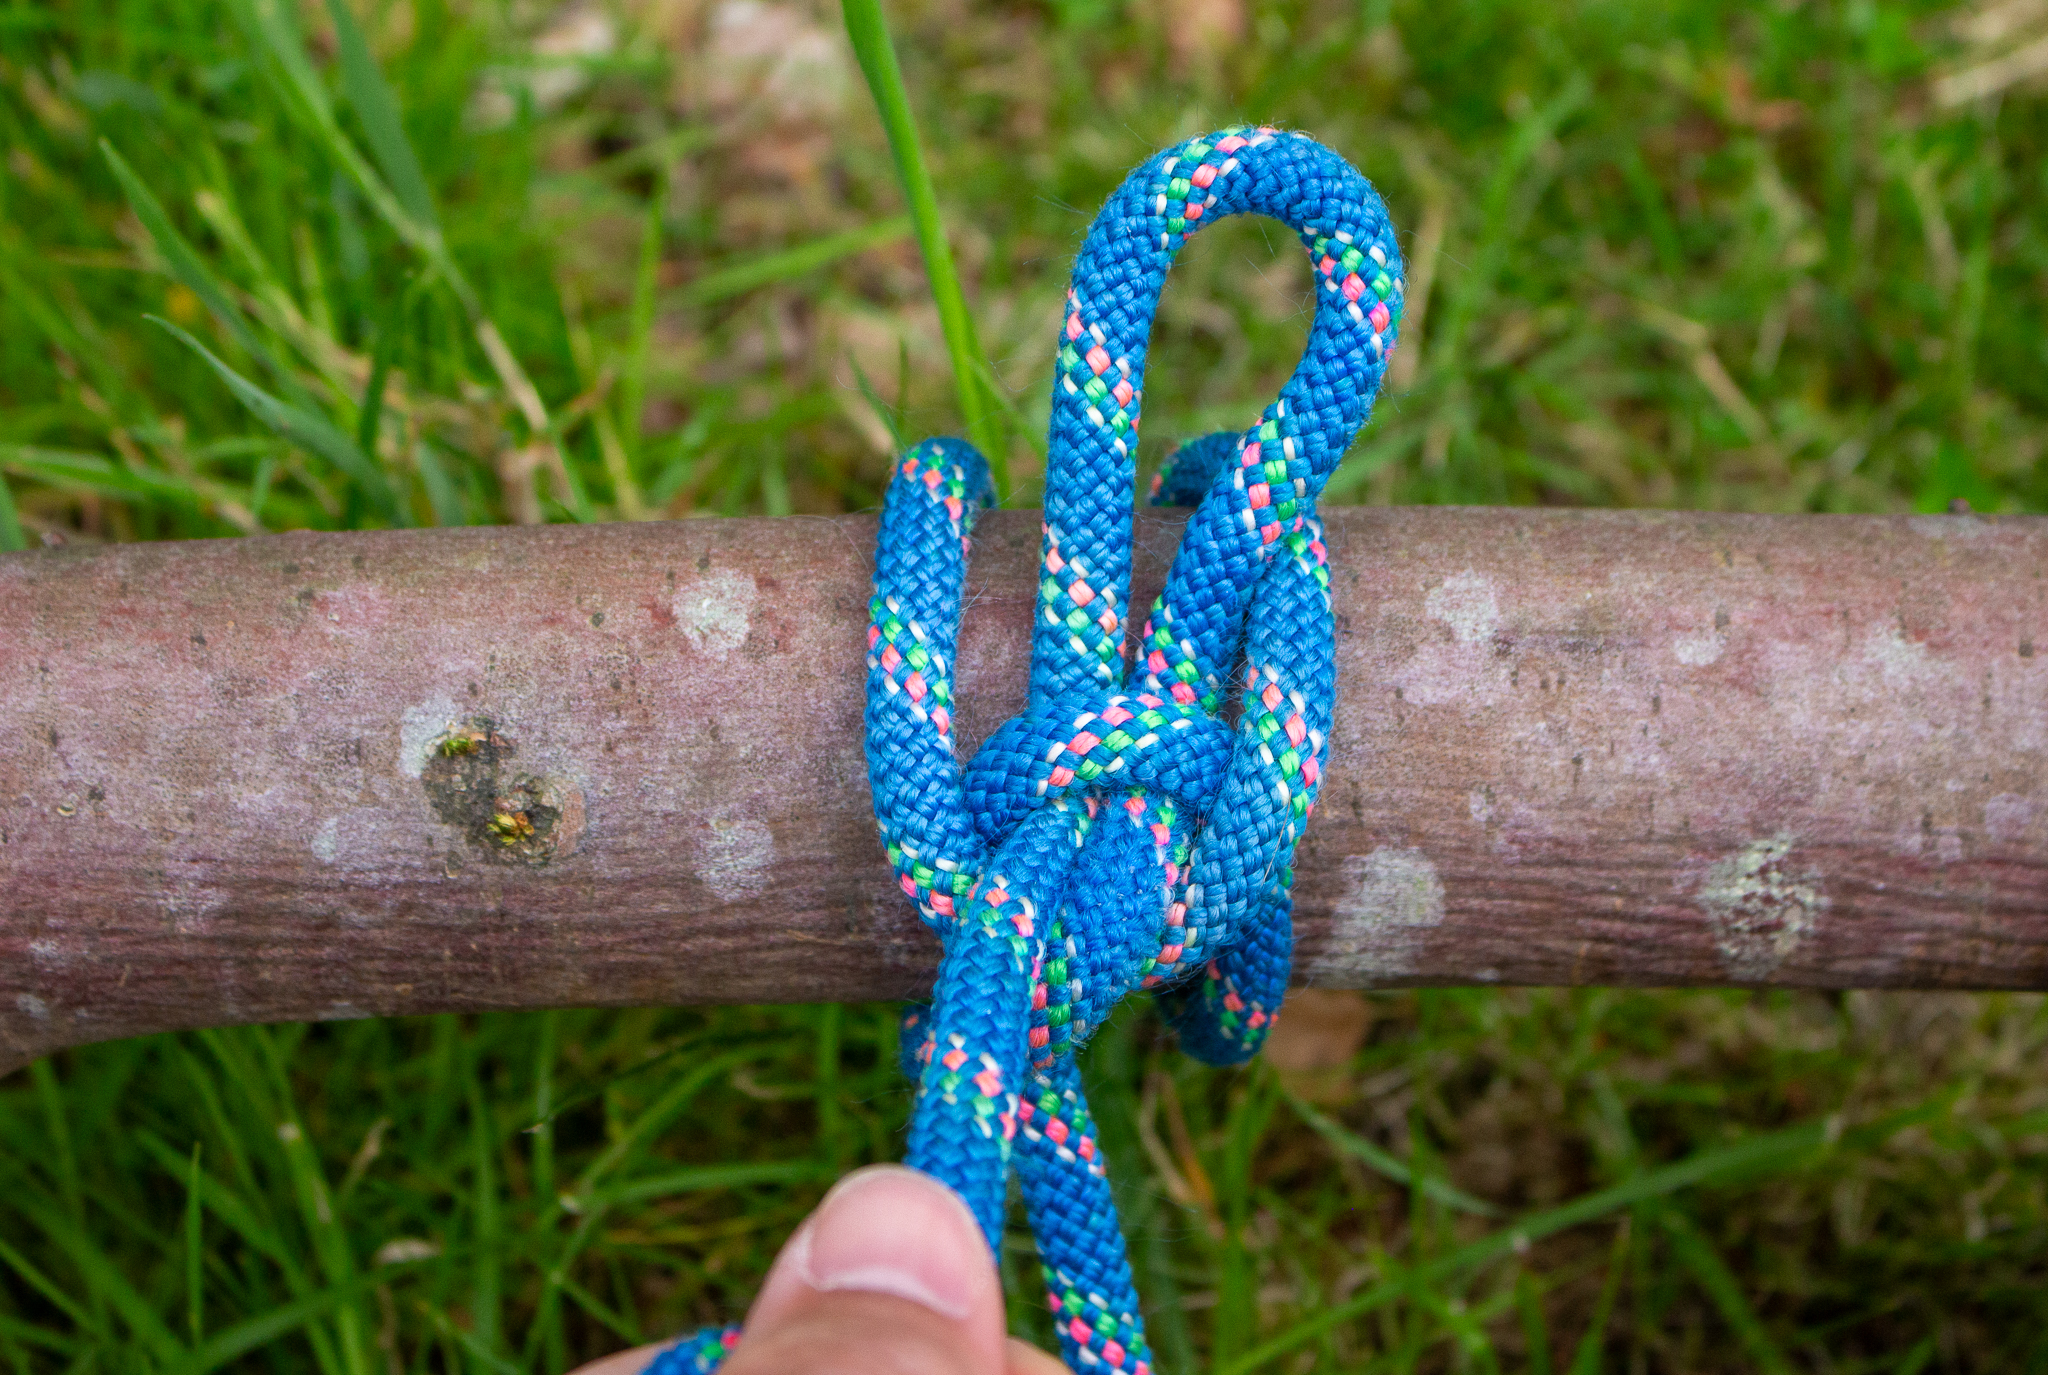
Step three of tying a highwayman's hitch.
Tom Kilpatrick / The Manual

Step Three

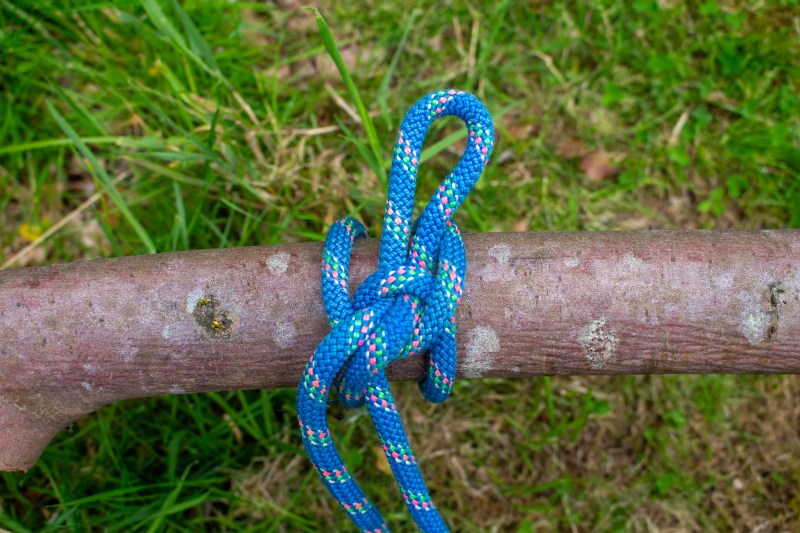
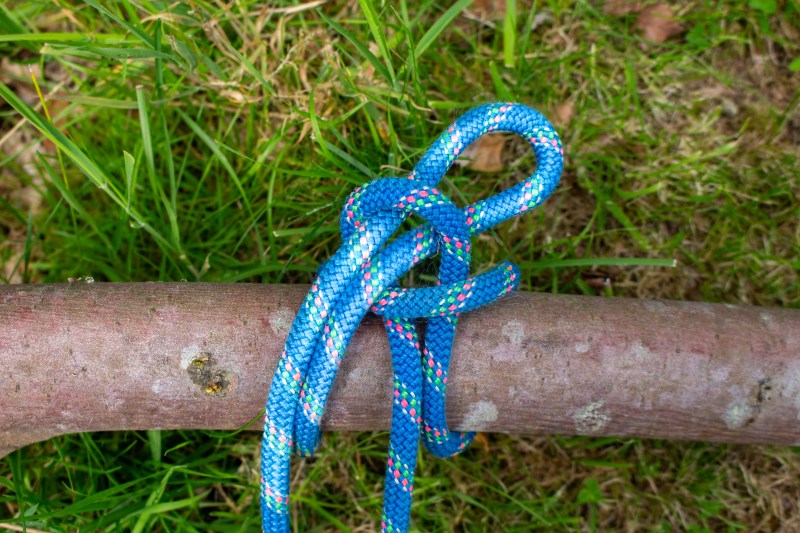
Now make a loop in your working end and push it through the loop you made previously in the standing end. Pull the standing end to dress and tidy the knot. This will ensure your knot remains secure and is less likely to capsize.

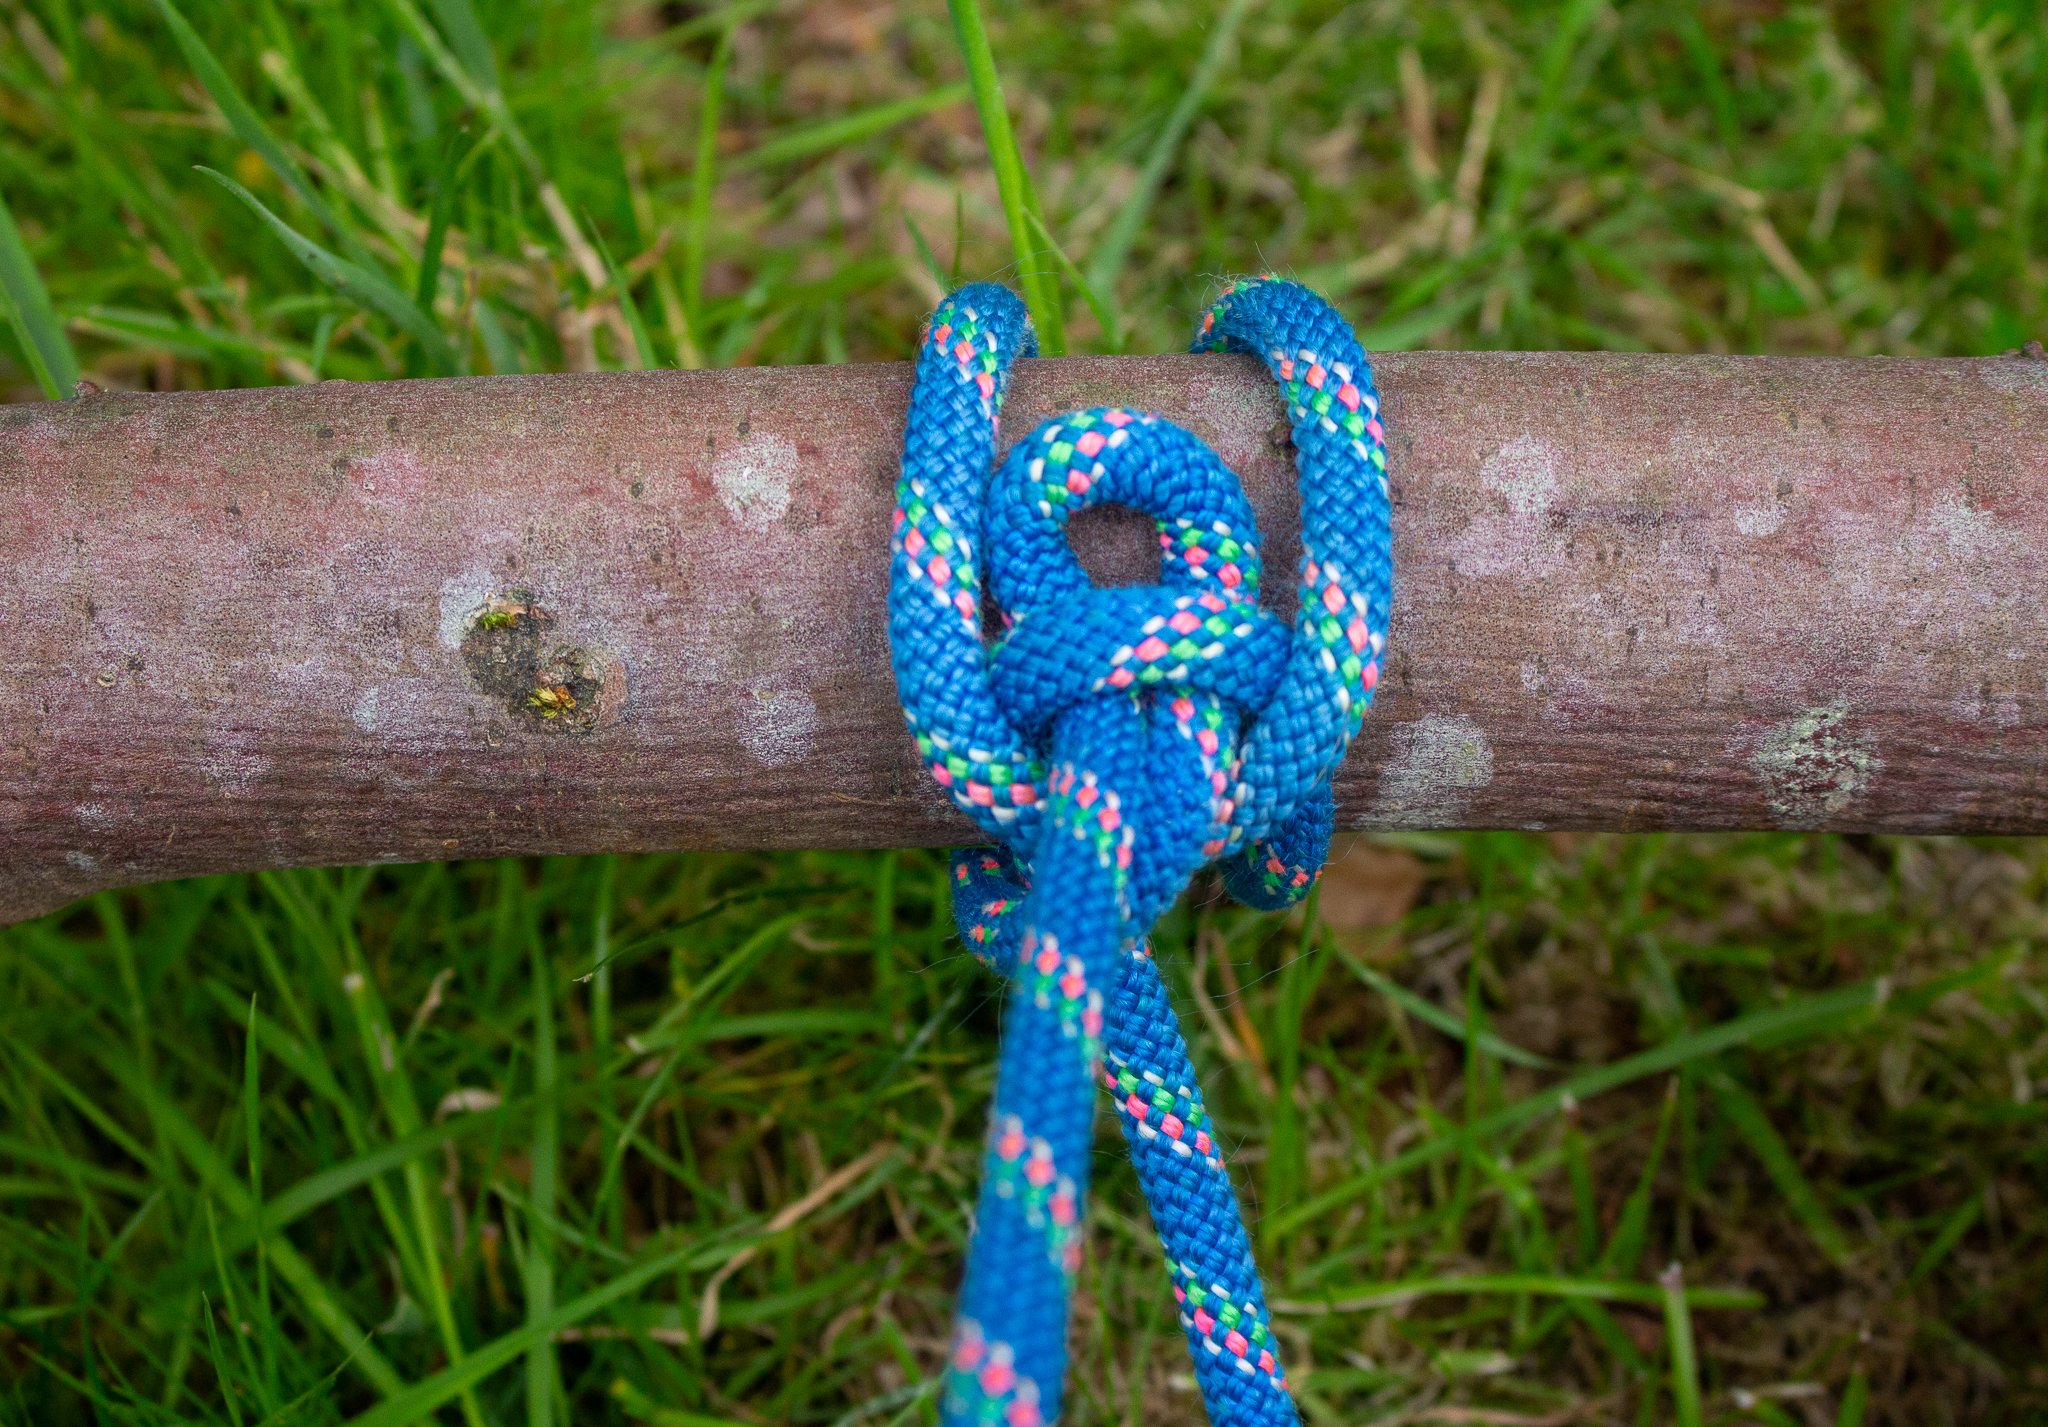
How do you release a highwayman’s hitch?

The highwayman’s hitch is perhaps one of the quickest and easiest knots to release, coming completely free from its fixed position with just one rope pull. This hitch knot stays securely in place because the standing end forms a tight loop around the working end, preventing the standing end from coming free. Pull the working end — the tail of your rope — to release your hitch while there’s a little pressure on your standing end, and the highwayman’s hitch will come free.

Recommended Videos

The tying and release of the highwayman’s hitch happen in a way that means you can’t tie this knot while maintaining pressure on the standing end — you need to be able to make a reasonable bight in the rope. The highwayman’s hitch is commonly used by kayakers or canoeists who want to tie their boat to a dock and release it quickly. By leaving a long working end that hangs into their kayak, they can climb onboard and cleanly remove themselves back onto the water without leaning over the side of the boat.

Tom Kilpatrick
Former Contributor
A London-born outdoor enthusiast, Tom took the first ticket out of suburban life. What followed was a twelve-year career as…
Topics
How to build a campfire pit: Tips, tricks, and how to leave no trace
How to leave no trace while building a temporary fire pit
Campfire ring in a sandy area

Having a campfire is, in my humble opinion, one of the best parts about camping. However, if you're out in the backcountry, you might not have a fire pit readily available for warmth, light, or cooking. Before you even consider building a fire pit, consult your local authorities. Campfires are a bad idea during the dry season, and many places have fire bans during that time to mitigate the risk of wildfires. You might also need to consider specific regulations or special permits depending on the area. If everything checks out, by all means, get to it! Here's how to build a campfire pit, as well as how to comply with Leave No Trace principles while you're at it.
How to build a campfire pit

Choose a safe location
The first step to building a campfire pit is to choose a safe location. Ideally, you'll want a place that is naturally durable, like a rocky area without vegetation. Keep it at least ten to fifteen feet away from tents, tarps, camping gear, grass, shrubs, or overhanging branches. The area should be relatively flat to keep the campfire from shifting or spreading unexpectedly. It's also important to pick a location sheltered from strong winds so the sparks don't fly far. Lastly, it should be in a location that doesn't interfere with foot traffic or campsite activities. Personally, I also like to have a water source nearby so it's easy to put everything out.
Prepare the ground
Next, you'll want to prepare the ground. Remove all dry leaves, twigs, pine needles, and other flammable materials at least a five-foot radius from the campfire pit. Clearing it all down to the bare sand, rock, or gravel will create a buffer zone to prevent the fire from spreading. It's helpful to keep a trowel in hand to make sure that there are no hidden roots or peat that could burn. The last thing you want is to create an underground fire. The good news is that if you plan to answer nature's call responsibly while in the woods, you probably already have a trowel on you, so you won't need to bring additional tools for this.
Don't gather rocks
While it's often common practice to gather rocks to form a ring around your campfire, the USDA actually warns against it. Instead, they recommend building a mound fire, which can be done by laying a fire-resistant cloth on the flat, durable area you cleared, and then flattening about two inches of sand, dirt, or gravel on top. Make sure that this layer doesn't have a lot of organic material. Then, build your fire on top.
If you have to gather rocks. . .
Doing a mound fire is one of the least environmentally damaging ways to have a camp fire, but if you're in a pinch, a rock ring can keep the area safe. You can't exactly call it leaving no trace, since there will be evidence of your stay, like ashes or black marks. Choose some rocks that are large enough to form a stable barrier around your campfire, but small enough to carry and arrange easily. These rocks will help shield your fire from the wind or even catch stray sparks before they get too far. For a two-foot diameter pit, around twelve rocks is usually good. However, you don't want to choose just any kind of rock. Some will explode when heated, so to avoid any surprises, avoid anything that is porous or shows signs of dampness.

Read more
5 simple things newbie overlanders should never forget (but usually do)
From recovery gear to reading the weather to knowing your vehicle's limitations, this is how to prepare.
Group of overlanders sitting around a campfire after dark.

If social media is any indication, overlanding is a very, very expensive hobby. It "requires" a ridiculously kitted-out Jeep or 4Runner with a six-inch lift kit, a $3,000 rooftop tent, and a long list of specialty recovery gear mounted to every square inch of your rig — usually to the tune of $80,000 or more. In reality, most people can start overlanding with nothing more than a stock SUV or vehicle with reasonably high clearance and a decent set of tires. Beyond that, there are a few basic things that every overlander should prepare for. Here's my top five:

Don't overpack your overlanding rig

Read more
Capilano Bridge: A gateway to BC’s rainforest, minutes from downtown Vancouver
My guide to a perfect day at Capilano Suspension Bridge Park
A pictur of the Capilano bridge surrounded by evergreens and empty

Just 15 minutes outside of downtown Vancouver, B.C., you'll find the Capilano Bridge, a 450-foot-long cedar-planked walkway placed 230 feet above the valley floor. While worth its own pilgrimage, the bridge is more than a one-hit wonder. It's one of dozens of attractions in Capilano Suspension Bridge Park's 27 acres of aerial walkways, carved totem poles, and mist-threaded rainforest. 

The coveted Park pulls off something rare: immersive, big, nature paired with all the creature comforts a visitor could want. While most people come to cross the Capilano Bridge, I opted to explore the other impressive aerial structures and bridges on site, which are equally remarkable and have fewer crowds. 

Read more