There’s probably nothing in the world more delicious, more succulently tender, more tantalizingly juicy than a really great smoked brisket. This barbecued beauty is a favorite of anyone who has put forth the time and effort to make it, knowing full well that all of the work and patience will be well worth it. Before smoking a brisket, though, this large, somewhat awkwardly shaped piece of meat must first be trimmed. Just as the process of smoking a brisket isn’t for the faint of heart, neither is trimming it. But oh, will your efforts be rewarded.
Sure, you can always ask your butcher how to trim brisket, but trimming a brisket yourself before smoking it is an admirable feat and one well worth doing. It’s also a very important step in the cooking process, as improper trimming will lead to uneven cooking, bad bark, poor smoke penetration, and several other hindrances that stand between you and an incredible meal.
So, how do you trim a brisket?
How to trim brisket
Step 1: Trim the fat
The first step in trimming a brisket, just like any other piece of beef, is to cut away the excess fat. The goal is not to remove all of it because, as we all know, fat equals flavor. But if there’s too much extra fat and an uneven shape to your brisket, it could cook unevenly and burn in sections that haven’t been properly trimmed.
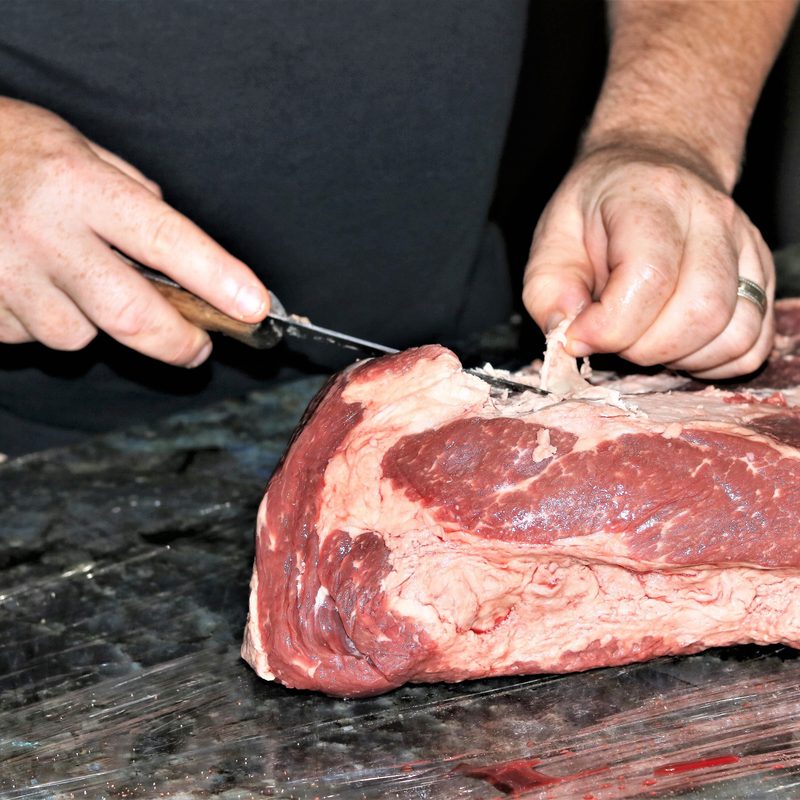
After unwrapping your brisket, you’ll notice a large section of fat on one side. This layer is called the fat cap and lies along the top portion of the meat. On the other side of the brisket is exposed meat with another large piece of fat and some silver skin. You’ll start trimming on the meatier side, not the fat cap side.
The rectangular, thin side of the brisket is called the flat. The other end with a more angular shape and more muscle is the point.
If you look at the point of your brisket, there will be a large, moon-shaped piece of fat that should be the first to go. Remove this piece by sliding your knife between the meat and fat, then carefully saw away the fat while gripping it with your free hand.
Step 2: Shape the brisket
Once this large piece of fat is reduced, use the knife to carefully level the brisket as much as possible. There’s no need to remove this entire section of fat, as it will add flavor and juiciness to your meat. The goal here should be to make as even a surface as possible by trimming the fat, not removing it altogether.
Shaping brisket can be a tricky science. On the one hand, it’s important to give your meat as much of an even shape as possible for the reasons we’ve mentioned. On the other hand, you shouldn’t be hacking away at perfectly good meat just to get a “perfect” shape. The goal here is balance.
Start shaping your brisket by trimming thin sections from the sides where the shape is the most uneven, keeping in mind that you can always go back and trim more, but you can’t sew your meat back on. Once the sides are even, move your knife to the ends and remove any smaller hanging pieces of fat or meat. Since brisket is such a slow-cooking piece, these smaller, uneven pieces will burn in the cooking process if not removed.
Step 3: Trim the silver skin
Silver skin is a thin connective tissue found in many cuts of meat. Unlike fat, there’s no benefit to this annoying little membrane and it should be removed. Thankfully, this can usually be done with ease. Simply run your knife underneath any of this silvery membrane and pull to remove.
Step 4: Trim the fat cap
It’s time to give that big piece of meat a big (but careful) flip on your cutting board and get to work on the fat cap. Again, the goal here is not to remove the fat cap completely but just to trim it down.
After ensuring that your knife is well-sharpened, run the blade along the fat cap, trimming away the fat as evenly as possible until it’s about a quarter-inch thick. Of course, the fat will be thicker in certain sections of the cap, and these parts will require more trimming while others may not require any. Aim for an even layer of fat, knowing perfection is an illusion.
Step 5: Finishing touches
Once the fat cap is trimmed and even, look over the entire brisket for any spots that appear uneven and do your best to level these out. This is also a good time to trim away any more small hanging pieces that may burn in the smoker. At this point, your brisket should look relatively uniform in shape and trimmed of any extra fat.
At this point, there’s only one thing left to do — smoke that brisket!