If you’ve ever spent time in a professional kitchen, you’ll know that omelets are the bane of a line cook’s existence. It’s not because they’re necessarily a complicated dish to cook, but they require a lot of attention. Many things within the omelet cooking process, if they go slightly wrong, can ruin the dish. And if you’re a line cook working a busy brunch shift, the last thing you want to do is babysit an omelet as the tickets come pouring in.
Good thing for you, you’re not a line cook, and if you are, we hope you already know how to make an omelet. But, if you aspire to be a cook, we all have to start somewhere.
If you search online “how to make an omelet,” you’ll find millions of breakfast recipes with different tips, tricks, and cooking techniques. We’re not here to provide you with any omelet hacks because you have to put in the work to have a genuinely delicious omelet. If you follow the steps below, you’ll cook an excellent omelet every time.
Step 1: secure your tools
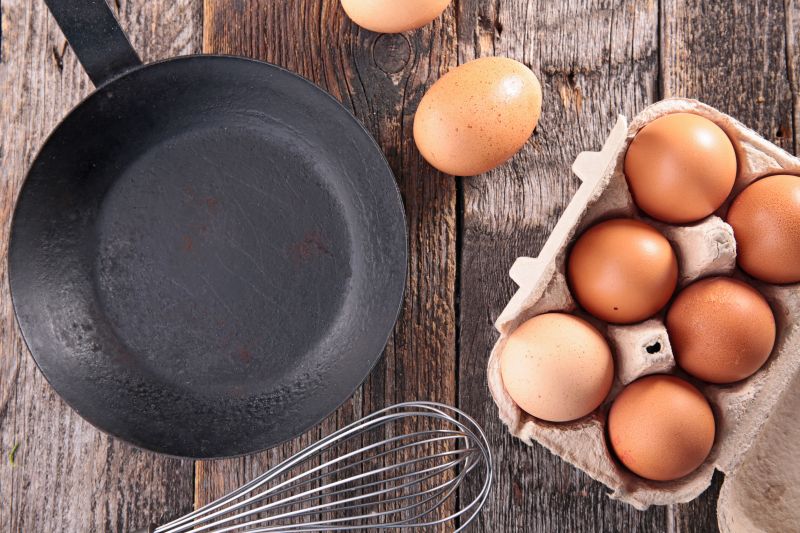
Before you cook anything, you always need your cooking tools and ingredients in place. When cooking an omelet, you’ll always need the following:
A nonstick pan
Omelet traditionalists will tell you that you don’t need a nonstick pan to cook an omelet. After all, there were no nonstick pans when French chefs invented the omelet hundreds of years ago. This is true. However, for the same reason that we don’t use Sony Discmans to listen to music anymore, we don’t use standard pans. You can cook an omelet with a regular sauteé pan, but you also will need a lot of fat to keep it from sticking. Why not use tools that modern technology has blessed us with?
There are two things to keep in mind when choosing your nonstick pan. First, make sure it’s a sauteé pan. Next, make sure the pan’s cooking surface area is big enough so that the eggs can spread out in a thin, even layer. If you’re cooking a smaller omelet (one to two eggs), a 6-inch to 8-inch egg pan should be fine. If you’re going big with three eggs or more, give yourself a nice cooking area with a 12-inch to 14-inch pan.
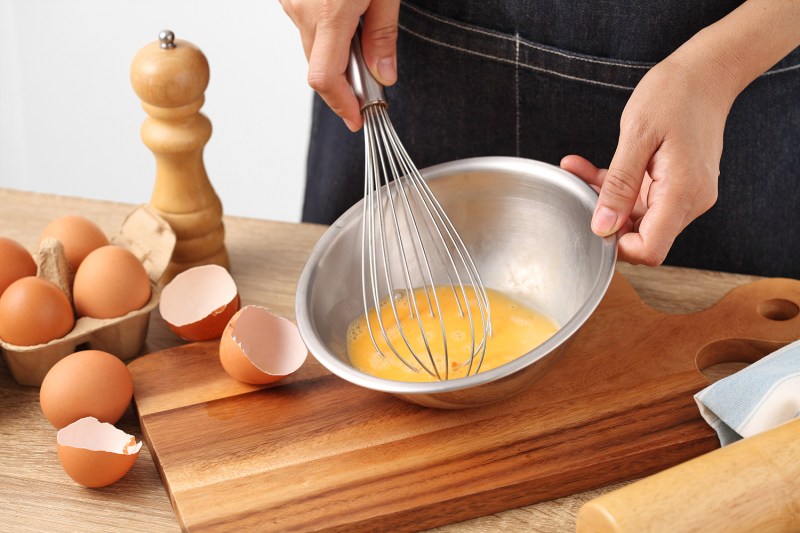
A bowl
You’ll need this to whisk the eggs. We suggest stainless steel, but you can use any kind. Just try to stay away from plastic, and it will be harder to whisk the eggs. If you plan on making a super fluffy omelet, you’ll need two bowls.
A whisk
Any whisk will do, but a good piano or French whisk will help incorporate air into the eggs. Just try and keep from using a fork.
Spatulas
Having an excellent spatula is one of the secrets to a great omelet. A standard silicone spatula with a thin and flexible edge works best. If you don’t trust your omelet-flipping capabilities just yet, you’ll also want a wider spatula used for flipping pancakes or burgers.
Miscellaneous tools
Depending on what you’re putting in your omelet will require more or fewer tools. A knife and cutting board will be needed for slicing scallions or bacon. If you’re craving some freshly grated parmesan, you’ll need a grater of some sort.
Step 2: gather the ingredients
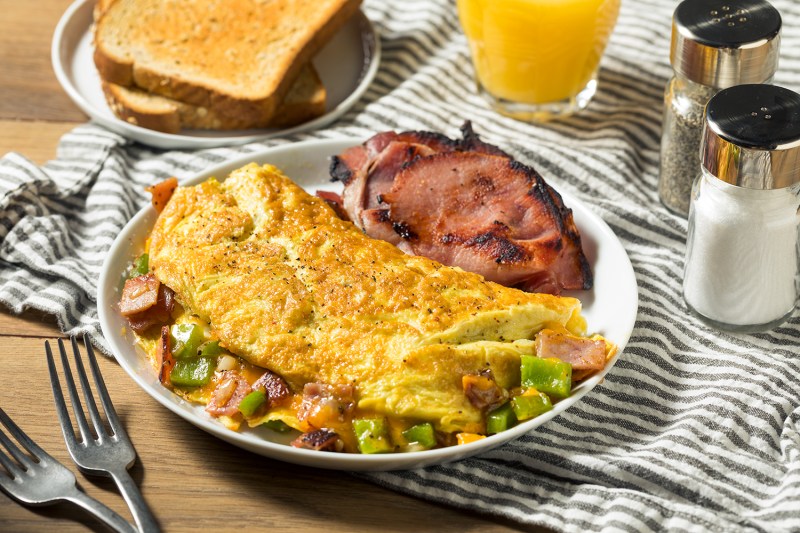
Although we may think all omelets must-have ingredients like cheese and ham, they’re really just eggs cooked with fat. Whatever you decide to add to your omelet is just personal preference. Keep in mind that the more ingredients you add, the harder it will be to roll or flip it. Also, make sure any components that need to be cooked — such as meats or sauteé mushrooms — are cooked and ready to go before the omelet cooking.
Eggs
Obviously, the most essential ingredient for an omelet is eggs. Letting the eggs get closer to room temperature before cooking isn’t crucial, but it helps expedite cooking.
Fat
Even with a nonstick pan, fat is necessary for flipping and flavoring your omelet. Traditionally, butter is used in an omelet. However, you can use basically any type of oil, shortening, or animal fat.
Step 3: the method

Before you start the actual cooking of the omelet, you’ll want to make sure you’ve done a little bit of food prep. Your eggs should be whisked and ready to go, and all ingredients you want to add should be prepped. Whatever seasonings you’d like to add should be ready as well. Traditionally, just a pinch of salt and white pepper is called for in an omelet.
Heat the pan with the fat
Your pan’s heat is the critical step of a perfect omelet. A pan that’s too hot will leave you with a tough, brown outer crust. If that’s how you like your omelets, crank the heat up to medium-high.
If you’re like most and enjoy a perfect pale-yellow omelet with a moist inside, you’ll want to heat your pan on medium-low heat. This will prevent any hot spots in the pan and allow the fat to maintain the same temperature.
The pan should be around 250 to 275 degrees Fahrenheit to prevent scorching. Since pans don’t come with built-in thermometers, a good way to tell when it’s ready is when your fat (about a tablespoon) is fully melted and moves easily around the cooking surface. It should bubble slightly but not be smoking hot. If you’re using butter, the instant it starts to get brown is an indicator your pan is getting too hot, and you should quickly add the eggs or let it cool a bit.
Add the eggs
Add the eggs from the bowl scrapping it clean with the silicone spatula. When your eggs hit the pan, you shouldn’t hear any sizzling. If you do, your pan is too hot. This is the point you add your salt, pepper, and any other seasonings.
Set the omelet
When you set your omelet, you’re ensuring that the curds from the eggs don’t cook faster than the omelet as a whole. Stir the eggs in a circular motion, ensuring none stick to the pan’s sides, similar to if you were making scrambled eggs. The eggs should be slightly firm yet still watery.
Add your ingredients
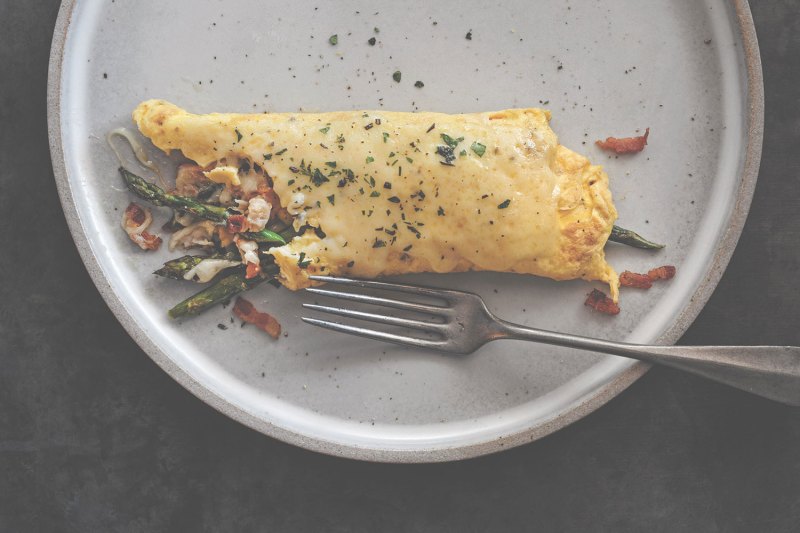
Once your omelet is set, quickly add your ingredients, spreading evenly across the entire omelet.
Step 4: flipping or rolling the omelet
This is the part that most people dread, where an omelet can quickly become a breakfast scramble. This part takes practice, so don’t fret if you don’t get it wrong the first time. A scramble tastes just as good.
The flip
This technique is most commonly used if you’re stuffing your omelet with a bunch of ingredients, and it’s where having a broad, plastic spatula comes in handy. You simply let your omelet reach its desired level of done-ness, fold it over on itself, and slide it off the pan onto your plate.
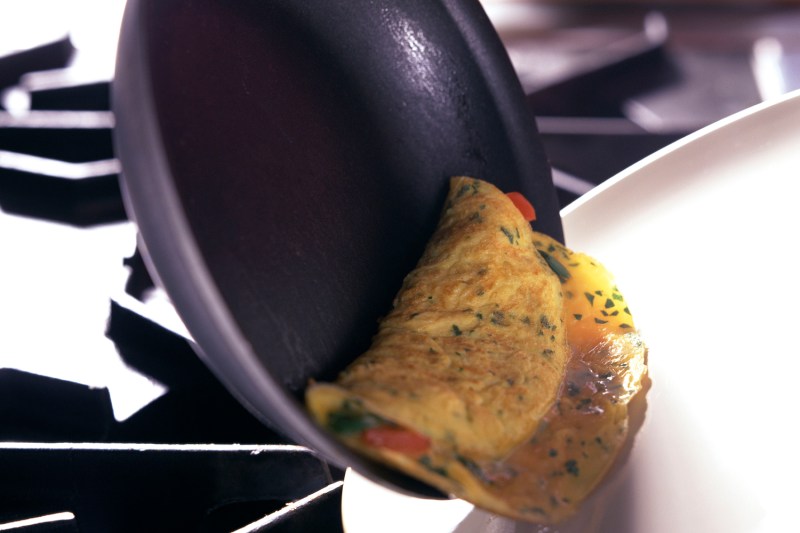
The French roll
The French roll technique for omelets takes a little maneuvering, but it’s really relatively easy once you get it down. You can add a little parm and some scallions for this technique, but this becomes more difficult if you’re loading your omelet up with ingredients.
Lift the pan
Once your omelet is set, lift the pan to a 45-degree angle and give it a little shake so that it slides to the outer edge.
Roll the omelet down
Roll the edge of the omelet closest to your wrist down halfway, or ¾ of the way to the other side.
Hit your wrist
To fold the edge of the omelet that’s furthest away from you, give your wrist a firm tap or two, and the force will make the outer edge fold over on itself.
Plate upside down
During this rolling technique, your hand will never move. Once the omelet is rolled, take your plate in the other hand and roll the omelet onto the plate by turning the pan upside down over the plate.
Making a fluffy omelet
We mentioned earlier that you’d need two bowls to make a fluffy omelet. That’s because you will separate the egg yolks and whites into two separate bowls and whisk each by themselves. The yolks will get a standard whisk, but the whites will get a power whisk until they are foamy and about three times their original size. Then, you’ll recombine the yolks and whites and cook as described above. For a super fluffy omelet, add extra egg whites so the mixture is three to one.