
This Charred Pig Tail Recipe Revamps a Southern Classic

Everyone knows bacon is delicious. As are pork chops. As are ribs. As are just about every other cut of pork we’ve ever tried. But do you know what part of the pig is delicious and you may not have tried yet? Pig tails.

A staple in Southern cuisine, pig tails have been cooked now for centuries in a variety of ways. Whether they’re smoked or brined, served with black-eyed peas or collards, they’re a cut of meat that, while you may not have ever contemplated eating before, are worthy of your attention.

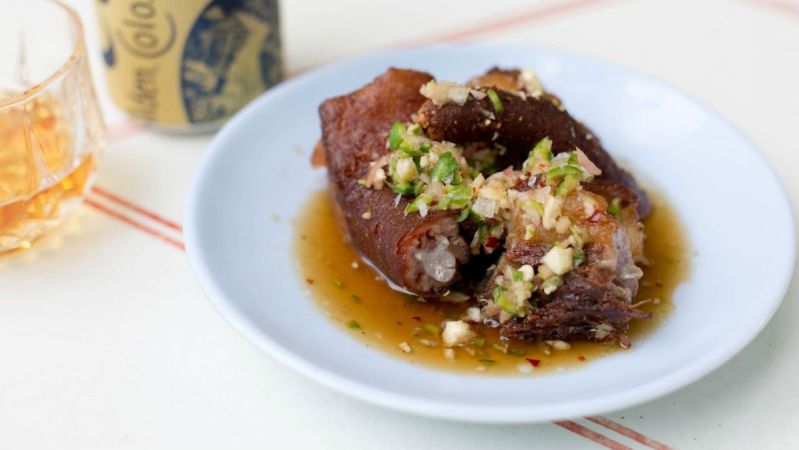
This recipe — which takes pig tails and kicks them up a notch thanks to a piquant and citrusy chili lime marinade — comes to us courtesy of chef Marcus Jacobs of Marjie’s Grill in New Orleans.

Charred Pig Tails with Chili Lime Marinade

Marjies Grill charred pig tails recipe
Marjie's Grill

Ingredients:

  • 8 pig tails
  • Seasoned boil*
  • Chili lime marinade**
  • Sea salt
  • Fresh herbs:
    • Mint
    • Cilantro
    • Thai basil
    • Scallions

Method:

  1. Combine ingredients of seasoned boil* and bring to a rolling boil over a high flame. Turn down and simmer for about 30 minutes.
  2. Strain seasoned boil into a clean pot large enough to accommodate the tails and bring to a boil.
  3. Add tails and reduce to a light simmer. Simmer for about 2 hours or until tails are totally tender, but not falling apart. (It’s important not to boil the tails too much or the skin will split.)
  4. Once tails are braised, remove from the boil and allow to cool to room temperature. (Once cool, the tails can be kept in an airtight container in the fridge for up to 6 days.)
  5. Light half a chimney of charcoal.
  6. Once coals are completely lit, transfer to one side of your grill so that you’re set up for two-zone grilling.
  7. Make sure your grill grates are clean and well-seasoned and start grilling the tails in batches over the charcoal. If they flare up too much from the fat dripping off of the tails, move them to the cooler zone. This is definitely a hands-on grilling project. You must flip the tails around every couple of minutes until you have them nicely charred, but not burnt the whole way around.
  8. Once your first batch is done, move them to the cooler side of the grill and cook the rest of the tails.
  9. Once all of your tails are cooked, roughly cut them up into 1-inch pieces and pile them onto a warm serving plate.
  10. Smother with the chili lime marinade** and fistfuls of chopped herbs.
  11. Dig in with your hands, get messy, and pair with a bone-dry Riesling or ice-cold cheap American beer.

Marjies Grill charred pig tails recipe 2

Seasoned Boil*

Ingredients:

  • 10 dried chilis
  • 5 heads of garlic, split
  • 3 onions, peeled and cut in half
  • 3 lemons, cut in half
  • 3 oranges, cut in half
  • 3 gallons water
  • 2 cups crawfish boiling spice
  • 2/3 cups soy
  • 1/2 cup fish sauce

Method:

  1. Combine all ingredients in a large mixing bowl and whisk together.
  2. Season to taste.

Chili Lime Marinade**

Ingredients:

  • 12 stalks of lemongrass, cleaned and sliced thin
  • 6 cloves of garlic, sliced thin
  • 2 Thai chilis, sliced thin
  • 1 cup fish sauce
  • 3/4 cup soy sauce
  • 3/4 cup lime juice
  • 3/4 cup cane syrup
  • 3/4 cup toasted chili powder

Method:

  1. Combine all ingredients in a large mixing bowl and whisk together.
  2. Season to taste.

Editors' Recommendations

Topics
Sam Slaughter
Sam Slaughter was the Food and Drink Editor for The Manual. Born and raised in New Jersey, he’s called the South home for…
How to start your own home bar: the essential spirits
Home Bar

When you start getting into cocktails, drinking them is only half the fun -- making them is part of the appeal too. If you start making your own drinks at home, you'll soon find that you can often create better or more interesting drinks than what you're served in most bars. And even better, making drinks for other people is a great way to try out new combinations, learn about spirits, and make your friends and family happy too.

However, moving beyond the simple spirit plus mixer style of drinks which most people make at home and into the world of cocktails means that you'll need a wider array of spirits on hand than you might be used to. It can take some time and research to build up a well stocked bar, and choosing high quality spirits isn't a cheap endeavor. It's worth it, though, for the pleasure of being able to try out classic cocktail recipes and experiment with making up your own creations too.

Read more
You’re overlooking the most important ingredient in your cocktail
Steel Hibiscus cocktail.

When you list off the most important parts of making a good cocktail your mind likely goes immediately to good ingredients: quality spirits, freshly squeezed citrus juices, and well-matched mixers. You might also consider the importance of using the right tools, like getting a proper mixing glass so your stirred drinks can be properly incorporated, or a good strainer so that there aren't little shards of ice in your cocktails. And then there are the fun additions like elaborate garnishes, bitters, or home-made syrups which can add a personal touch to your drinks.
All of those things are important, absolutely. However I think there's one ingredient that can make or break a good cocktail, and it's something many drinkers don't ever stop to consider. It's the humble but vital ingredient of ice.

Why ice is so important
In mixed drinks like a gin and tonic or a screwdriver, ice is added to the drink primarily to chill it down to a pleasing temperature. That's a topic we'll come back to. But in cocktails which are shaken or stirred, ice is far more important than that. Cocktails are typically composed of between around 20 to 30 percent water, and this water comes from the ice used in the preparation process.
When you stir ingredients in a mixing glass or shake them in a shaker with ice, you are chipping away small pieces of the ice so that it dissolves and blends with your other ingredients. You might imagine that water doesn't make much of a difference to taste, being tasteless itself. But it's vital in opening up the flavors of other ingredients. That's why many whiskey drinkers like to add a dash of water to their whiskey when they drink it neat.
If you're ever in doubt of how important water is to cocktails, it's worth trying to make a drink with no ice. Even if you mix up the ideal ratios for a drink that you love and put it into the freezer so that it gets to the chilled temperature that you usually enjoy it at, if you sip it you'll find that your drink tastes harsh, unbalanced, and incomplete. Even for special room temperature cocktails like those designed to be drunk from a flask, you'll generally find water being added at a rate of around 30%.
When you make your cocktails you should be sure to stir for a long time – around 30 seconds is a good start – or to shake for a good while too – I typically do around 12 to 15 seconds – in order to melt enough ice to get plenty of water into your cocktail. Despite what you might imagine, this won't make the cocktail taste watery but will rather make the flavors stand out more as well as often improving the mouthfeel of the drink. A good rule of thumb is to mix or shake until the vessel is cold to the touch. That means your ingredients are sufficiently incorporated with the ice.

Read more
How to reverse sear for a flawless steak every time
Trust us, you're going to want to try this method
Sliced steak on cutting board

It seems that every day, there's a new method of cooking that seems, honestly, pretty superfluous compared to the old-fashioned way of doing things. As a cooking purist myself, I sometimes find it difficult not to roll my eyes at many of the new techniques and culinary trends or methods that promise to be "easier than ever" or the "best" way to cook something. Usually, I like to cook the way my Grandmother did. Give me a wooden spoon, a good cast iron pan, an oven, and some fire, and I'll be good to go. Admittedly, I've been pulled out of this way of thinking once or twice - like the time I finally dropped my pride and tried sous vide ribs. Good lord. That one delicious experience showed me that - just maybe - there's still a little room for modern cooking upgrades every now and then. Reverse searing is one of those modern upgrades. And for those of us who still cringe a bit when trying out a new cooking gadget, worry not. Only the process itself is modern. This method requires absolutely no specialized equipment - just an oven and a good-quality pan.

Reverse searing steak allows for a better handle on temperature control, decreasing your chances of overcooking that beautiful ribeye. This method also creates a gorgeously caramelized crust on the outside of your steak. When placed in the oven first, the surface of the meat will dry more thoroughly and make for a better pan-sear later on.
How to reverse sear a steak

Read more