In a perfect world, every day is clear and sunny, the roads are always dry, and motorcycle riding season lasts 365 days a year. Some folks would argue that Southern California is that perfect world, but for those of us that prefer four seasons, the riding season ends around the time the turkeys start getting nervous.
Regardless of where you hang your motorcycle helmet, if you want your motorcycle to start when spring rolls back around, there are a few things you need to do before putting it into hibernation. Winterizing your motorcycle on your own might sound a little intimidating, but it shouldn’t. Anyone can prep their bike for the long nap in a single afternoon by following these five simple steps.
Fuel And Fluids
Today’s gasoline isn’t what it used to be. Granted it was never perfect, but thanks to modern additives like ethanol, it has picked up a nasty habit of pulling outside moisture into your tank. During the riding season, this is a non-issue because we don’t give it time to sit and cause trouble. Over the course of the winter, however, the ethanol effect combines with gasoline’s natural tendency to evaporate and oxidize, leaving your fuel system prone to rust and flow-stopping buildup.
Step 1: If you’re riding a carbureted motorcycle, your best bet is to simply drain both your fuel tank and carburetors completely, then fill your bike up with fresh gas when it’s time to ride again.
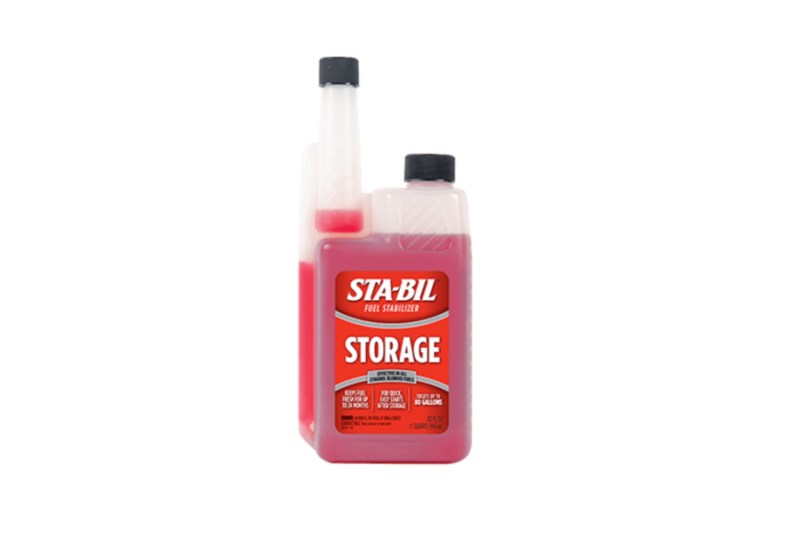
Step 2: For modern fuel-injected speed machines, however, you’ll do the exact opposite: Start your winterization by taking your motorcycle on its last ride of the year, and stop to fill the tank to the brim at the closest gas station to your home. Once you get your bike home with a full tank, open the gas cap and add in a high-quality fuel stabilizer. Sta-Bil is our first choice here as it fights both corrosion and moisture buildup, but any stabilizer that’s been proven to do the same works. Once you’ve got the stabilizer in your tank, fire the bike up and let it run for a few minutes to circulate the treated gas through your fuel system.
Wash And Protect
Once you’ve got your fluids taken care of, it’s time to move to the exterior of your bike.
We want to remove any potentially corrosion-causing gunk from every surface, including the bug juice on your paint and the road grime on your wheels. Wash your bike as you normally would, then give the painted surfaces a once-over with a spray-on detailer or even a hand-waxing if you’re really in the mood. If you don’t already have a favorite detailer/wax, Maxima is typically our go-to brand for anything from detailer to chain cleaner.
Step 1: We want to remove any potentially corrosion-causing gunk from every surface, including the bug juice on your paint and the road grime on your wheels. Wash your bike as you normally would, then give the painted surfaces a once-over with a spray-on detailer or even a hand-waxing if you’re really in the mood. If you don’t already have a favorite detailer/wax, Maxima is typically our go-to brand for anything from detailer to chain cleaner.

Step 2: After washing your motorcycle, give any exposed metal surfaces from your fork legs to your swingarm a quick wipe down with some WD-40, and do a final clean and lube on your drive chain if your bike has one.
Other Fluids
As far as your other fluids go, they’re largely optional, but we recommend taking both your oil and coolant into consideration when you winterize your motorcycle. If your oil is relatively fresh, you don’t need to mess with it. If you’re a few hundred miles away from (or overdue for) your next oil change, it’s a good idea to go ahead and change it now so fuel-diluted oil and sludge aren’t spending the winter in your crankcase.
The same goes for your antifreeze. Generally speaking, it’s recommended that you flush your coolant about every two years for optimal performance and protection. If you can’t remember the last time you replaced your coolant, it’s a good idea to do it now to ensure the system is protected from corrosion and freezing temperatures.
Battery
There’s a lot of bad information out there about keeping your motorcycle battery alive through the winter. Some folks recommend pulling it out completely, while others will tell you to simply go out and start your bike every week or two to keep it charged.
Both of these approaches are wrong, and both will almost always lead to a dead battery by the time riding season starts back up. That’s because motorcycle batteries slowly discharge over time. They discharge when you let them sit, and they discharge even faster if you use them to start your bike without going for a proper ride to recharge it.
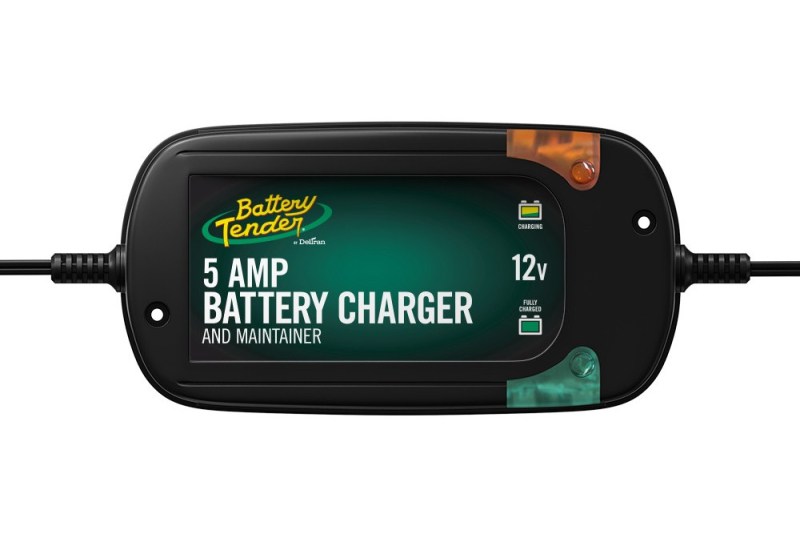
Step 1: If you’re running a traditional lead-acid battery, your best bet is to put it on a maintainer. Notice we said “maintainer” not “trickle charger.” That’s because a battery maintainer monitors your battery’s charge level, and automatically shuts off when it reaches a certain level. Trickle chargers, on the other hand, constantly feed power to your battery, which will overcharge and damage a fuel cell over time.
The industry standard here is the tried-and-true Battery Tender, which does all of the above and also comes with a convenient pig tail giving you easy access to your battery leads.
Step 2: This is a simple enough process with a lead-acid battery, but if you really want to make life easy, we highly recommend considering upgrading to a lithium-ion battery for your motorcycle. Lithium-Ion batteries are perfect for winter storage because they have virtually zero self-discharge rate. All you need to do is disconnect the negative battery terminal until riding season rolls back around. As an added bonus, there’s literally no easier or more cost-effective way to drop five pounds or more from your bike than by replacing that clunky old lead-acid fuel cell. We’ve been running Shorai lithium batteries in our bikes for years, and can’t recommend them highly enough.

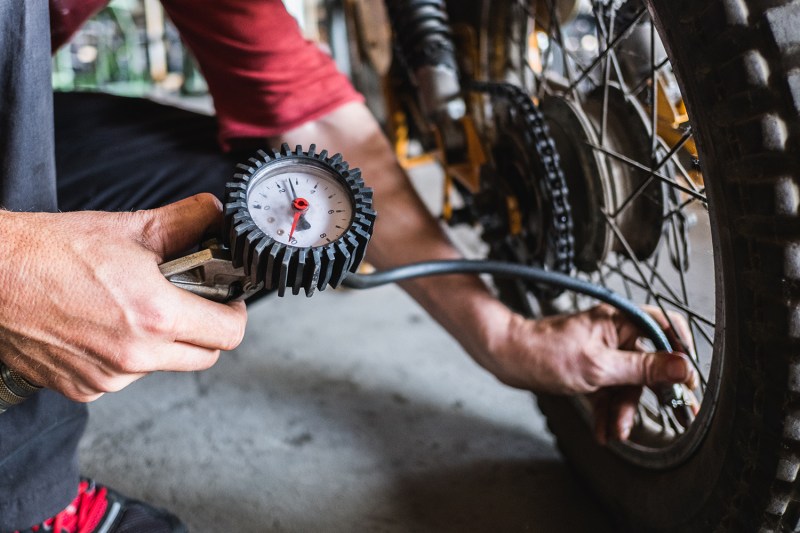
Prepare Your Tires
Modern motorcycle tires are built pretty stout. Flat spots and damaged rubber caused by a
Step 1: The first and most basic is to just fill your tires up to the maximum recommended pressure listed on the sidewall. You’ll want to air them back down to your normal pressure before getting back on the bike, but this is really all the protection your tires need to stay in good shape through the winter.
Step 2: If you’re running tube-type tires or tires with thinner sidewalls, some owners will go a step further by either lifting the tires off the ground completely using the center stand or paddock stands. You can also leave your tires sitting on a few pieces of cardboard if you don’t have stands and want to add an additional layer of protection, but it typically isn’t necessary.
Cover It Up
Alright, we’re in the home stretch. Your fuel is treated, your bike is clean, your battery is ready for some well-deserved rest, and your tires are fat and happy. All that’s left now is to tuck your bike in. Whether or not you tell it a bedtime story stays between you and your motorcycle.
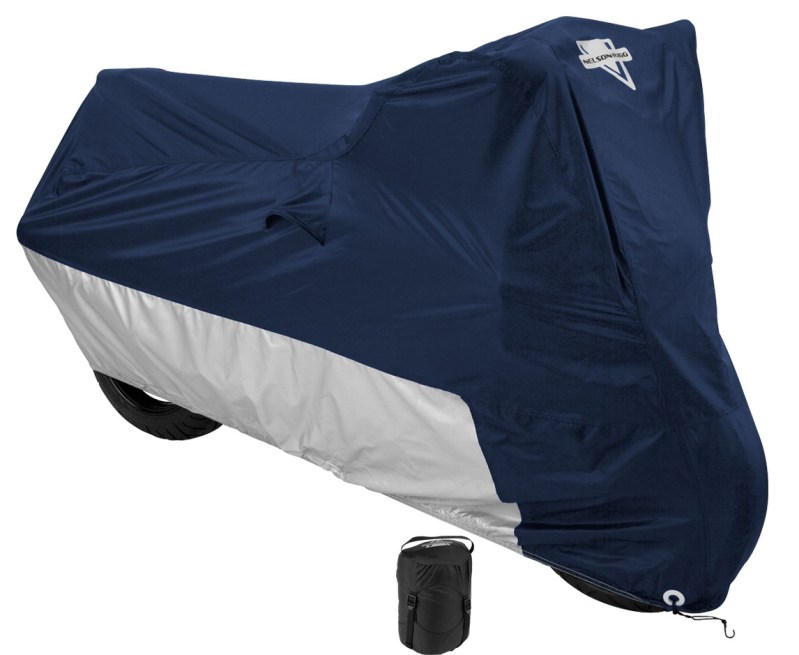
Whether you’re parking your bike in the garage for the winter or storing it outdoors, a motorcycle cover is always a good idea to protect your bike from the elements and preserve all that elbow grease you used cleaning and polishing it up. We recommend using a cover made from synthetic materials, as cheap cotton covers retain moisture when they get wet.
No need to get extravagant here, a simple breathable-polyester cover like the Nelson Rigg Defender will do the trick without breaking the bank. If you’re storing your motorcycle outside completely unsheltered, however, you might want to consider stepping up to a fully waterproof design.
Winterizing your tire may be tedious and a little sad since it marks the end of the riding season, but spending some extra time getting it right means you can be one of the first riders on the road when the weather clears up in spring.