
Winter and fire season are here, and it’s the perfect time to learn to split wood to make your own firewood. You may also be exploring the great outdoors during the cold season, and chances are, you may need to build a fire. And to build a fire, what do you need? (Everybody together now) GASOLINE! Kidding. No gasoline, please. The correct answer is wood. Not just any wood, though; you need the best kinds of wood sized just right for burning. Otherwise, your fire is likely to either go out too soon or not light at all.
So let’s assume you’ve gathered a stack of logs or a few fallen trees around you. Now what do you do? You have to cut it. With the right tools, proper technique, and a guide to follow, learning how to split wood — with or without the best axe you can find — will help you build roaring fires for years to come. So, ready your inner lumberjack because it’s time to get to work. Chop-chop!
How to split wood with an axe
Gather the right tools for splitting wood
- Axe
- Chopping block
- Wedge
- Sledgehammer
- Safety goggles or glasses
- Gloves
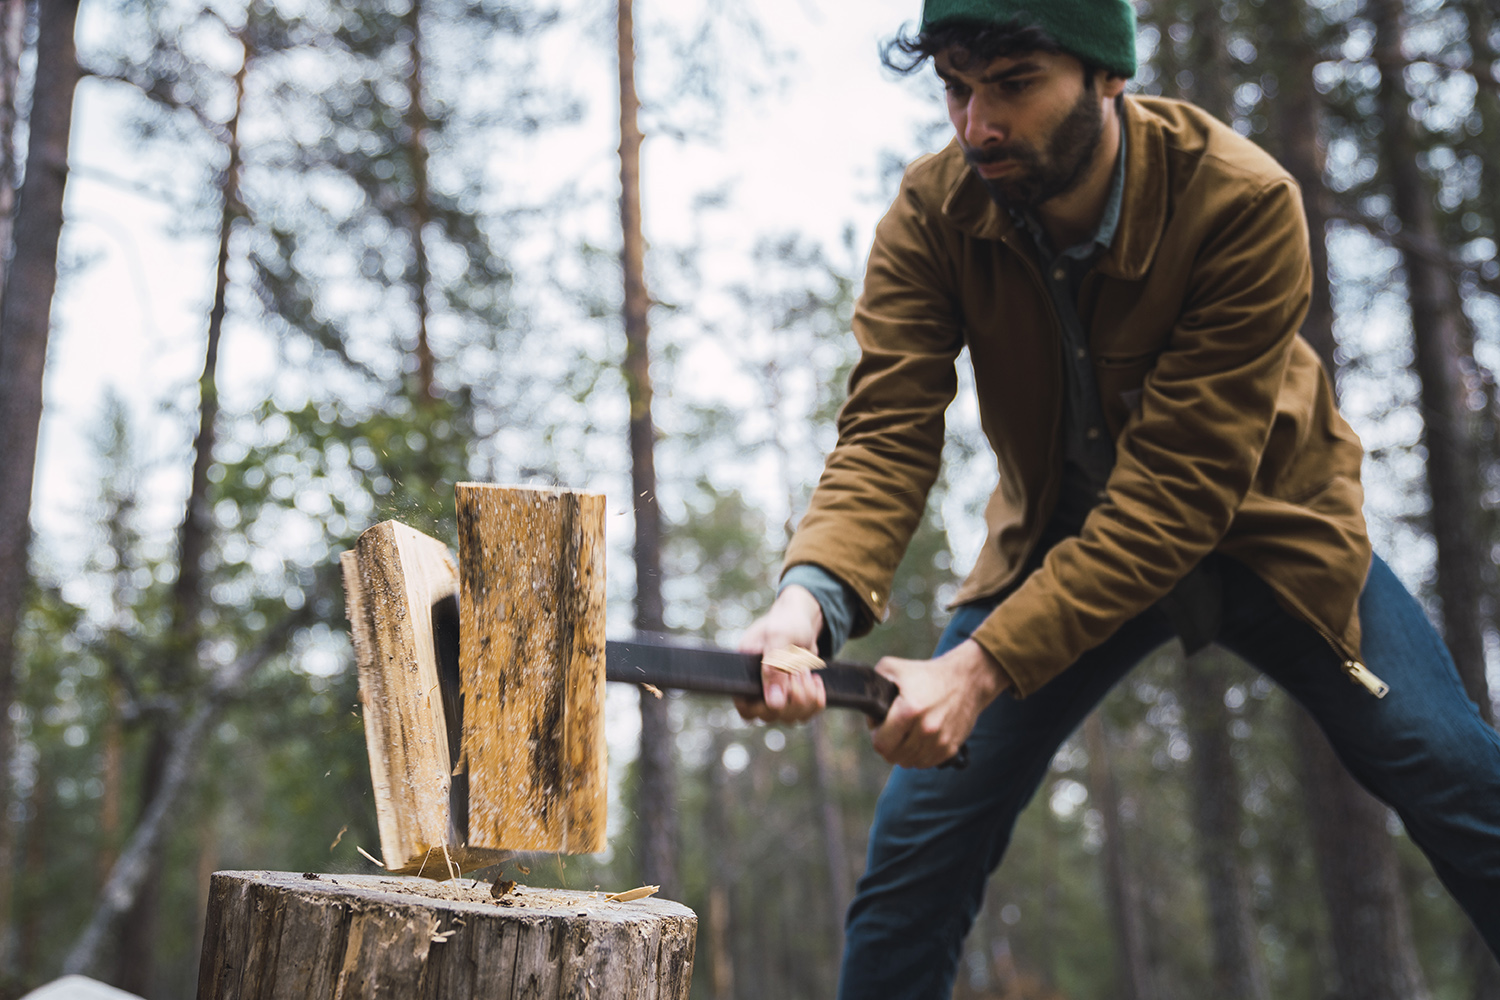
To chop wood properly, you should have, at the very least, a good, heavy axe (though a good camping or survival hatchet will work in a pinch). To be more accurate, you should have a maul, the type of axe with one sharp edge set into a thick, heavy head. The maul’s shape concentrates maximum force into the blade and helps split logs apart as it is driven down into the wood.
Better still, you will have a maul, a wedge, and a sledgehammer. Many logs will fly apart with a single, satisfying strike of the maul, but larger and/or harder (and damper) logs might require the use of a “wedge and sledge” combination.
You want a decent chopping block, too, which is usually just a large, squat log but is ideally a tree stump. Also, consider a pair of work gloves, sturdy men’s boots, safety glasses (or any glasses, really), and a damn fine pair of jeans. There you have it — all the tools of the wood-splittin’ trade.
Master your wood-splitting technique
Contrary to popular misconception, the optimal stance for splitting wood sees your shoulders squared off relative to the doomed log, not with one foot forward and one step back. This position concentrates maximum force down through your swing while minimizing how much work you actually need to do.
Put your dominant hand right under the head of the axe; it will slide down as you swing, directing the blade (or the sledgehammer) and increasing force as you move. Your other hand should grip the axe handle right near its bottom. Swing for the center of smaller logs (strike with the grain when possible) and cut nearer the outside of larger logs, with the blade striking parallel to an imagined diameter (not perpendicular to the arc of the log, if you follow).
If your maul gets stuck, you can either pull it out and try again; you can drive in a wedge and knock that through with the sledgehammer, or you can leave the maul in the log, turn the whole thing over, and pound away at it with a hammer (or with another log if you’re working with a sledge).
With a maul, a wedge, a sledgehammer, and some persistence, you should be able to split most logs that are less than two feet in length and two feet in diameter. Above that size, consider using an electric log splitter or enlisting the help of a burly Norwegian fellah with an impossibly gorgeous, flowing beard.
How to split wood without an axe
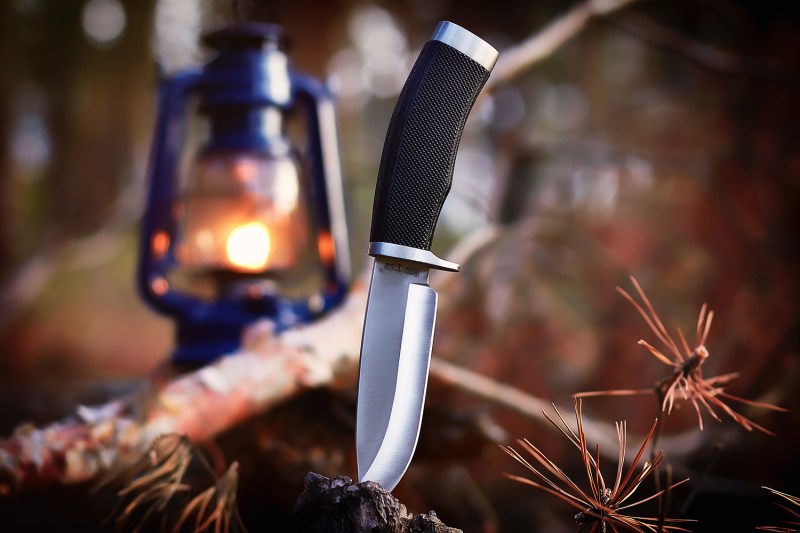
Now … what to do if there’s wood to be split, but you don’t have those tools on hand? To split wood without an axe, one labor-intensive but effective approach is to saw through logs lengthwise. But we’re going to assume you don’t have a saw. Got a knife every man should own, at least? You’re in business.
For slimmer logs, you can often split wood using a fixed-blade knife. Saw or score a notch in the top of the wood (ideally using a saw — even a small one like those found on a Swiss Army Knife will help make a decent starting crevice), then tap the blade into the wood using a hammer. Make sure you use a section of the knife blade that’s near the handle, as it will be thicker and stronger at this point. Once you have the knife tapped firmly into the wood, you can commence with heavier blows (use a standard hammer or another chunk of wood), alternating on the back of the exposed blade and the handle, slowly working the blade down through the wood.
To split larger pieces of a log without an axe or a proper wedge, you will need to carve a series of wedges out of slender staves. You will essentially be making a series of small, simple spears. Use a knife or a very sharp rock to create a crevice in the wood to be split, then commence tapping your wooden wedge points into the log. Place the first wooden wedge near the edge of the log and tap it in a bit. Then place another next to it, and so forth. Eventually, you should have multiple wedges embedded in the log that you can work on in an alternating fashion. We won’t lie: The process is painstaking but effective when you need to split wood without an axe.
There are a few other tricks to try to make your log-splitting go a lot quicker. For example, try placing an old tire on your splitting block, set the wood around inside the tire, or wrap a bungee cord around the base of the log; then get to swinging as you normally would. This will keep your wood in one place while you’re splitting it, so you don’t have to worry about setting pieces upright before every hack.

What are the best types of wood to make firewood?
Hardwoods are the best types of wood you should be splitting to make firewood. They are denser and have a lower moisture content than softwoods, which means they burn hotter and longer. Here are some of the best hardwoods for firewood:
- Oak: One of the most popular types of firewood because it burns hot and long. It also has a pleasant aroma.
- Maple: Another good choice for firewood. It burns hot and clean, and it has a long burning time.
- Hickory: A very dense hardwood that burns hot and long. It’s also a good option for smoking meat.
- Ash: A hardwood that burns hot and clean and is also a good choice for kindling.
- Birch: This hardwood burns quickly and hot. It’s also a top pick for starting fires.
- Cherry: Burns hot and clean and gives off a pleasant burning aroma.
- Beech: A hardwood that burns hot and long, and you can use it to smoke meat as well, like hickory.
- Locust: Another one that burns hot and long and is the best choice if you’re burning in an outdoor fireplace.
When choosing firewood, it’s really important to make sure the wood is seasoned, because seasoned wood has been dried for at least a year, and it will burn more efficiently than unseasoned wood.
Need more tips? Check out our guide on how to fell a tree with an axe.


