If you regularly consume mountain bike content, you likely have watched videos and read articles about mountain bike upgrades. Along with this content comes buzzwords like “essential,” compelling the reader to buy the newest, latest, and greatest.
Upgrading your bike has become a regular part of mountain biking. And while getting new parts and components for your mountain bike is always fun, some upgrades can be unnecessary.
For example, drivetrains are commonly featured in mountain bike upgrade content. Like most components in mountain biking, there is a starting point for a drivetrain, and then they move up in performance and cost. As you move toward drivetrains with higher performance and price, you will notice mountain biking’s law of diminishing returns.
A mid-level drivetrain will shift crisper, be more responsive, and perform better than an entry-level drivetrain. The top-of-the-line drivetrain performs phenomenally compared to its entry-level counterparts, but the performance gains won’t be as drastic compared to a mid-level drivetrain.
Weight is usually the most significant difference between mid to top-tier mountain bike components. And, especially with a drivetrain, we’re talking grams, not pounds. So, while you may think a drivetrain upgrade is in order, upgrading to mid-level components may be a better option. It will undoubtedly save you some cash.
But, there is no other mountain bike “essential” upgrade that is perhaps more misleading than the “touchpoint” upgrade.

Mountain bike touchpoints
The mountain bike corner of the internet is littered with content on “touchpoints.” Especially after COVID’s mountain biking boom, videos and articles telling new riders they must upgrade their touchpoints were abundant. And they still pop up from time to time.
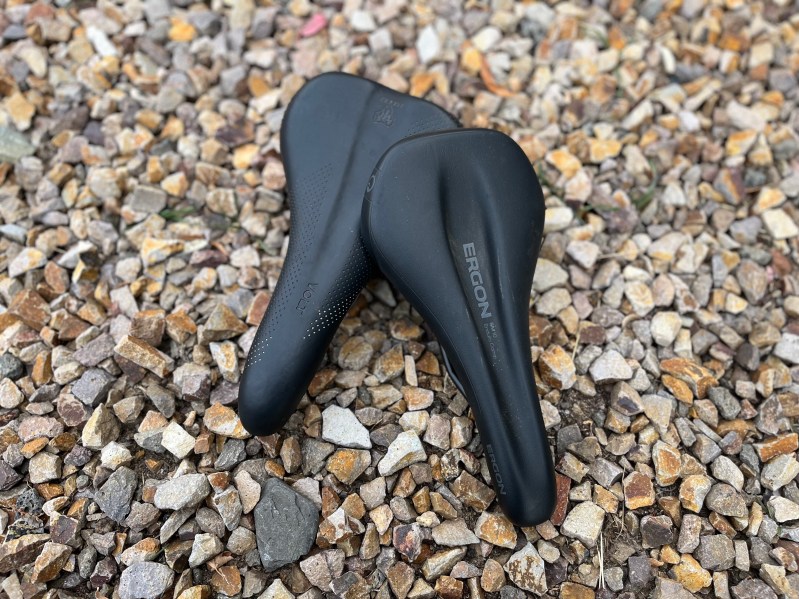
What are the touchpoints on your mountain bike? The touchpoints are the components your body comes into physical contact with—handlebar grips, pedals, and, often, bike seats, the most expensive of the upgrades.
Telling new riders to “upgrade” these components right away is misleading for two reasons. The first has to do with riders feeling uncomfortable on their mountain bike.
You should be comfortable on your mountain bike, but that takes time. Mountain biking is a physically demanding sport. Especially if you don’t regularly cycle, you will be sore after mountain biking. This will also be true of your butt.
It takes time to get used to bike seats. New mountain bikers go on their first ride and return with a sore butt. They then have many articles and videos telling them they must upgrade their bike seat. So, upgrade they do, only to get the same sore butt, but this one costs an extra $100.
Wait to upgrade; give your body time to adjust to the bike seat. You may find that after a handful of rides, the upgrade you were told was so “essential” wasn’t.
The other reason mountain bike touchpoint content, especially regarding bike seats, is misleading is that it doesn’t discuss appropriately sized bike seats. Luckily, we all have sit bones, and they can be measured.

How to find the right mountain bike seat
So, let’s say you’ve done your due diligence with the mountain bike seat on your bike. You’ve put in the miles and the hours of “saddle time,” but the bike seat is still bothering you.
Now, it is time to start looking at bike seats and consider an upgrade.
However, before you go to your local bike shop or click “buy” online, make sure you know what bike seat size to get. Bike seat sizes correlate to your sit bone measurements. A good mountain bike shop will likely not sell you a new bike seat before they know your sit bone measurements.
And while many bike shops can help you measure your sit bones, there is a simple way to do it at home. Plus, you likely already have all the needed items.
Here’s how to do it and what you will need:
- A piece of cardboard (more significant than your rear end)
- Aluminum foil
- Permanent marker
- Measuring tape
Instructions
- Step 1. Cover the piece of cardboard in aluminum foil. The most challenging part of this step is trying to keep the foil relatively smooth. Having a lot of crinkles in the foil will make seeing your sit bone indentations more difficult.
- Step 2. Find a hard surface to sit on so your knees are bent at a 90° angle. This can be a chair or a staircase landing with a couple of steps. The most important things are that the surface is relatively hard (a carpeted staircase landing works, a couch does not), and the surface is big enough to fit your rear end.
- Step 3. Place foil-covered cardboard down on the surface and sit squarely on it with an upright posture. Force your rear end down into the cardboard—If you are in a chair, you can hold onto the bottom of the chair for leverage.
- Step 4. Carefully climb off the foil-covered cardboard to reveal your masterpiece. You should find an unmistakable outline of your rear in the foil. Look carefully, and you will see your sit bones’ more profound, symmetrical indentations inside the outline.
- Step 5. Mark the center of each sit bone impression with an “X” and measure the distance between the two. This is your sit bone measurement.
Convert this measurement from inches to millimeters—the mountain bike industry gets slightly confused as it likes to use the metric system. That number won’t change, so keep track of it.
Depending on the manufacturer, different bike seats will have a specific method of figuring out what size seat you need. It usually involves adding 20mm to your sit bone measurement and seeing how that corresponds to the typical narrow, medium, and wide bike seat sizing.
Don’t throw money away. Make your mountain bike upgrades worth it.