Unless you’re planning to ride a rental snowboard until the end of time — not always such a bad thing, by the way — you’ll eventually be faced with a challenge. You’ll have your swanky new snowboard in hand, and on the bench in front of you will be a box containing the new snowboard bindings you deliberated over for weeks. I’m imagining that at this point, you’ve got a whole bunch of snowboarding gear scattered around your house, too. But then what? Well, I’m afraid you’ve got to set up your ride.
Suddenly, you’re presented with a load of options. Why are there so many holes on your snowboard to screw bindings into? Why do they now sit at a weird angle? Then there are all these optional extras: The stickers, the spikes, the pads, the leashes. Do you need all of that?
Well, you’ve come to the right place. We’ve got you covered. Put down the snowboard, back away from the bindings, grab a beer, and find out all you need to know about getting your snowboard set up and ready to hit the slopes.
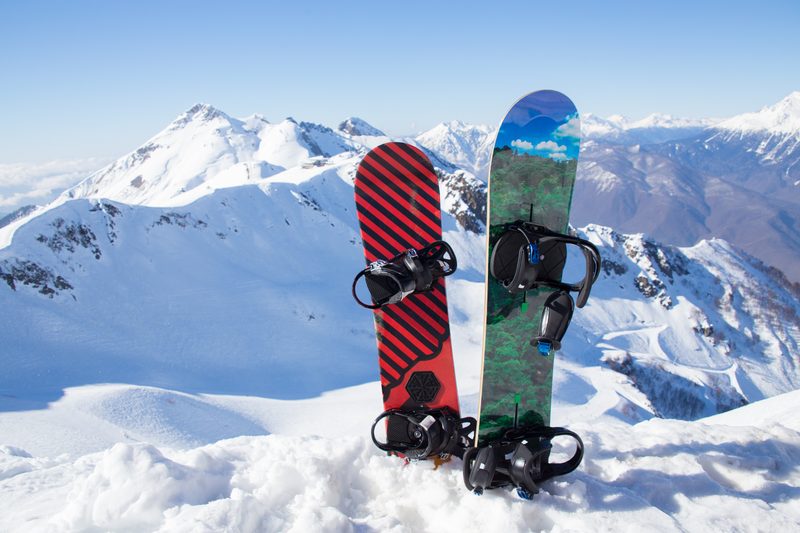
Choosing the right board for you
While there is some truth in the idea that a good snowboarder can ride any board, it’s undeniable that every snowboarder will have a better time on the right snowboard. Most snowboarders will benefit from an all-mountain board, which balances shape, size, and rocker or camber profile to ride groomers and a little off-piste. The ideal beginner snowboard will have a little flex to make it easier to learn your turns.
When it comes to selecting your snowboard, the main three things to think about are getting the right size, getting a shape that suits your riding style, and deciding whether you want a rockered or cambered snowboard. Shape and rocker/camber profile will affect whether you carve, hit the park, cruise through powder, or do a little of everything.

How to set up bindings
Setting the right angle
This is “How to Snowboard for Beginners 101,” and it sets you up for everything else you’re going to do on a board.
When you attach your bindings, you’ll notice that the pucks — the disks that attach to your snowboard — have angle markers to indicate their position. Before you go into this, you’ll need to know whether you ride regular or goofy — left foot or right foot forward — and make sure to set your front foot at the correct end of the snowboard. Setting your angle is all about comfort, but it will affect how aggressively you can ride your body position and your ability to ride switch for tricks.
Remember that you can always adjust your angle later on, but as a starting point, try the following:
- Place your snowboard on the carpet, or a blanket if you have a hardwood floor.
- Stand on your board with your feet where your bindings would be and jump up and down 10 times, landing in an athletic pose each time. Imagine someone is coming to tackle you.
- After 10 jumps, mark where your feet land with masking tape. This will give you a good reference point for where your bindings should be placed for a comfortable stance.
Adjusting forward lean on snowboard bindings
Your snowboard boots will already have a little forward lean built into them that can help you stand in your active snowboard position, but you can enhance this by using the high backs on your bindings — presuming you have adjustable high backs. A lot of snowboarders wrongly see forward lean as an “on/off” type option, where you’re either fully cranked forward and engaged or loose and relaxed.
More forward lean will give you a snappy edge transition and an aggressive riding stance, which is great for carving groomers and high-speed turning. A looser, more relaxed forward lean gives you a surfy feel, which is often favored by riders in powder and the park. Most beginners find that they are comfortable between the two. You want to set your forward lean to the point that it’s comfortable and engaging, but not where it’s pushing you into a position that feels like you’re squatting for hours at a time when you try to relax.
Where to place bindings on your board
Almost every snowboard has a reference marker for both of your bindings, even Burton snowboards with their channel system. If you’re on the right size snowboard, these reference points will usually give you the perfect stance for all-around riding. As a general rule, wider stances are more stable for stomping drops and landings, while a narrower stance is better for edge transition — but as with everything, you want a balance rather than the extremes.
If you’re going to take your snowboard off-piste and explore some powder, you might want to think about setting your bindings back to help the nose float. If you’re on a directional powder board, then you can most likely use the reference markers. If you’re on an all-mountain board and want a day without your back leg feeling the burn, set your bindings back a notch or two. Just remember to move them back before you head out to the groomers again.
Snowboard accessories – are they really necessary?
Is snowboarding hard when you’re riding one-footed? Get a stomp pad
Unless you really love that clean aesthetic of your super-sleek top deck and are willing to sacrifice grip for look, there’s no argument against a stomp pad. Back in the day, these were super tacky — in both senses — and often took the form of big foam pads or metallic-looking spikes. Now you can get stomp pads in almost any style and color to match, complement, or just plain clash with your board. Heck, the other day, I saw a fake poop stomp pad because why not, I guess? Seriously, these make riding one-footed so much easier, Just get one.
Do you really need a leash?
An uncontrolled snowboard sliding down the groomer is the perfect missile and a surefire way to cause injury. Sure, it’s not that likely that you’re going to let go of your snowboard and let it head downhill on its own, but if it happens accidentally, it can cause a major injury to someone. When you’re learning how to snowboard, a leash can mean one less thing to worry about as you clip in and unclip. Also, some resorts out there still insist on them, so it’s worth checking no matter what level you ride at.
Snowboard wax is a must-have
Even if you rigorously wax your snowboard, some days you’ll find yourself riding a little slow or needing a boost. Along with a small tool for tightening binding bolts — trust me on this and just carry one — all snowboarders should have a small bar of quick wax in their pocket when they’re riding. Now, this doesn’t replace a proper hot wax, but it will get you out of a pinch so you can keep riding and then wax up overnight. Because it doesn’t have time to soak in, some of your speed wax will end up on the snow, so always remember to go for an eco-friendly, biodegradable choice to help maintain your ski resort.
Snowboard setup mistakes to avoid
Before we turn you loose on your new snowboard, we wanted to share some common snowboard setup mistakes you need to avoid so you don’t have to worry about anything during your ride.
- Make sure you use the right size screwdriver for the screws on your bindings. If the head of your screwdriver doesn’t fit snugly, you could end up stripping the screw heads, making it next to impossible to make any adjustments.
- While we’re on the subject of screws, it’s important not to overtighten them. You should go until the screws are snug, and then a half-turn more. Screws that are overtightened could cause damage to the board.
- Make sure your binding straps are set up so they are centered over your boots going left to right, and never tighten the straps until you can feel the tension through your boots. It could damage the straps, and it’s unnecessary. The straps just need to be tight enough to keep your feet from coming out of the bindings.


