Modern skiing and snowboarding goggles often come with lenses made to be exchanged. The idea is that when conditions change, your goggle can adapt with a simple swapping-out of the lens, which is the only thing that needs to change when conditions do.
Most goggles come with an extra lens — and most skiers and snowboarders never bother to swap their lenses. Instead, they squint or struggle to see. It’s not safe or smart, but they do it anyway.
Then there are snowboarders like me who analyze conditions and try to out-think mother nature. It’s been a long winter with varying conditions, and I want to have as much fun as possible on the hill. I consider which lens to load onto my goggles frame and try to be mindful of when I might need to swap them out during those moody weather days in Oregon.
Enter the Anon M4 Perceive Pro Pack, easily the most well-equipped goggle setup on the planet. But can it meet the demands of a demanding snowboarder in one of the most dynamic ski and snowboard environments on Earth? Let’s find out.
Pros
- Everything you need in one bundle
- Lenses are easy to swap out
- You get facemasks, too!
- Extra lens case is durable — perfect for taking it with you
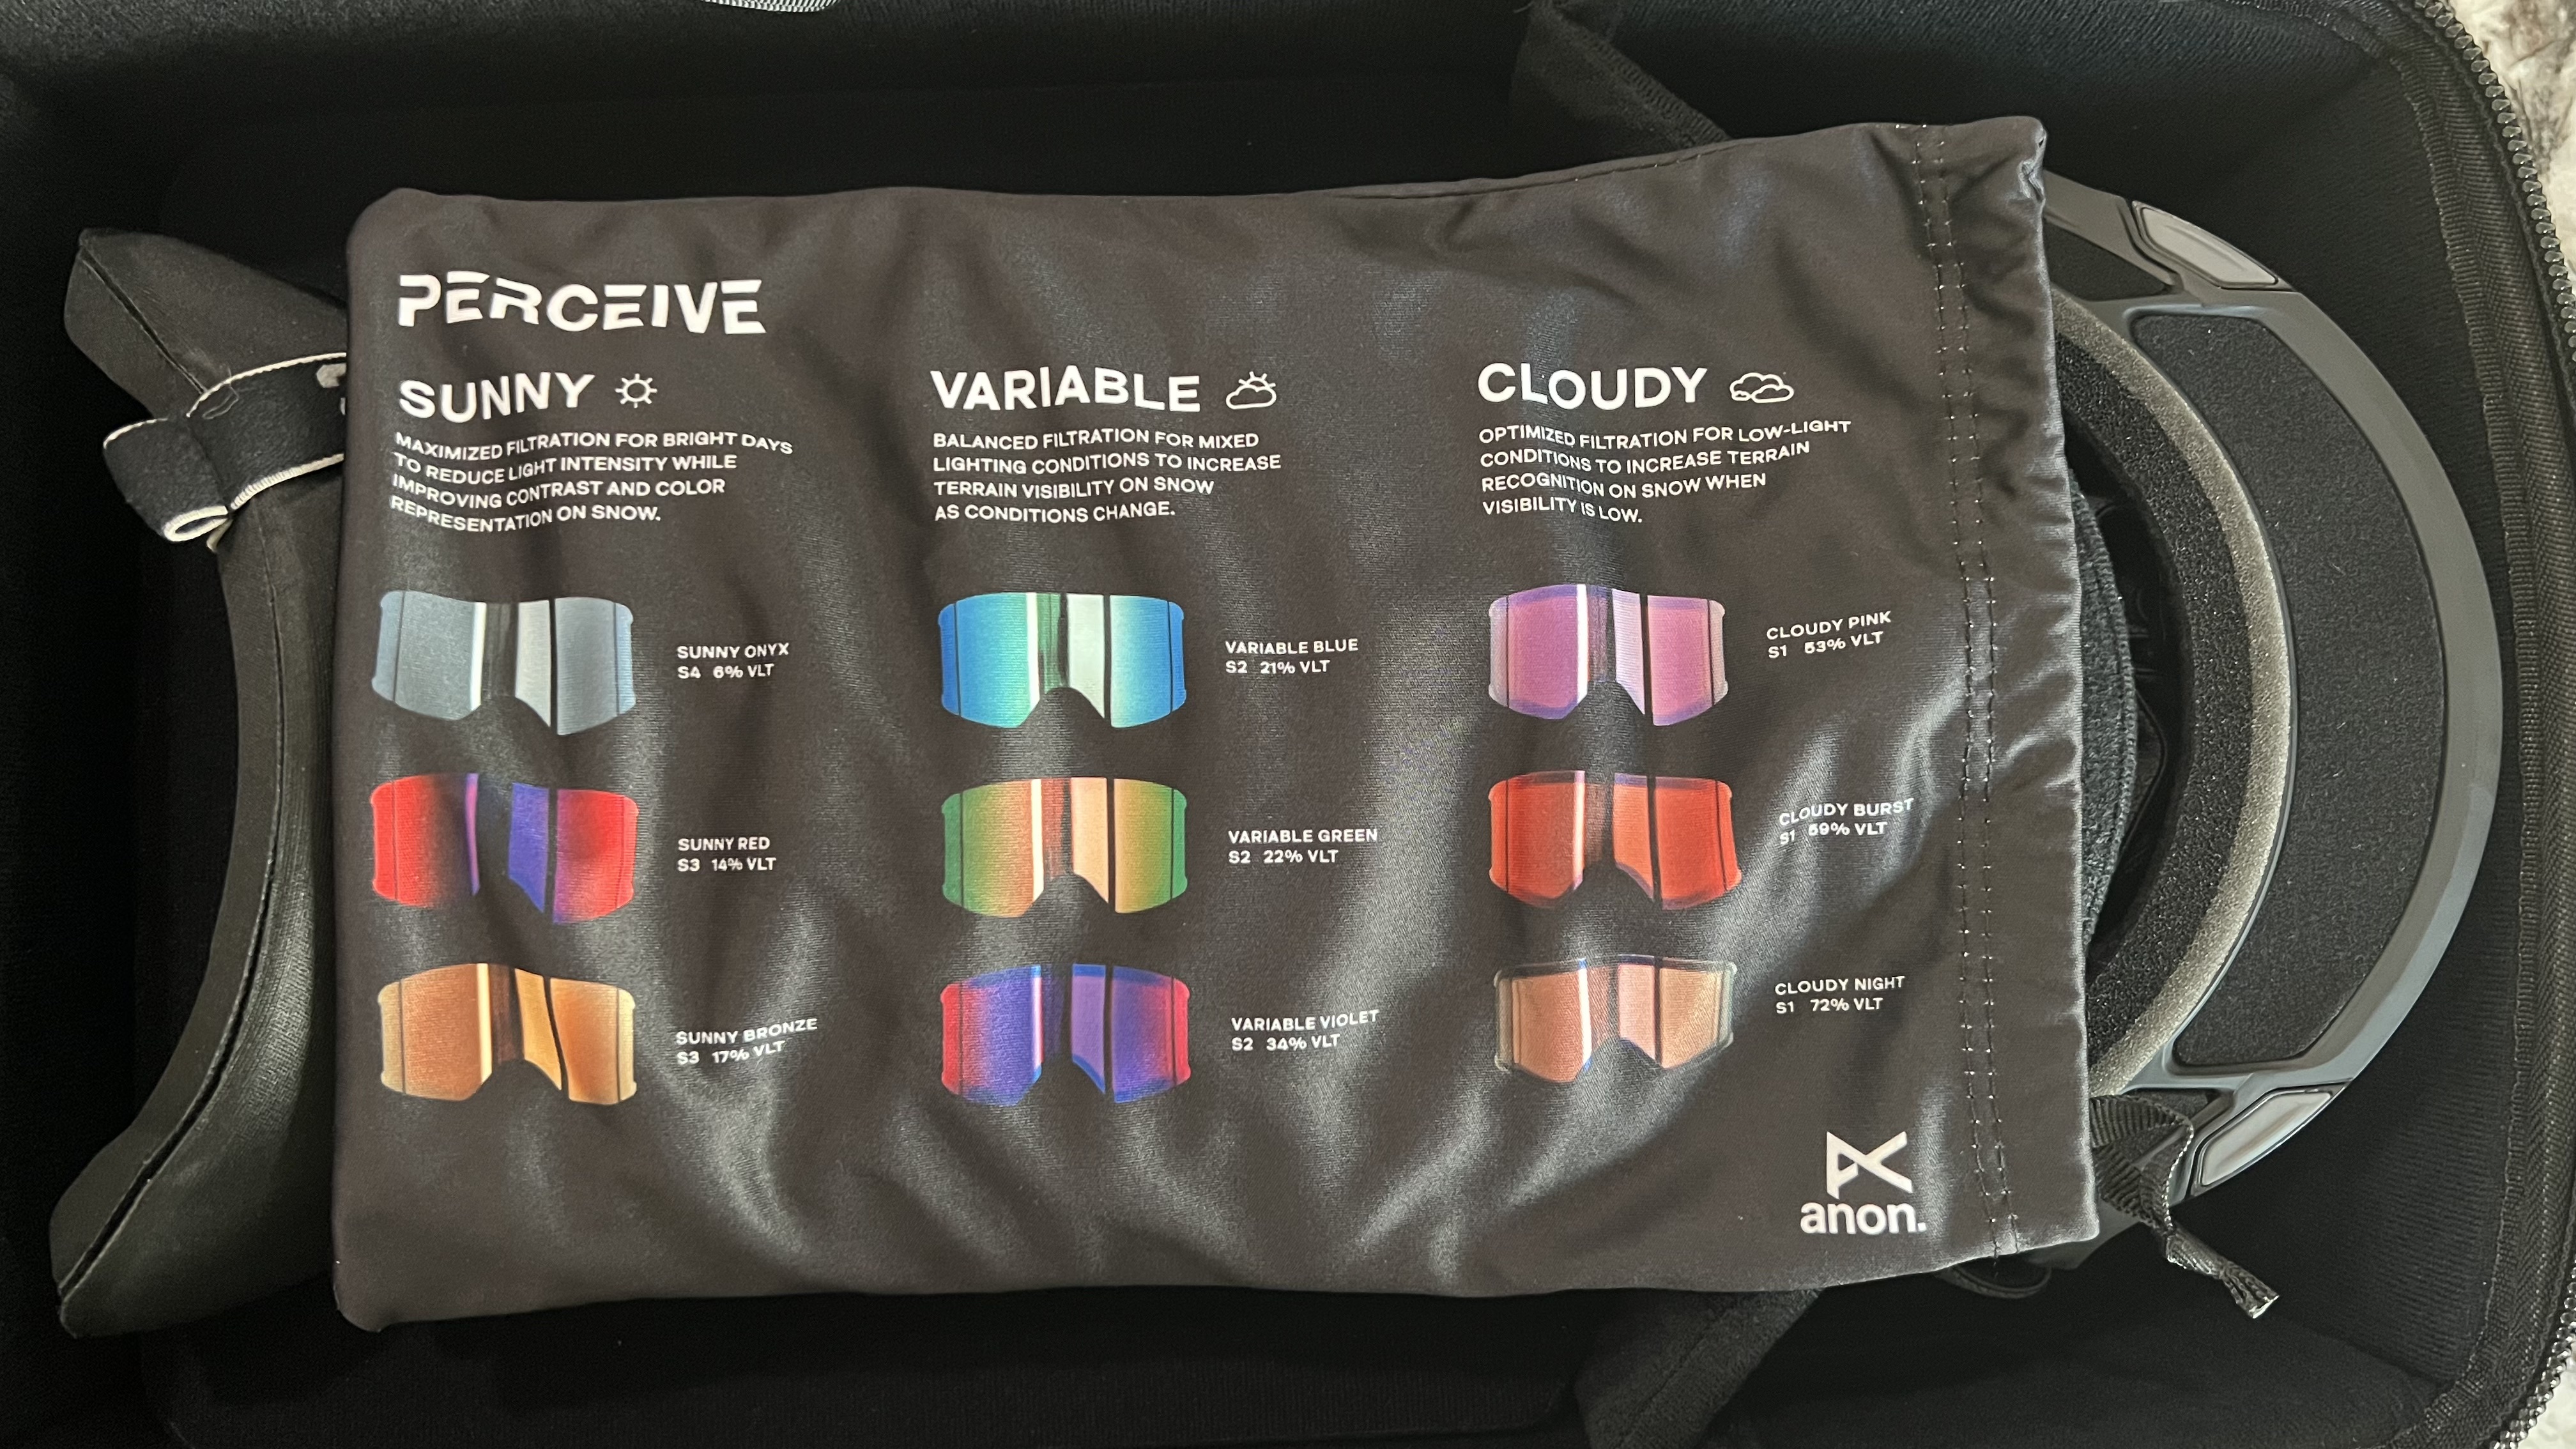
- Goggle bag has cheat sheet for conditions and lens swapping
- Each lens has a slot in the case
- Excellent all-in-one carrying case
Cons
- Expensive
- Possibly too many lenses
- Case is quite large
Anon M4 Perceive Pro Pack: everything you get
Here’s a rundown of all you get in the M4 Perceive Pro Pack:
- 1 M4 T Frame
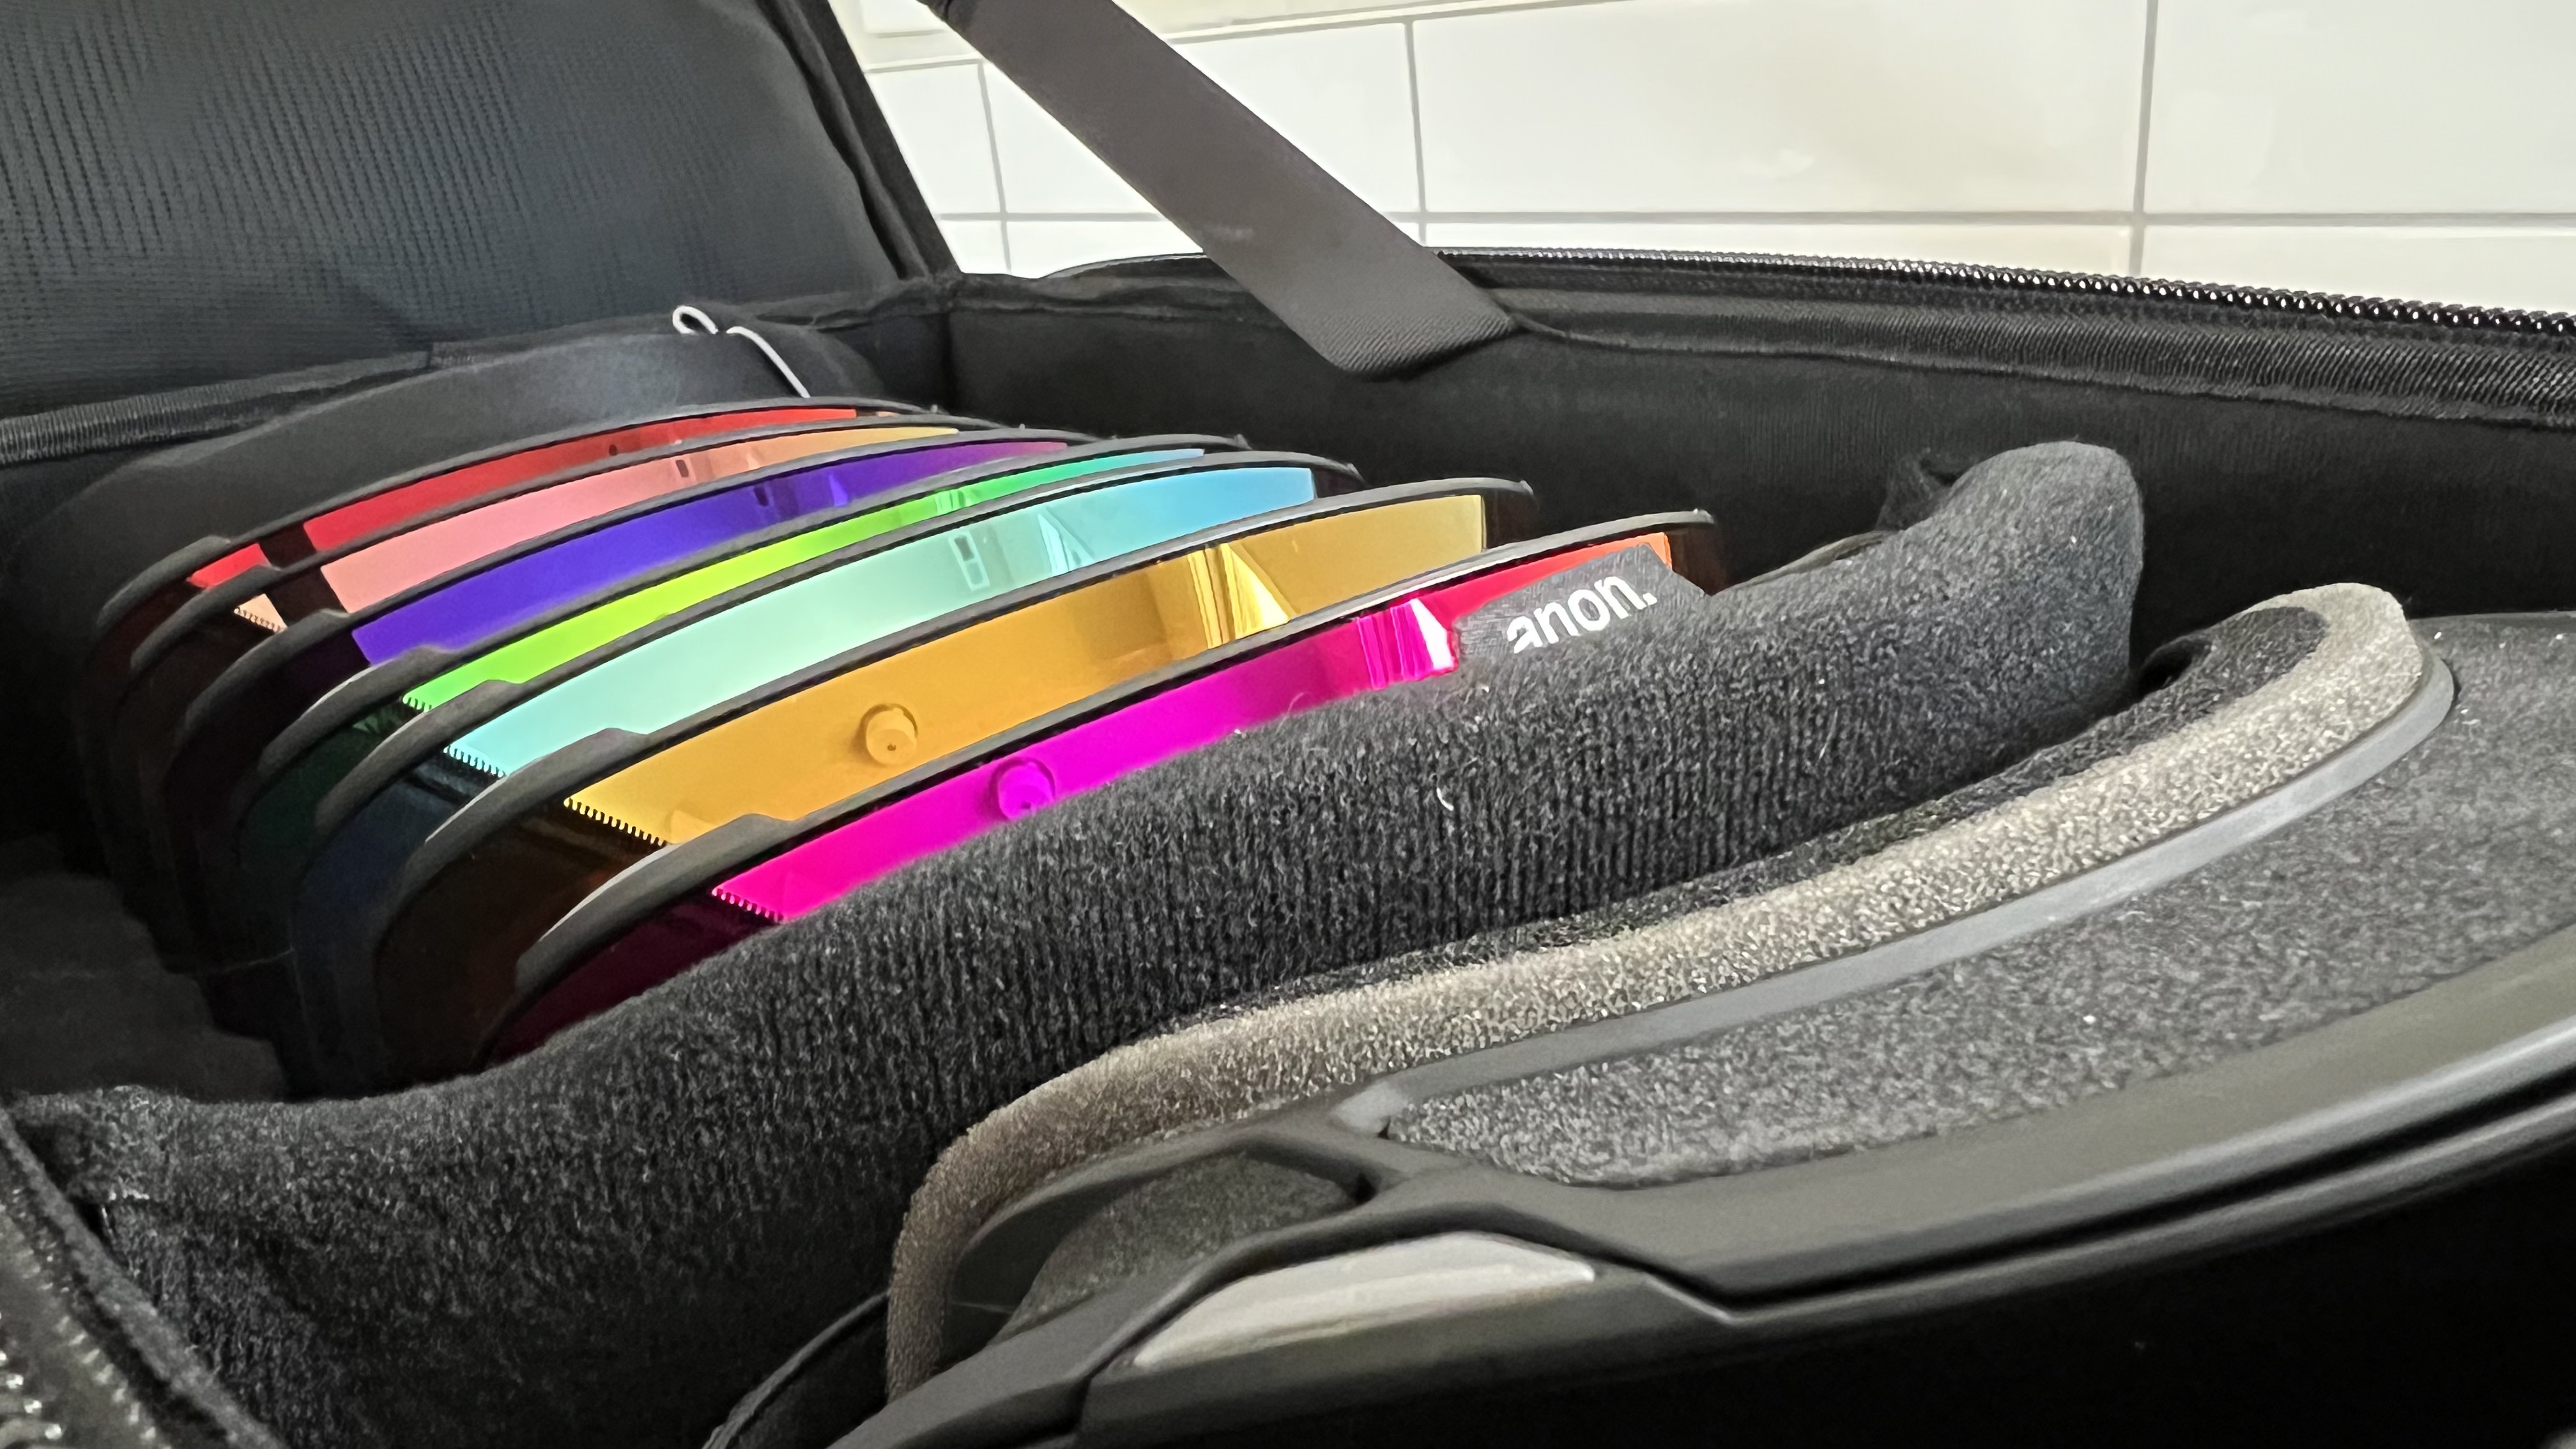
- 9 M4T Perceive Lenses- One of each tint (1 installed in Frame)
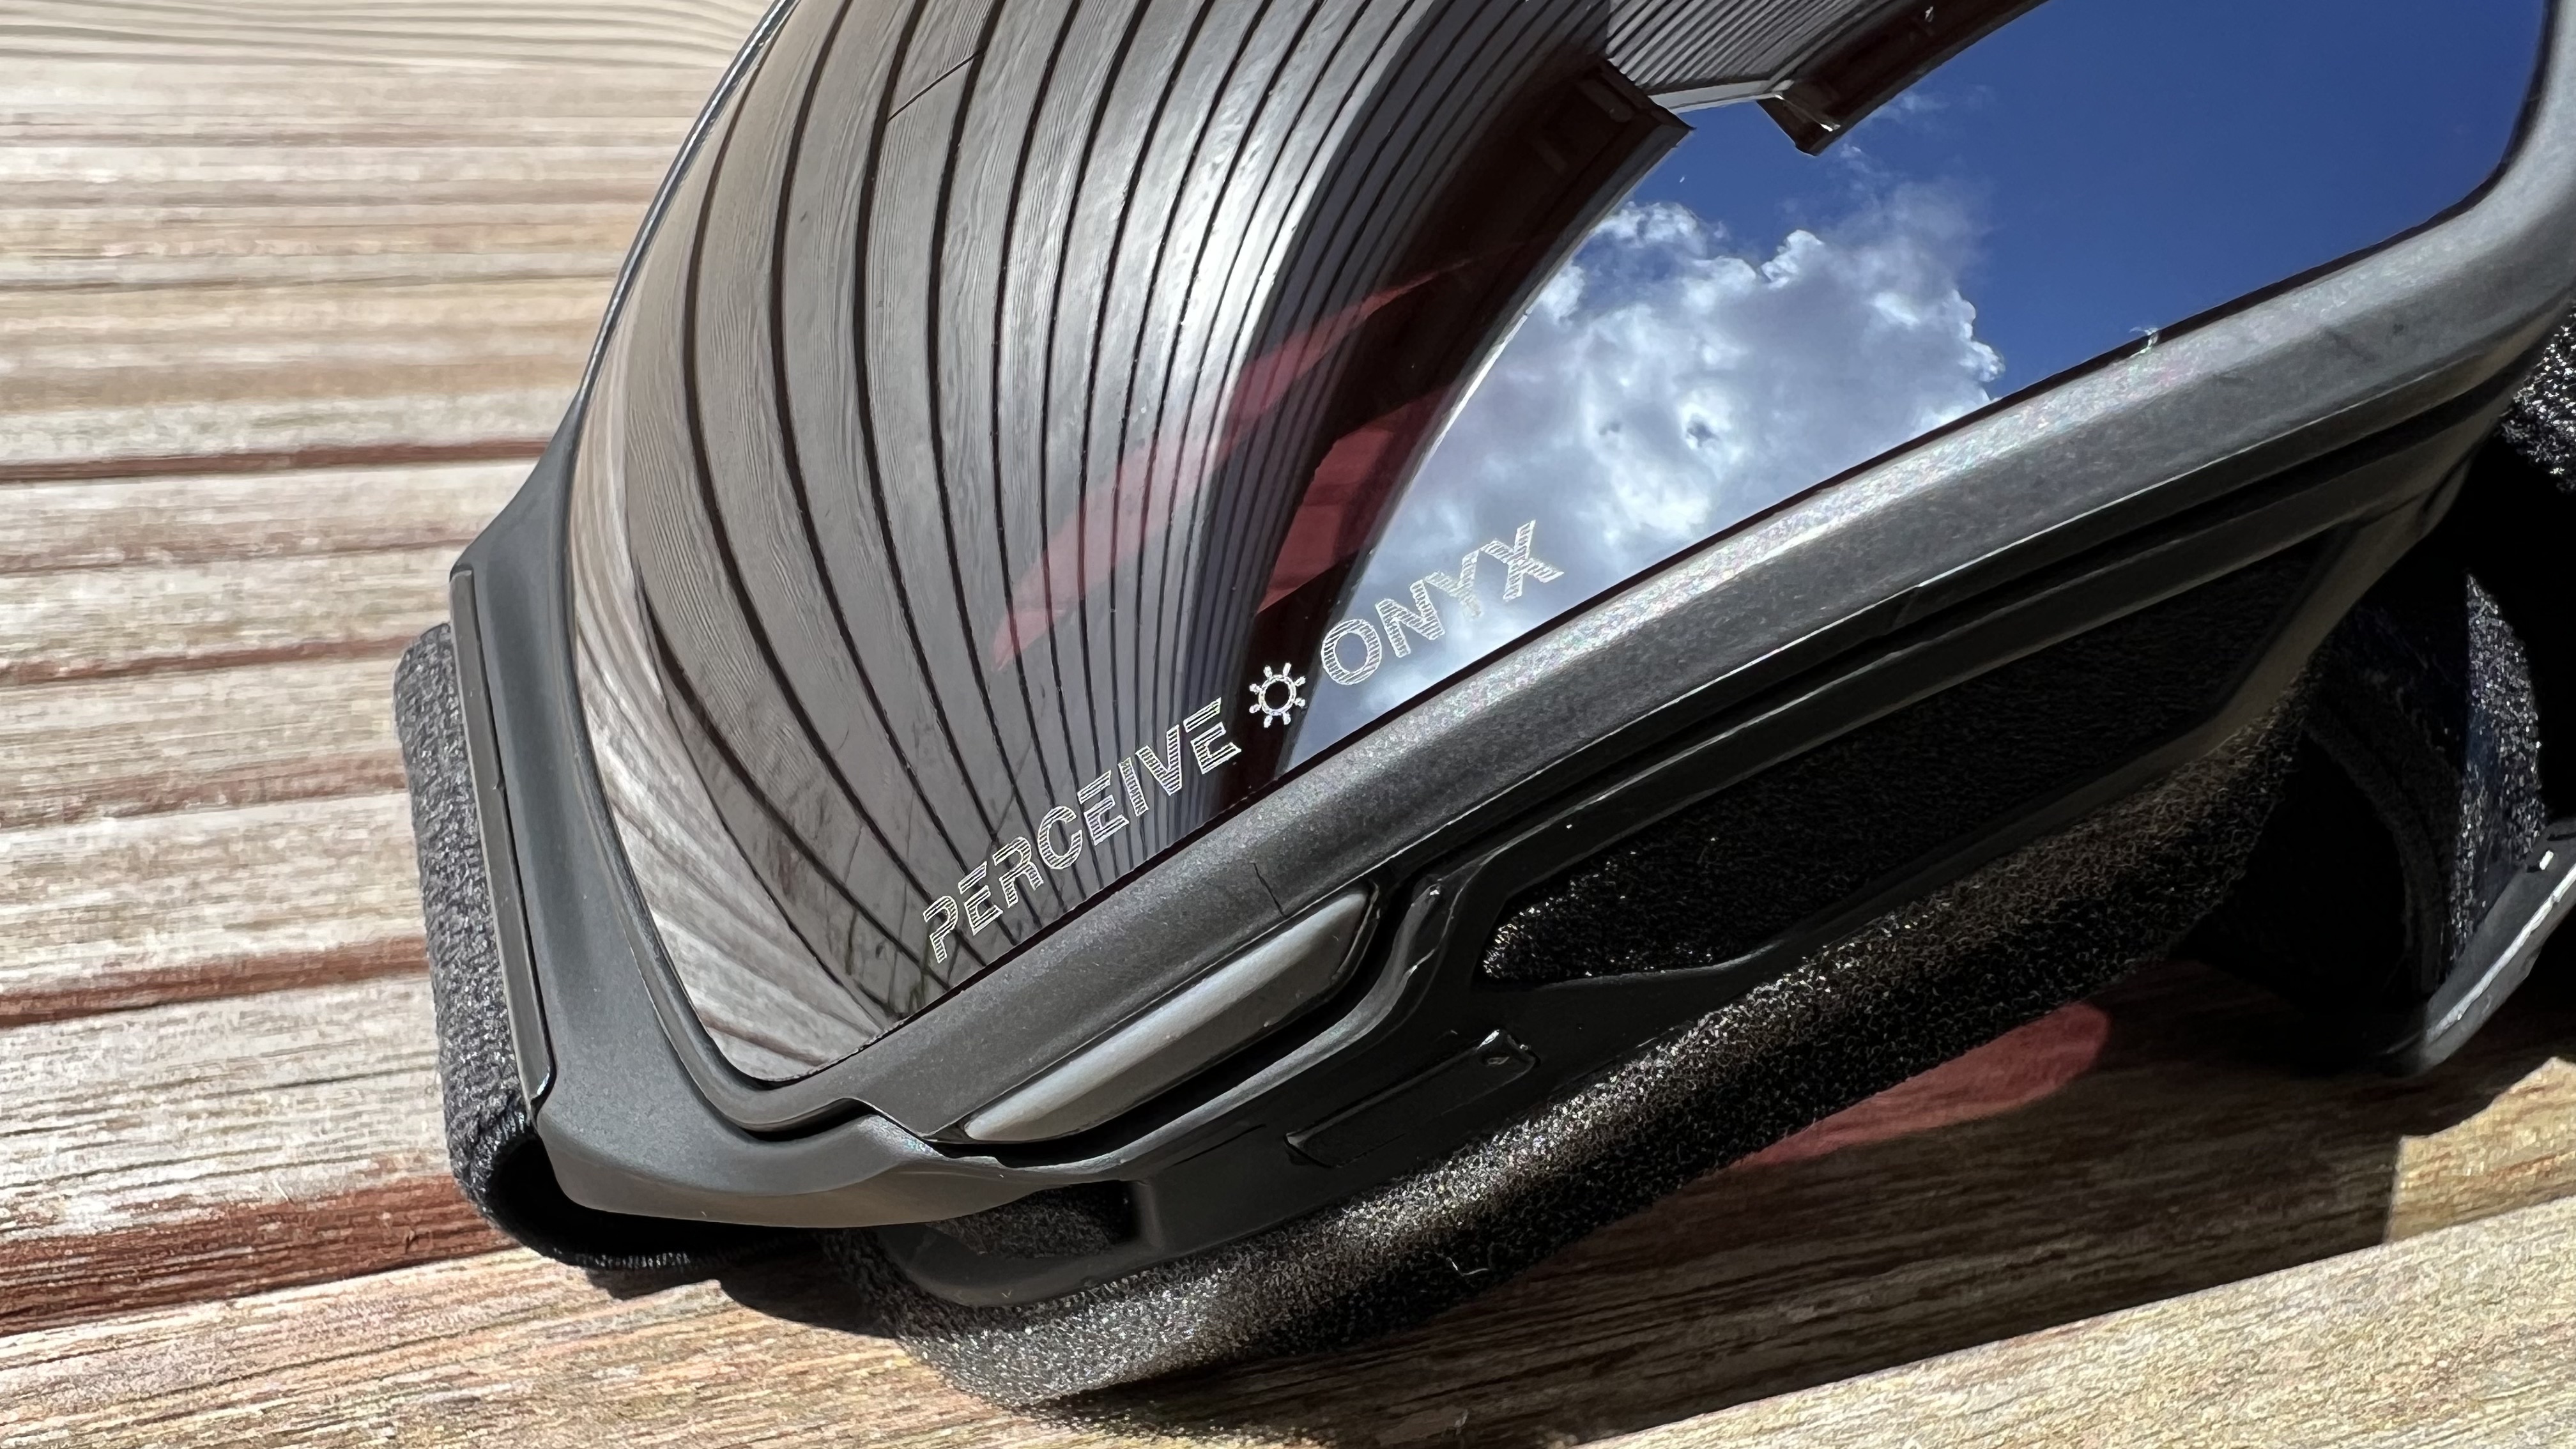
- Perceive Sunny Onyx (6% / S4)
- Perceive Sunny Red (14% / S3)
- Perceive Sunny Bronze (17% / S3)
- Perceive Variable Blue (21% / S2)
- Perceive Variable Green (22% / S2)
- Perceive Variable Violet (34% / S2)
- Perceive Cloudy Pink (53% / S1)
- Perceive Cloudy Burst (59% / S1)
- Perceive Cloudy Night (72% / S1)
- 1 M4 Paneled MFI Mask
- 1 Mesh MFI Mask
- 2 MFI Gray Carrier’s
- 1 Microfiber Goggle Bag
- 1 Compression-Molded Lens Carrying Case
- 1 Carrying Case (Exterior bag)

Anon M4 Perceive Pro Pack: the tech behind the goggles (and masks)
I hope you like magnets because the M4 is loaded with ‘em.
Anon’s “MAGNA-TECH” lens-swapping tech is pretty impressive. You don’t need to toggle a switch to swap lenses or hold the lens a particular way. All you have to do is grab the M4 lens at the contact points, which are naturally placed where your forefinger and thumb would land when grabbing the goggles. Pull straight out — firmly — and the lens comes off. Easy.
The included facemasks also employ Anon’s magnetic system. A small, rigid nose bridge fits into a channel in the mask, which adheres to the goggle magnetically. If you like face protection — but not close-fitting balaclavas — this is a sensational system. We especially like that Anon was wise enough to include several masks suitable for a variety of conditions.
Anon also says there is triple-layer foam around the goggle, which “features two layers of foam, including a slightly denser layer closest to the face, and a layer of moisture-wicking fleece for a snug seal and comfortable fit.” The “dual-molded” polyurethane frame “combines a rigid outer frame that improves lens interface performance and rigidity with a soft and flexible inner frame that maintains a comfortable fit on the face.”
The M4 goggles are over-the-glasses compatible and have silicone on the underside of the strap for a non-slip experience. There is also a full-perimeter venting system to keep your goggles from fogging.

Anon M4 Perceive Pro Pack: performance
The case has nine lenses. I have one face. Is the M4 Perceive Pro Pack overkill?
Maybe. Look, I won’t sit here and pretend that you’ll need nine lenses in any given day. I also won’t tell you I tested each lens. I gave most a shot, sure, but there’s a core issue with the pro pack.
The M4 Perceive Pro Pack and VLT: let’s clarify the most confusing component
Each lens has a unique tint. Each lens also has a unique VLT (variable light transmittance) rating.
There are also three conditions the lenses sit under: sunny, variable, and cloudy. Each condition has three lenses categorized in it.
Each of these nine lenses has a different VLT rating, which corresponds to unique light conditions ratings – S1, S2, S3, and S4. The lower the “s” number, the less natural light there is. That’s why lenses for cloudy conditions are all S1, and the lens for the sunniest conditions (6 percent VLT) is an S4.
The issue here is that there’s no way to truly assess which VLT percentage is best for the conditions when you’re on the mountain. VLT is a rating for how much light is transmitted through a lens, which accounts for the color of the tint and how reflective the coating is as well.
An example: the “variable” category in the M4 Perceive Pro Pack has three lenses – blue, green, and violet. Both the blue and green lenses are more reflective than the violet, so they block more sunlight from entering the lens (and your eyes). This gives these two lenses a VLT of 21 and 22 percent, respectively. The violet lens is less reflective and allows more light through the lens, so its VLT is 34 percent.
There’s no solid method for knowing which lens will be right for you in any given condition. You can’t look at a weather report and calculate the morning hours will require a VLT of 22 percent, but after 1 pm you should switch to 72 percent, for instance. You’ll have to employ a little trial and error.
Using the M4 Perceive Pro Pack
Nine lenses – that are easy to swap out. This is key. The MAGNA-TECH lens tech (by the way, Anon crew, if you’re reading this – calm down on the all-caps branding) makes it simple to swap lenses, so even the moodiest weather conditions are conquerable.
My home mountain happens to be a top-down resort, so a lift to the top means I’m at the parking lot. In those moments I’d need to grab a different lens, I could drop by my car. There’s also the sturdy extra-lens carrying case included in the pack, which is something most of us should utilize. It keeps your extra lens protected when riding, even when you crash. (Yes, I crashed. I always crash. Read my snowboarding articles. Falling can be fun!)
The M4, as standalone goggles, is one of the best on the market. I can’t knock its performance; it was breathable, stayed put while riding, and is comfortable. Add in the face coverings and the MFI magnetic clasp for the goggles, and this system is unbeatable.
(The M4 didn’t fit as well as the Smith I/O Mag Imprint 3D goggles, but those are 3D printed to fit my face, so that’s maybe a bit unfair.)
One feature we love: Burton and Anon were smart enough to add corresponding icons to the lenses for each of the three conditions. This helps a lot with hot-swapping lenses on the go. All you do is identify the icon, let the lens grab the goggles frame, and off you go. No need to reference the chart!
Should you buy the Anon M4 Perceive Pro Pack?
The M4 Perceive Pro Pack is $1,400. So, there’s that.
Shocking, maybe, but this is about what it would cost for any snowboard goggles setup with all the lenses and accompanying facemasks (if any other company had such a thing). You’re just buying it all upfront with the Perceive Pro Pack.
Think about when you like to ski or snowboard. Do you only go out when it’s a bluebird day? Maybe you don’t need this pack. Most try to get out as often as possible, no matter the conditions. For most, the M4 Perceive Pro Pack is one to consider — even though it costs as much as a full setup (board, boots, bindings).
It could also be the last goggles setup you’d buy for a good long while. Even if a lens was scratched up or broken, there are several others ready to take its place. It’s a spendy item, but if the M4 Perceive Pro Pack is within your budget, it’s worth it.
I found myself swapping lenses more often than I have been, likely because I have more options and think about light conditions more frequently. And swapping lenses with the M4 is incredibly easy. That means I was enjoying snowboarding more. I’m not sure I can put a price on that, really, even though $1,400 is a lot of money.