Canning has always been daunting to me. I vividly remember by dad going over to my grandparents’ house every early fall to help jar that summer’s tomato sauce. My grandparent’s house was usually the type of place where a kid could run free, but for those five days, it was off limits. That made canning seem like a behemoth that could only be tackled by a team of fully functioning adults. But now that I’m older and growing my own produce, the urge to preserve the yield so it can be enjoyed all year is a task I actually want to tackle. And thanks to The New Homemade Kitchen by Joseph Shuldiner, it actually seems possible.
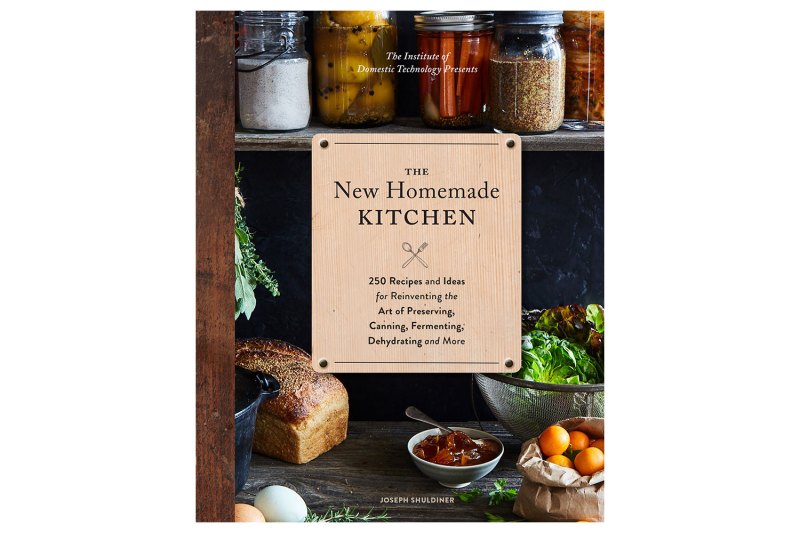
Shuldiner was the founding director of The Institute of Domestic Technology, a Southern California food crafting think tank that’s dedicated to reviving and teaching a variety of lost culinary arts, like fermenting, jam-making, and coffee roasting. Shuldiner sadly passed away last year before the book was published, but his work lives on in The New Homemade Kitchen. It’s a tome of expert knowledge on everything from canning to sourdough, and it explains each process in a way that is welcoming rather than intimidating for the home cook. Some of the techniques and recipes involve a bit of a learning curve, but they can be mastered by simply practicing.
To get more insight on the canning techniques Shuldiner outlines in the book, we spoke with Hana van der Steur, the assistant director of The Institute of Domestic Technology. She elaborates on the process laid out in The New Homemade Kitchen and also offers some of her own tips for the beginning canner to get started.
What are the absolute essentials you should buy to start canning for the first time?
“A copper preserving pan is a canning luxury that is certainly nice to have if you’re making tons of jam (the shape and material facilitate faster cooking), but it’s expensive, takes up a lot of space, and is by no means necessary,” van der Steur says. “With the possible exception of a jar lifter, most people can cobble together a canning kit out of everyday kitchen equipment.”
Essential Canning Equipment:
Large stockpot: Van der Steur says that 10 to 12 quarts is generally fine for small batches, so long as it’s deep enough to accommodate your jars. “You should be able to cover the tops of the jars with 1 inch of boiling water during processing, while also accommodating a 1 inch rack below,” she says. “If canning taller jars, you may need to size up to a 16 to 20 quart pot.”
Rack: “You can buy a dedicated canning rack, but we like to repurpose a round wire cooling rack that fits into the bottom of our stockpot,” van der Steur says. “The idea is to lift the jars off the bottom of the pot in order to allow the boiling water to circulate all the way around them during the canning process.” As mentioned in the book, you can even attach mason jar screw bands together with twist ties to make a makeshift rack if you really need to assemble something quickly.
Preserving pan: If you’re getting into canning to make preserves, you’ll need a wide, shallow, heavy-bottomed, non-reactive pan for cooking down jam ingredients. “Ideally, you want to cook the ingredients as quickly and efficiently as possible in order to preserve their flavor and color,” van der Steur says. “Specialty pans have tapered sides to speed evaporation, but a large chef’s rondo will also work. The pan should be wide enough that the ingredients only come an inch or two up the sides to maximize surface area and speed cooking time.” You can also use a wide stockpot if absolutely necessary, but the tall sides will interfere with evaporation and you’ll have to cook the ingredients longer.
Jar lifter: These are hinged tongs with a nonslip coating that will allow you to securely move hot jars of jam in and out of a boiling water bath.
Mason jars: “We prefer regular and wide mouth mason jars with self-sealing lids and threaded metal screw bands for water bath canning,” van der Steur says. “They are inexpensive and, except for the lids, can be reused many times.” The experts at IDT caution to always check jars for chips and cracks before filling and submerging in boiling water.
Not Exactly Necessary But Fun to Have:
Canning funnel: “These funnels have wide-mouthed openings — to provide plenty of space for ladling in ingredients — and narrow mouths at the bottom that fit nicely into the opening of any size mason jar,” van der Steur says. “You can achieve the same result with a steady pouring hand, but we store a lot of dry ingredients in mason jars and find ourselves reaching for these funnels for more than just canning.”
Extra long spoon: A pot full of boiling water is a burn waiting to happen, so an extra-long wooden stirring spoon comes in handy. Long sleeves and an elbow-length oven mitt are also helpful.
Headspace measurer: The unfilled gap above the food and below the lid in a jar of preserves is called the headspace. This allows for expansion of the food when jars are processed and creates a vacuum as the jars are cooling. “Directions for measuring the headspace should be included in any well-tested recipe, and a headspace measurer — with its ziggurat-like ‘tiers’ on one end that indicate a series of headspace depths — is a nifty alternative to a ruler,” van der Steur says.

Let’s say someone isn’t quite ready to can because they are still waiting on their plants to produce more fruit. What is the best way to keep produce fresh while you wait to can it?
If you’re new to gardening, yield sizes can be overwhelming, especially if your plants are producing a lot of fruits or vegetables well before harvest season. “Rather than waiting for all 10 bushels of tomatoes to be ripe at the same time, consider working with smaller, 3 to 4 pound batches at a time as your produce comes in,” van der Steur says. “This can keep your canning sessions more manageable and ensure that you are working with the freshest possible ingredients. You can always make two or more small batches if you want to keep going, and you’re more likely to become a ‘frequent canner’ if you don’t burn out in one epic session.”
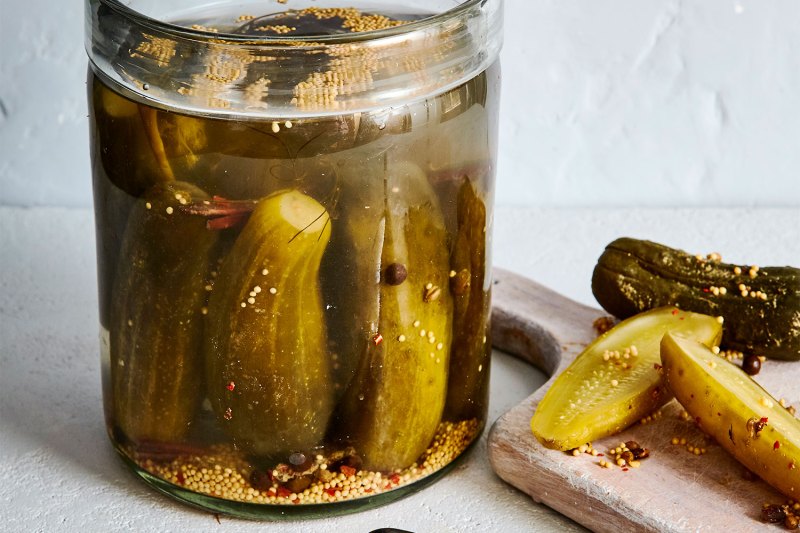
When it comes to storing your produce before canning, less time is more. You shouldn’t refrigerate your tomatoes because they will lose flavor quickly. That’s why making a small batch of sauce or jam is better than waiting until the middle of fall to can your entire yield. “Fresh cucumbers and other hardy pickling vegetables can generally be stored in the refrigerator for at least a week or two before pickling, though for the ‘snappiest’ pickles use produce that is as fresh as possible,” van der Steur says.
“Delicate fruits like berries and stone fruit will likewise make the best jam when used at peak ‘just ripe’ freshness,” she adds. “If you’re not ready to make preserves immediately, you can prep and macerate fruit with the sugar and acid that a recipe calls for, then store it airtight in the refrigerator for up to one week before making jam.”
When canning for the first time, what do you recommend starting with — jam, sauce, or pickles?
“While pickles and tomato sauce are just as easy to make, we tend to think of jam as the ultimate gateway experience,” van der Steur says. “Homemade fruit preserves are beautiful, sweet, fun to prepare, and so much better than store-bought jam. Many foodcrafters start their journeys to kitchen self-sufficiency with their first batch of jam.” Homemade jam also makes an excellent, economical gift that pretty much everyone on your list will love.
What are the biggest misconceptions that people have about canning?
“Fear of botulism poisoning from an improperly canned product is a common concern among Institute students,” van der Steur says. “Luckily, the bacterium that causes botulism, Clostridium botulinum, cannot grow when it is in contact with acidic ingredients that have a pH of 4.6 or lower. The best way to control C. botulinum is by using high-acid ingredients (5 percent vinegar or stronger) when canning vegetables; canning high-acid fruits (or adding extra acid, like lemon juice, to lower-acid fruit); and using enough sugar in jams and high enough salt concentrations in pickles to inhibit bacterial growth.” The key to making safe and delicious canned goods is all about following a solid process, so van der Steur urges people to always reference well-sourced recipes from books and outlets that you trust.
Another persistent misconception is that canning and jam making is a good way to rescue old produce. But as with anything, your pickles and preserves will only be as delicious as the ingredients you use to make them. “Not only can older produce have off-flavors and textures that will affect the final product, but natural pectin levels in fruit fall as the fruit ages, which can lead to a looser set when making jam,” van der Steur says. “Use the highest quality produce you can find at peak freshness for best results.”
Any other important points about the process that people should know before they get started?
“The basic formulas for canning pickles or preserves don’t change much from recipe to recipe — what makes these items distinct from others of their kind are the ways in which different ingredients are combined,” van der Steur says. “This makes both pickles and preserves a great template for experimentation. Find a trusted basic recipe and use it as a starting point to play around with flavors. We’ve already mentioned some of the benefits of small batches; another is the low commitment. Just make sure you take good notes so you can replicate your successes in the future!”
Now that van der Steur has answered some of our most pressing canning questions, it’s time to talk about the process. Below is the basic canning method from The New Homemade Kitchen, which is great to reference on your pickling and preserving journey. Get familiar with these instructions and use them alongside a trusted canning recipe.
1. Prepare the Canning Equipment
Check the jars and lids for chips or hairline fractures and discard any damaged pieces. Wash the jars, lids, and screw bands in hot, soapy water, or run through a dishwasher. Keep the jars warm in a low (200 degrees F [95 degrees Celsius]) oven until ready to use. Dry the lids and screw bands, setting aside until ready to fill the jars.
Select a canning pot designed for home preserving or a deep stockpot large enough to fully immerse the jars by several inches. Place a canning rack or wire cooling rack in the bottom of the pot or use twist-ties to link extra jar screw bands together to form a trivet wide enough to cover the bottom of the pot.
Fill the canning pot three-quarters full of water and add a splash of white vinegar to prevent mineral deposit spotting on the outside of the jars. Cover with a lid and bring the water to a boil, then maintain a strong simmer until ready to can.
2. Prepare the Product
Fill the jars with the prepared product. Use a headspace measuring tool or a ruler to measure headspace (the space between the top of the product and the lip of the jar), according to the recipe instructions. If there is not enough product to fill a jar completely, store it in the refrigerator instead. Do not process a half-filled jar.
Release air bubbles by running a wooden skewer or chopstick around the inside edges of the jars. Wipe the rim and outside threads of the jars with a clean, damp kitchen towel to remove any particles that may interfere with a clean seal and prevent sugar left in the threads from becoming moldy when stored.
Place the lids on top of the jars, then screw on the metal bands, but do not over-tighten. The metal screw band’s only job is to keep the lid in place while the jar is processing in the water bath. To ensure a proper seal, first tighten the band firmly, then slightly loosen the band by about 1/4 in [6 mm].
Use a jar lifter to lower the jars into the canning bath, adding more boiling water if needed to cover the jars by 1 inch [2.5 cm]. Replace the lid and bring the canning bath back to a full, rolling boil before beginning to track processing time according to the recipe. Note that safe processing times can vary depending on the size of the jar used. Jar sizes are not interchangeable unless specified in the recipe.
After processing, turn off the heat. Wait for 5 minutes before removing the jars from the bath. Use a jar lifter to transfer the jars to a towel-lined surface (to prevent the hot glass jars from cracking upon contact with a cold countertop), and allow them to rest undisturbed for 8 to 12 hours, without tilting or inverting the jars.
Test each jar’s seal by pressing down on the center of the lid. The button should be concave and not pop up and down with an audible click. You can also remove the screw band and gently lift the jar up by holding only the lid, which should not lift away.
If some jars are not properly sealed, reprocess following the same instructions within 24 hours. Improperly sealed jars may also simply be stored in the refrigerator and consumed within one month.
Label jars and store without their rings to prevent possible mold growth on jar threads or rusting of metal screw bands. They will keep for up to 1 year when stored in a cool, dry, dark place.


