Behind every great dinner is an even better dessert! Whether you’ve got a craving for cupcakes, peanut butter, chocolate brownies, or ice cream indulgences, saving the best for last has never been sweeter than with these delicious dessert recipes. You don’t need to be an expert baker or pull out any heavy equipment because these recipes are simple to create, use a handful of ingredients and some even have a healthy twist. But you’ve been warned, these desserts are easy to make but hard to resist.
Related Guides
Gluten-Free Peach Crisp


(From All The Healthy Things)
This delicious gluten-free peach crisp recipe is a quick and easy way to use fresh or frozen peaches! It has a delicious jammy peach ginger filling and a brown sugar crisp topping that is so easy to make. With just a few simple ingredients and a few minutes, you can easily have a show-stopping dessert that everyone is sure to love.
Ingredients:
For the filling:
- 3.5 pounds peaches, peeled and sliced (around 8 small/medium peaches)
- .5 tsp ground cinnamon
- 1 tbsp arrowroot starch
- 1 tbsp vanilla extract
- .5 tablespoon lemon juice
- 2-inch knob of ginger, finely grated
- 1/3 cup maple syrup
For the Crumble Topping:
- 1.5 cups gluten-free old fashioned oats
- .5 cup almond flour
- .5 cup dark brown sugar
- 1 teaspoon ground cinnamon
- 6 tbsp butter
Method:
- Spray a 9×13 baking pan with non-stick spray.
- Add the sliced peaches, arrowroot starch, ground cinnamon, vanilla extract, lemon juice, ginger, and maple syrup to a mixing bowl. Stir until well combined and then transfer to the prepared baking dish.
- Next, make the crisp topping. Add the oats, almond flour, brown sugar, ground cinnamon, and butter to the mixing bowl (you can use the same bowl you used to mix the filling). Use your hands to work the butter into the dry ingredients until you have a clumpy crisp topping.
- Bake the crisp at 350 degrees for 30 minutes and then cover with foil and bake for another 15 minutes until the fruit bubbles around the edges.
- Let cool for ten minutes and then serve with vanilla ice cream and enjoy!
Carrot Cake Cookies
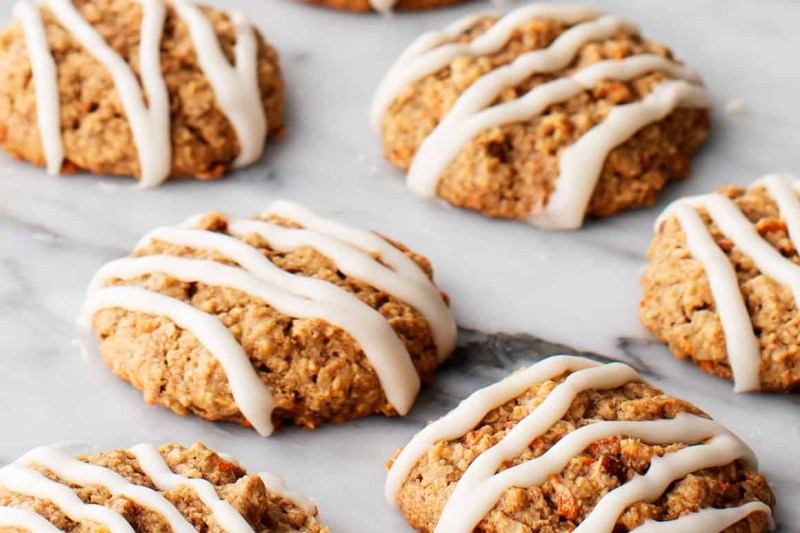
(From Love and Lemons)
These carrot cake cookies have a soft, cake-like texture, a sweet, spiced flavor, and a tangy cream cheese frosting on top. You’ll want to keep a stash of these cookies in your freezer for busy days.
Ingredients:
- 2 tbsp ground flaxseed
- 5 tbsp warm water
- 1 cup oat flour
- 1 cup additional whole rolled oats
- .5 cup almond flour
- .5 tsp baking powder
- .5 tsp baking soda
- 1 tsp cinnamon
- .5 tsp nutmeg
- .5 tsp sea salt
- 1 cup grated carrots, (about 3 medium)
- .5 cup almond butter
- .25 cup coconut oil, melted
- .5 cup maple syrup
- 1 tsp vanilla extract
- 1/3 cup chopped walnuts or pecans
- Vegan Cream Cheese Frosting, optional
Method:
- Preheat the oven to 350°F and line two large baking sheets with parchment paper.
- In a small bowl, combine the flaxseed and warm water and set aside to thicken for 5 minutes.
- In a large bowl, stir together the oat flour, the additional 1 cup rolled oats, almond flour, baking powder, baking soda, cinnamon, nutmeg, and salt.
- In a medium bowl, combine the carrots, almond butter, coconut oil, maple syrup, and vanilla and stir well. Add the flaxseed mixture and stir well to incorporate.
- Add the wet ingredients to the bowl of dry ingredients and fold in just until combined. Fold in the walnuts.
- Scoop ¼ cup of batter for each cookie onto the baking sheets. Bake, one sheet at a time, for 20 to 24 minutes, or until browned around the edges. Cool on the pan for 5 minutes and then transfer to a wire rack to finish cooling.
- When cookies are completely cool, pipe with cream cheese frosting if desired.
Peanut Butter Stuffed Dates
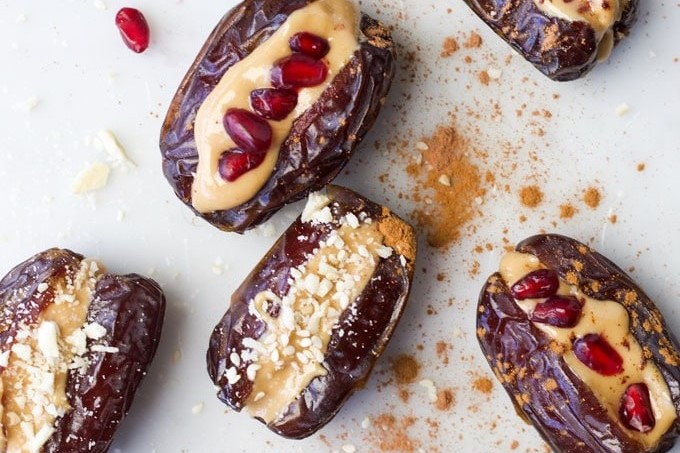
(From Healthy Little Foodies)
Peanut Butter Stuffed Dates are a super delicious dessert or appetizer. They are so simple to make and only require two ingredients with additional toppings if desired.
Ingredients:
- 6 Medjool Dates
- 6 tsp peanut butter
- Optional Toppings: cinnamon, cacao powder, crushed nuts, coconut, pomegranate seeds, sesame seeds. drizzled chocolate.
Method:
- Carefully remove the pits from the dates. Be careful to keep one side of the date intact. You want to add a slit to hold the peanut butter rather than splitting the date in half. (See picture above)
- Add a teaspoon of peanut butter to each date.
- Add toppings if desired.
Strawberry-Coconut Freezer Fudge
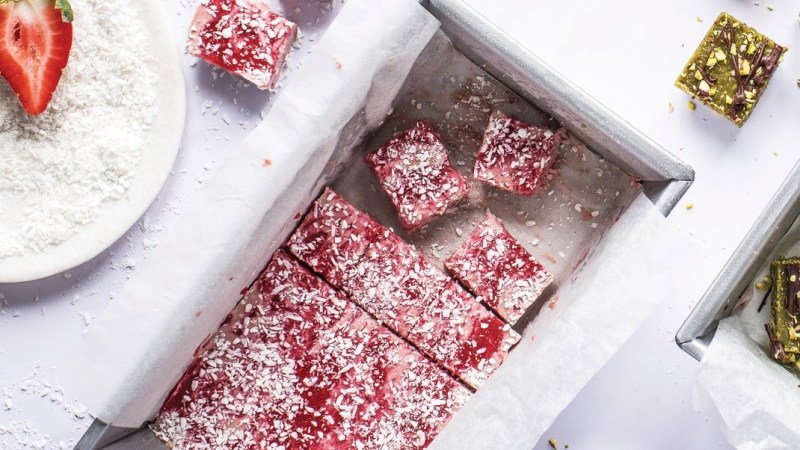
(From Clean Eating Magazine)
Not only are these cashew-butter-based treats sink-your-teeth-in delicious, they’re also super-pretty from the swirl of strawberry puree. Naturally sweet from the coconut, cashews and berries, they have just a touch of maple syrup, so you could even eat one for breakfast.
Ingredients:
- 2 cups sliced strawberries
- .5 cup cashew butter
- 6 tbsp coconut oil, melted
- .25 cup pure maple syrup
- 3 tbsp coconut flour
- 1 tsp pure coconut extract
- 1 tsp pure vanilla extract
- .25 tsp sea salt
- 1 tbsp unsweetened shredded coconut
Method:
- Line a 9 x 5-inch loaf pan with parchment paper, leaving a 2-inch overhang, and mist with cooking spray.
- In a food processor, process strawberries until completely smooth, 1 to 2 minutes. Remove ½ cup of strawberry purée and set aside. Add cashew butter, coconut oil, maple syrup, coconut flour, extracts and salt; process until smooth, 1 minute.
- Spread mixture evenly in prepared pan and swirl in reserved ½ cup strawberry purée; sprinkle with shredded coconut. Freeze until firm, 45 minutes to 1 hour.
- Lift overhanging parchment and transfer fudge to a cutting board. Using a serrated knife, slice into 24 squares. Store in an airtight container in the freezer.
Coffee Granita

(From Every Last Bite)
Made simply with brewed coffee and a bit of honey, then topped with vanilla-coconut cream, it’s so easy to throw together and such an unexpected treat. Add some cinnamon for a cappuccino-like flavor, or blend in some cacao for a mocha granita.
Ingredients:
- 3 cups strong coffee
- .25 cup honey or maple syrup
- 1 can coconut milk refrigerated for at least 6 hours
- 1 tsp vanilla extract
- .5 tbsp honey or maple syrup
- 1 tsp chopped hazelnuts optional
Method:
- Place the coffee and honey in a large pot and bring to a boil on medium heat, stirring to allow the honey to dissolve into the coffee.
- Pour the liquid into a baking dish and place in the freezer. Approximately every 45 minutes remove from the freezer and stir with a fork to break up any of the large frozen chunks.
- After 2 to 3 hours, the entire mixture should be frozen to a slush like mixture.
- To make the coconut cream, open the can of coconut milk, making sure that you don’t shake it. Scoop out the thick coconut cream, saving the water for another use such as smoothies. Place the coconut cream in a bowl, add in the vanilla extract and honey and mix using an electric mixer. Don’t over-mix otherwise the cream will become liquid (if this happens, place the cream in the freezer for 10 to 15 minutes or in the fridge for an hour or so).
- Scoop the granita into a glass and top with a scoop of the coconut cream. Top with chopped hazelnuts or a dusting of cocoa powder. Serve immediately.
Raw Vegan Blueberry Cheesecake
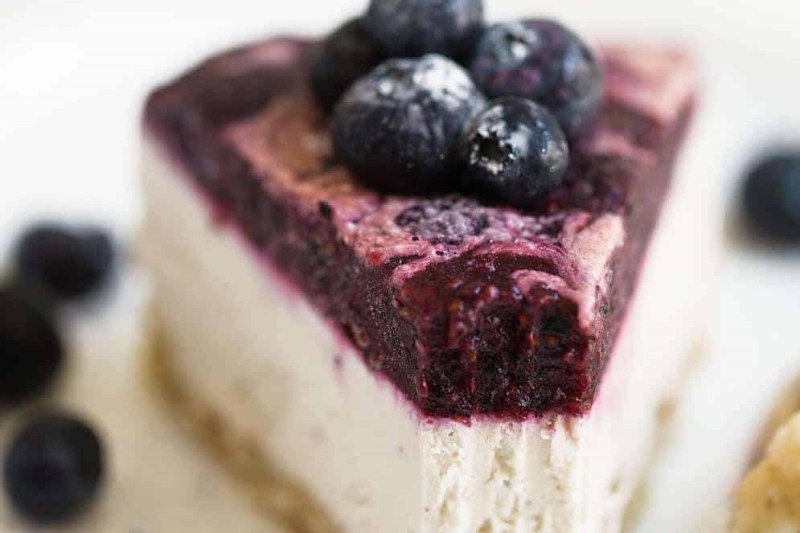
(From The Movement Menu)
Best, no bake, raw vegan blueberry cheesecake! This cheesecake is completely refined sugar free, paleo, raw and absolutely delicious! The fresh blueberry topping really takes it over the edge.
Ingredients:
Crust:
- 1/3 cup walnuts
- 2/3 cup raw macadamia nuts
- 2 Medjool dates
- 2 tablespoons unsweetened coconut flakes
- 1 tbsp coconut oil
- .25 tsp sea salt
Cashew Cheese
- 2 cups raw cashews soaked in boiling water for 1.5 hours
- 2/3 cup canned coconut milk
- .25 cup coconut oil
- .25 cup plus 1 tablespoon pure maple syrup
- 2 tbsp lemon juice
- 1 tbsp pure vanilla extract
Blueberry Topping
- 1 cup fresh blueberries
- 2/3 cup fresh blackberries
- 1.5 tbsp lemon juice
- 1 tbsp honey or maple syrup
- 1.5 tbsp chia seeds
- 2 tsp beet powder
Blueberry Beet Swirl
- .25 cup cashew cheese
- 2 tsp beet powder
- 2-3 tbsp filtered water see notes
Method:
- Add cashews to a bowl and cover with boiling hot water. Let set, uncovered, for 1.5 hours. Rinse and drain thoroughly.
- Line the bottom of a 6″ or 7″ springform pan with parchment paper (cut out a circle) and lightly oil the sides to make it easier to remove once the cheesecake has set.
- Combine the nuts in a food processor and pulse until you get a coarse mixture. Add the rest of the crust ingredients and pulse several times until it starts clumping up and forming together.
- Transfer the crust mixture into the pan. Press down with your fingers to pack it evenly into the bottom of the pan to create an even base. If it starts to get sticky, lightly wet your fingers with warm water. Set aside.
- Add drained cashews and the rest of the filling ingredients to the bowl of your food processor or into a high speed blender pitcher. Process or blend until creamy and smooth throughout, scraping down the sides as needed. *Taste and adjust accordingly. Be sure to add more lemon juice if it’s too sweet, more maple syrup if it isn’t sweet enough or a pinch more of salt for more balance!*
- Pour the filling over the crust but reserve about .25 cup and set aside in a small bowl. Tap on the counter a couple of times to release any air bubbles that may have formed. Set aside.
- Combine the blueberries, blackberries, lemon juice, honey, chia seeds and beet powder in the bowl of a food processor until pulverized. Add this mixture on top of the filling.
- In the small bowl with the .25 cup cashew cheese reserve, add the beet powder. Whisk with a fork until combined. Add approximately 2-3 tablespoons of water until it is the consistency of a milkshake. You don’t want it runny, but you also want it thin enough so it’s easily pourable! Using a .5 teaspoon, make circular dots all over the top of the cheesecake and using a toothpick, begin to swirl away! You’ll be amazed at the art you’re creating 🙂
- Place in the freezer to set for at least 4 hours or overnight.
- When ready to serve, pull out the cheesecake and allow it to sit at room temperature for about 10-15 minutes before slicing and serving. When you’re ready to slice, run your chef’s knife under very hot water and dry it off with a towel. Cut the cheesecake using that hot knife — it’ll be much easier. Leftovers can be stored in the freezer for up to 2 weeks. Enjoy!
Read more: Best Vegan Food Products
Chocolate Mousse
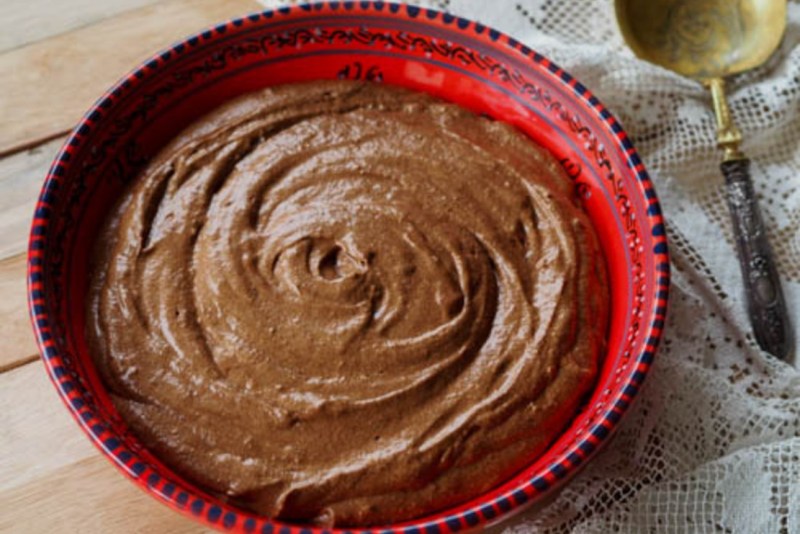
(From My Paris Kitchen)
Rich and creamy, yet light and fluffy Chocolate Mousse may well be the ultimate chocolate fix! This is a classic chocolate mousse made the proper French way, as served in fine dining restaurants. Less cream, more chocolate, a more intense chocolate flavor and a beautiful creamy mouthfeel.
Ingredients:
- 6 eggs large
- 7 oz dark chocolate 60% cocoa
Method:
- Gently melt chocolate (in a bain-marie double boiler or using the microwave at low temperature).
- Separate egg whites and egg yolks.
- Combine egg yolks with the melted chocolate.
- Whip egg whites until stiff.
- Gently and gradually fold whipped egg whites into the egg yolk–chocolate preparation.
- Refrigerate for at least 2 hours, 4 hours being better before serving.
Fresh Strawberry Cupcakes
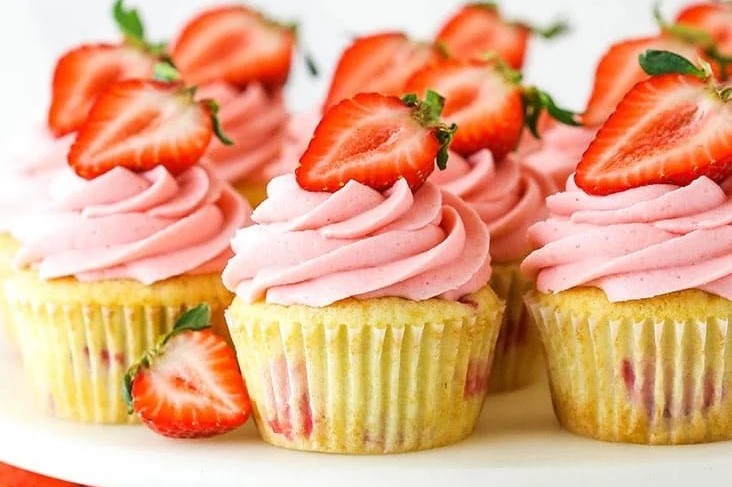
(From Life Love And Sugar)
These Fresh Strawberry Cupcakes are moist, tender and totally addicting! There are pieces of chopped strawberry in the cupcake and they are topped with strawberry buttercream! So much flavor and perfect for spring and summer.
Ingredients:
Cupcakes:
- 1 2/3 cups (217g) all-purpose flour
- 1 tsp baking powder
- .25 tsp baking soda
- .5 tsp salt
- .75 cup (168g) unsalted butter, melted
- 1 cup (207g) sugar
- 2 tsp vanilla extract
- 2 large eggs
- .5 cup (115g) sour cream
- .25 cup + 2 tbsp milk
- 1.5 cups (200g) chopped strawberries
Frosting:
- 1.5 cups (200g) chopped strawberries
- 1.25 cups (280g) unsalted butter, room temperature
- 5 cups (575g) powdered sugar
- .5 tsp vanilla extract
- Pinch or two of salt
- Strawberries, for decorating
Method:
- Preheat oven to 350°F (176°C) and prepare a cupcake pan with cupcake liners.
- Combine the flour, baking powder, baking soda and salt in a medium sized bowl and set aside.
- In a large bowl, whisk the melted butter, sugar and vanilla extract together until well combined.
- Add the eggs and whisk together until well combined.
- Add the sour cream and whisk together until well combined.
- Add the milk and whisk together until well combined.
- Add the dry ingredients and whisk together until combined, but do not over mix.
- Fold in the chopped strawberries.
- Fill the cupcake liners a little more than half full and bake for 18-20 minutes or until a toothpick inserted into the center comes out clean.
- Remove cupcakes from the oven and place on a cooling rack to cool.
- To make the strawberry buttercream, make the strawberry reduction. Add the strawberries to a food processor or blender and puree until smooth. You should have about 3/4 cups of puree.
- Add the puree to a small sized saucepan and cook over medium heat. Allow the mixture to come to a slow boil, stirring consistently to keep it from burning, until it has thickened and reduced to about 6 tbsp, about 10-15 minutes. To measure, pour the puree into a measuring cup. If it’s more than 6 tbsp (between 1/4 and 1/2 cup), add it back to the pan and continue cooking.
- When the puree has thickened and reduced, pour into a large measuring cup and allow to cool to at least room temperature. This strawberry mixture can be made ahead, if you like, and stored in the fridge.
- Add the butter to a large mixer bowl and beat until smooth. Carefully add about half of the powdered sugar and mix until smooth and well combined.
- Add 4 tablespoons of the strawberry reduction, vanilla extract and the salt to the frosting and mix until well combined.
- Add the remaining powdered sugar and mix until smooth. Add additional strawberry reduction as needed to get the right consistency and flavor.
- Pipe the frosting onto the cupcakes. I used Ateco tip 844. Decorate with a strawberry half, if desired.
- Cupcakes are best when stored well covered in the fridge for 2-3 days. Serve at room temperature.
Read more: Best Boxed Cake Mix Brands
Banana Foster
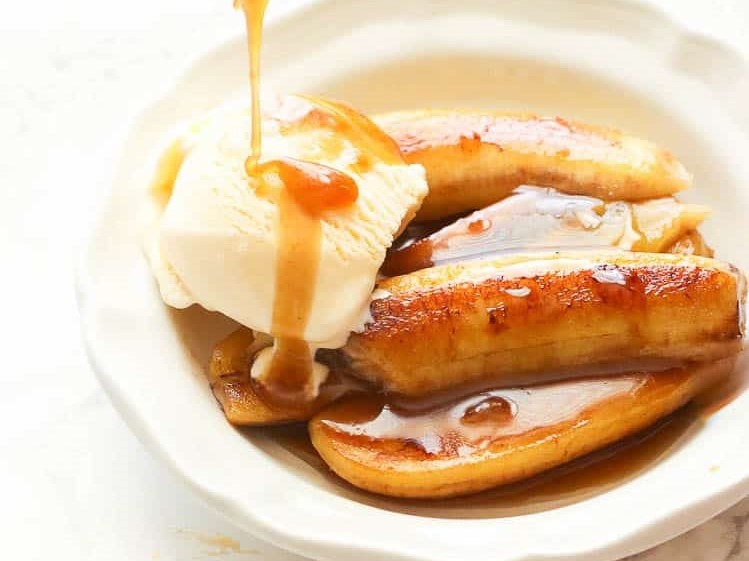
( From Immaculate Bites)
Banana Foster is a decadent New Orleans dessert with sautéed bananas in butter, sugar, cinnamon and nutmeg and bathed in a rum syrup. Top with vanilla ice cream and you’ll have the fanciest 10-minute dessert for dinner date nights!
Ingredients:
- .25 cup (57 g) unsalted butter
- ⅔ cup (132 g) brown sugar
- .25 tsp (0.35 g) cinnamon
- .25 tsp (0.55 g) ground nutmeg
- .25 cup (59 ml) rum
- 3 tbsp (45 ml) water
- 1 tsp (4 g) vanilla
- 3 firmly ripe bananas , peeled and halved lengthwise and crosswise
- 2 scoops vanilla ice cream
Method:
- Melt butter in a 12-inch skillet over medium low heat, add the brown sugar, cinnamon and nutmeg, and cook until moist for about 1 minute. Stir in 1 tablespoon of rum, water and vanilla extract, cook stirring continuously, until the grainy texture disappears and the mixture rolls off the spoon in a steady stream (bubbly and thickened) – 1 to 2 minutes.
- Add the bananas to the skillet and turn them until coated with the sauce. Remove the pan from the heat and pour in the remaining rum. Carefully ignite the rum with a long match or grill lighter, using extreme caution to stay away from the flame! Allow the alcohol to burn off, then return the skillet to heat and cook for 2 to 3 minutes stirring and flipping the bananas until the sauce is thickened and the bananas are tender.
- To serve, place warm banana foster on a plate or bowl and top generously with vanilla ice cream.
Summer Lemon Icebox Cake
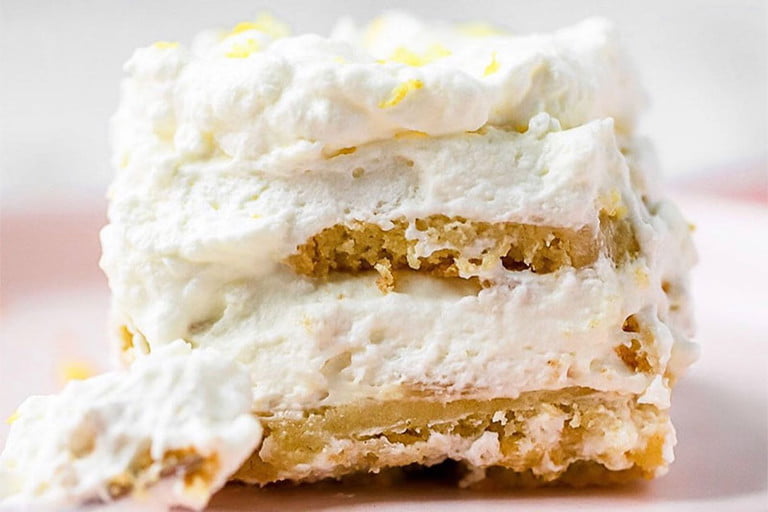
(By Rosalin Siv, founder, The Evercake, New York City)
Ingredients:
- 2 cups heavy cream
- 10 oz mascarpone
- .5 cup powdered sugar
- .5 cup limoncello or lemon liqueur
- 1 tsp Meyer lemon juice
- 1 tsp vanilla extract
- 1 18-oz package lemon wafer cookie
- Zest of 3 Meyer lemons, plus extra for garnish
Method:
- Using a stand mixer or hand mixer with a whisk attachment, combine the heavy cream, mascarpone, sugar, limoncello, lemon zest, lemon juice, and vanilla extract. Mix on low speed, gradually increasing the speed until firm peaks form.
- Use an 8-inch springform pan to assemble the cake, making 4 layers each of wafer cookies and of whipped filling. Begin with a layer of cookies, overlapping to ensure a solid base with no spaces between the cookies. Next, add 1/4 of the filling and smooth with a spatula. Repeat the cookie-filling layers 3 more times, finishing with the cream filling on top. Smooth and refrigerate overnight.
- To serve, run a knife around the sides of the cake and carefully lift the cake off the springform bottom. Garnish with lemon zest.
Giant Salted Espresso Hot Fudge Cookies
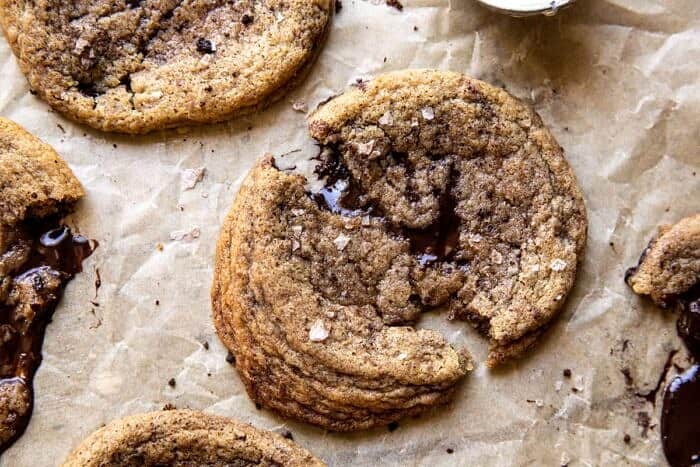
(From Half Baked Harvest)
The very BEST Giant Salted Espresso Hot Fudge Cookies for your summer weekend baking. Easy homemade chocolate fudge sauce stuffed into the best buttery cookies. YES, it’s true, and they are so very good! Each cookie dough ball is hand stuffed with a ball of frozen fudge and sprinkled with espresso salt before baking them to perfection.
Ingredients:
Fudge Sauce:
- .25 cup unsweetened cocoa powder
- 2/3 cup whole milk
- .75 cups semi-sweet chocolate chips
- 5 ounces chopped dark chocolate or .75 cup additional chocolate chips (I use 70% dark)
- 2 tbsp salted butter, cubed
- 1 tsp vanilla extract
Cookies:
- 2 sticks (1 cup) salted butter, at room temperature
- .75 cup dark brown sugar
- .25 cup granulated sugar (use 1/2 cup for a sweeter cookie)
- 2 large eggs, at room temperature
- 2 tsp vanilla extract
- 2.25 cups all-purpose flour (+2 tablespoons, if needed, see note)
- 1 tsp baking soda
- 1 tbsp flaky sea salt
- 1 tbsp instant coffee powder (optional)
Method:
- To make the chocolate fudge filling. In a medium bowl, melt together cocoa powder, milk, chocolate chips, dark chocolate, and butter in the microwave for 1-2 minutes, until smooth. Stir in the vanilla. Transfer to a glass container. Freeze 30 minutes, until firm.
- Roll the fudge sauce into scant tablespoon-size balls and place on a parchment lined baking sheet. Freeze until firm, at least 30 minutes or overnight.
- To make the cookies. Preheat the oven to 350 degrees F. Line a baking sheet with parchment paper. In a large mixing bowl, beat together the butter, brown sugar, and granulated sugar until combined. Beat in the eggs, one at a time, until combined. Add the vanilla, beating until creamy. Add the flour and baking soda. Remove 2 of the frozen fudge balls and cut into 4 pieces. Fold chunks of fudge into dough, leaving streaks of fudge throughout.
- Roll the cookie dough into 2 tablespoon-sized balls. Place 1 frozen fudge ball in the center of the dough, pushing down gently into the dough. Add 1 additional tablespoon size cookie dough ball on top, sealing the dough around the fudge. Place the balls 3 inches apart on the prepared baking sheet (don’t bake more than 4 cookies per baking sheet).
- Mix the flaky salt and coffee. Sprinkle the salt mix over each cookie. Transfer to the oven and bake for 8 minutes. Remove the pan from the oven and tap the baking sheet on the counter 3 times to flatten them down. Return to the oven and bake another 4-5 minutes or until the cookies are just beginning to set on the edges, but still doughy in the center. Remove from the oven and tap the baking sheet on the counter 2-3 times to flatten them down again. Let the cookies cool on the baking sheet. They will continue to cook slightly as they sit on the baking sheet. Sprinkle with flaky salt mix.
- Eat warm (with ice cream…highly recommended) or let cool and store in an airtight container for up to 4 days.
Editors' Recommendations
- These are the 7 classic tequila cocktail recipes you need to know
- How to make a killer meatloaf (and it’s easier than you think)
- How to make the best vodka gimlet for a twist on a classic
- The 11 best grill and smoker recipes to make now
- The 10 best brunch recipes for restaurant-quality meals at home


