What should I make for dinner tonight is the age-old question. While it’s easy to fall into a routine of Taco Tuesdays and Spaghetti Sunday, you’d do better to spice things up with new dinner recipes. And we don’t mean trying takeout every night.
We’ve put together this list of the best restaurant-quality recipes that should be added to your weeknight rotation. This list of dishes caters to every type of dinner craving — from healthy to indulgent and vegetarian to meat lovers alike — all in one place. Stay in and dig into some of the best dinner
Salsa verde chicken soup

This easy salsa verde chicken soup is warm, comforting, and the perfect weeknight dinner meal. Shredded chicken, flavorful salsa verde, and hearty white beans combine to create a soup that everyone will love. Not only is it delicious, but it is also incredibly easy to make. Make it in the evening for a quick 30-minute weeknight dinner, or throw the ingredients in the slow cooker and have a hot meal ready and waiting for you when you get home!
Ingredients
- 1 tbsp coconut oil
- 1 tbsp salt (plus more to taste)
- 1 1/2 pounds boneless skinless chicken thighs
- 1 cup diced onion
- 4 cloves garlic, minced
- 2 tsp cumin
- 1 tsp oregano
- 2 dried bay leaves
- 2-4-oz cans hot green chiles
- 16 oz. salsa verde
- 2 15-oz cans white beans
- 32 oz. chicken broth
- Juice of one lime
- Lime wedges, cilantro, avocado (for garnish)
Method
- Heat a large pot over medium-high heat.
- While the pot is heating, season the chicken thighs on both sides with 1 tablespoon of salt.
- When the pot is hot, add the coconut oil and then the chicken thighs. Sear the chicken thighs on both sides for 3-4 minutes until golden brown, and then remove them from the pot.
- Next, add the diced onion and garlic to the pot and cook for 2-3 minutes until they start to become tender.
- Next, add the cumin, oregano, bay leaves, green chilis, salsa verde, white beans, chicken broth, and lime juice. Stir until well combined, and then add the chicken thighs back to the pot and bring to a boil. Reduce the heat to a simmer and let the soup simmer for 30-45 more minutes until the chicken is tender.
- Once tender, remove the chicken thighs from the pot and use two forks to shred the meat. Once shredded, move the chicken to the soup and stir until well combined. Serve the soup with an extra squeeze of fresh lime juice, cilantro, and avocado. Enjoy!
Bulgogi kimchi fried rice
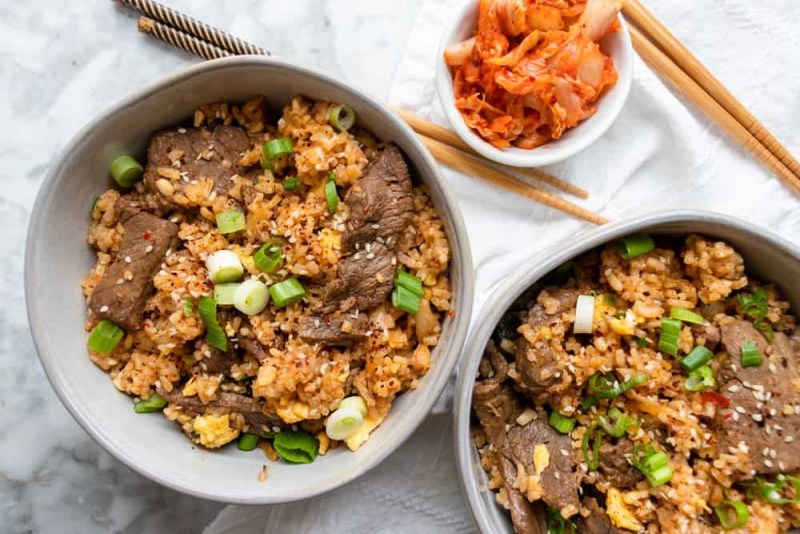
(From A Dash Of Dolly)
This bulgogi kimchi fried rice is a quick and easy dish that comes together in less than one hour. The sweetness from the bulgogi and tartness from the kimchi are perfectly balanced by the savory rice and seasonings.
Ingredients
For the bulgogi beef
- 8 oz thinly sliced ribeye (or any cut of meat)
- 1/2 medium onion thinly sliced
- 3-4 garlic cloves minced
- 1/4 cup grated Asian pear or 2 tbsp honey
- 2 tbsp soy sauce or tamari or coconut aminos
- 1 tbsp rice wine vinegar
- 1 tbsp sesame oil
- 1/2 tsp fresh ground black pepper
For the bulgogi kimchi fried rice
- 2 eggs whisked
- avocado oil
- 8 oz bulgogi beef
- 1/2 cup kimchi chopped
- 1/4 cup kimchi juice
- 2 cups leftover cold white rice or 4 cups cauliflower rice
- 2 tbsp soy sauce or tamari or coconut aminos
- 2 green onions sliced
- 1 tsp sesame oil
- Kosher salt to taste
- Fresh cracked black pepper to taste
- Sesame seeds
- Korean red chili flakes (gochugaru – optional)
Method
For the bulgogi beef
- In a bowl, add the sliced ribeye, sliced onions, minced garlic, grated Asian pear, coconut aminos, rice wine vinegar, sesame oil, and ground black pepper.
- Mix until everything is coated. Cover the bowl and marinate for 20-30 minutes in the refrigerator.
For the bulgogi kimchi fried rice
- Preheat a wok or large skillet over medium heat with about 1 tablespoon of avocado oil.
- Add the eggs to the wok and scramble until cooked through. Remove eggs from the wok and set aside.
- Bring heat up to medium-high and add an additional tablespoon of avocado oil.
- When wok is hot, add the marinated bulgogi beef to the skillet, spread the meat out so a majority is touching the skillet.
- Let the beef sit for 2-3 minutes and then toss the beef until cooked through to your liking.
- Next, add the kimchi and kimchi juice to the wok. Toss until everything is mixed through.
- Add in the cold leftover rice and gently break it apart and then add in the soy sauce.
- Stir everything until well combined. Spread the rice out and let it sit for a couple minutes to get some crispy bits.
- Then add in the scrambled eggs and a little more than half the sliced green onions to the rice and mix. Taste to see if you need additional kosher salt and black pepper.
- Turn off the heat and mix in the sesame oil.
- Serve and garnish with remaining green onions, sesame seeds, and Korean red chili flakes.
Sheet pan chicken fajitas
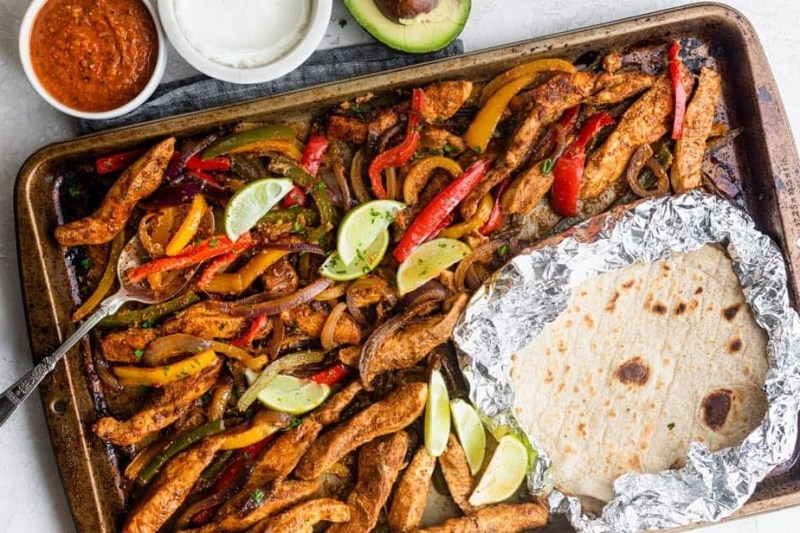
(From Feel Good Foodie)
These chicken fajitas are baked in the oven on a sheet pan and spiced with homemade fajita seasoning for an effortlessly fast and easy meal that is full of flavor.
Ingredients
- 1 1/2 pounds boneless skinless chicken breasts sliced into thick strips
- 3 bell peppers cored and sliced into strips
- 1 red onion thinly sliced
- 2 cloves garlic minced
- 3 tbsp olive oil
- Seasoning
- 2 tsp chili powder
- 1 tsp cumin
- 1 tsp paprika
- 1/2 tsp coriander
- 1/2 tsp onion powder
- 1/2 tsp salt
- 1/2 tsp black pepper
For serving
- Flour tortillas
- Lime wedges
- Fresh cilantro
- Avocado
Method
- Preheat oven to 425 degrees Fahrenheit. Grease a large-rimmed baking sheet with cooking spray.
- Place the chicken, peppers, onions, garlic, and olive oil on the baking sheet.
- Combine the ingredients for the seasoning in a small bowl, then sprinkle evenly over the chicken and vegetable mixture on the baking sheet.
- Toss everything together with tongs or your hands to evenly coat. Spread into an even layer, ensuring that the chicken strips are on top of the vegetables and overlapping each other
- Cook in the preheated oven, tossing once halfway through cooking, until the chicken is cooked through and the vegetables are tender, about 15 to 20 minutes.
- Place tortillas in foil and wrap them tightly, and warm them in the oven during the last 5 minutes of the fajitas cooking.
- Serve the fajitas with the warmed tortillas, along with lime juice, cilantro, and sliced avocados, if desired.
Easy Instant Pot Cajun rice
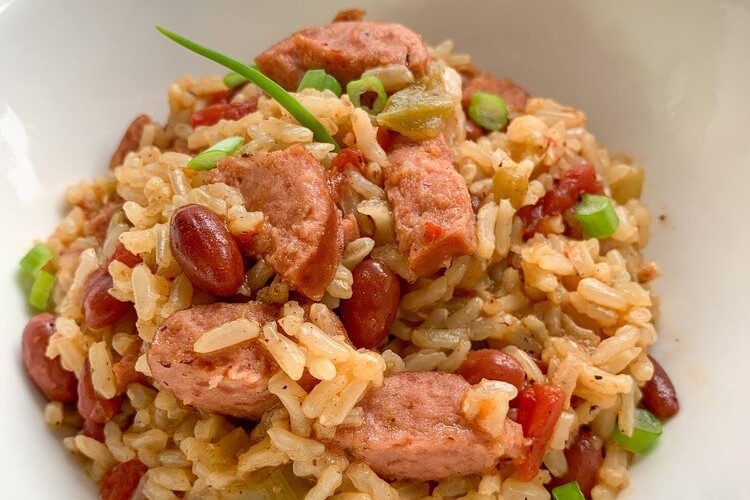
(From Eat Whole Live Fit)
This Cajun rice is super flavorful, perfectly spiced, and speckled with onions and peppers for a delicious way to amp up any weeknight dinner! This recipe can be made in so many variations even vegetarian for an awesome Meatless Monday meal.
Ingredients
- 1 cup frozen creole veggie mix ( fresh peppers, onions, celery can be used)
- 2 (16 oz) turkey kielbasa sausage, diced
- 1 can red beans ( drained and rinsed)
- 1 tbsp cajun seasoning
- 1 tsp onion powder
- 1 clove of garlic minced
- 1 can diced tomatoes (undrained)
- 2 cups chicken broth (low sodium)
Method
- Turn the pressure cooker on saute mode.
- Saute veggie mix until soft. Add cut sausage to the veggie mix to brown.
- Add in brown rice, red beans, and seasonings, and pour broth over the ingredients. Stir.
- Attach lid and lock. Set pressure cooker to brown rice setting, about 15 minutes.
- After the timer is complete, quickly or naturally release pressure. Stir and serve with green onions or fresh herb of choice to garnish.
Creole salmon with mango salsa

(From Immaculate Bites)
This grilled salmon recipe is smoky, spicy, and sweet moist salmon marinated in an easy-peasy and flavor-packed marinade that is sure to satisfy your appetite. You’ll want this grilled salmon again and again! Pair it with mango salsa on the side for a complete summer backyard meal.
Ingredients
- 1 1/2 to 2 pounds salmon fillets
- 1/4 cup vegetable oil
- 1/3 cup soy sauce
- 1/4 cup water
- 2 tsp garlic powder
- 2 tsp onion powder
- 2-3 tbsp brown sugar
- 1/2 tsp hot sauce
- 1 tsp white pepper
- 2-3 tbsp Creole Seasoning
Method
- In a medium bowl, whisk in oil, soy sauce, water, garlic and onion powder, brown sugar, hot sauce, and white pepper. Stir until fully combined.
- Drench the salmon in the marinate and then seal bowl or place it in a ziplock bag, and refrigerate for at least 30 minutes.
- Remove salmon from marinade; drain thoroughly and discard marinade.
- Brush salmon lightly with the oil, then season with salt and pepper. Followed by creole seasoning
Gas method
- Start by Preheating your grill to high for 3-5 minutes so, as to burn off any loose debris that has collected at the bottom of the grill. Use a barbecue brush to clean the grate.
- Turn the heat down to medium high heat, you do not want to burn the salmon. Medium heat ensures some good grill marks without burning the skin.
- Oil the grill by dipping a few crumbled paper towels in very little oil (a little goes a long way), then use tongs to wipe the oil evenly over the grate. Be careful not to use too much oil, too much oil might start a flare-up.
- Gently place salmon skin side up diagonally on grill grates for those gorgeous grill marks, if that is your thing.
- For 1/2-inch salmon thickness, grill for about 4-6 minutes per side or more. Close the grill as you grill and start checking after 3 minutes, with 1-minute intervals, until the thickest part flakes through the entire thickness when you pierce it with a fork.
- You might have to pull the salmon apart in a small section, if needed, to determine if the salmon is done. Salmon should be opaque and feel slightly firm to the touch
- Use a wide spatula to remove the salmon from the grill.
Charcoal method
- If using a charcoal grill, open vents on the bottom of the grill, add the charcoal about 1/4 full. Light the barbecue. Let the charcoal briquettes burn until they turn into hot coal ashes and glow red. Allow the flames to cool down until the ashes are white with heat.
- Oil the grill by dipping a few crumbled paper towels in very little oil (a little goes a long way), then use tongs to wipe the oil evenly over the grate. Be careful not to use too much oil, too much oil might start a good flare-up.
- Place the drained salmon fillets skin side up on the grill grate directly above the coals to cook over medium heat
- Gently place salmon skin side up diagonally on grill grates for those gorgeous grill marks, if that is your thing.
- For 1/2-inch salmon thickness, grill for 4-6 minutes or until fish begins to flake when tested with a fork. Start checking after 3 minutes, with 1-minute intervals, until the thickest part flakes through the entire thickness when you pierce it with a fork.
- You might have to pull the salmon apart in a small section, if needed, to determine if the salmon is done. Salmon should be opaque and feel slightly firm to the touch.
- Use a wide spatula to remove the salmon from the grill.
Sweet and spicy garlic ginger chicken wings

(From CarnalDish)
These wings are sweet, spicy, and sticky. This is a wing recipe that can be adapted any way you want. Once you crisp up the wings, the world is yours — you can do so many different and delicious things.
Ingredients
- 4 pounds chicken wing parts, patted dry!
For the baking powder mix
- 3 1/2-4 tbsp aluminum-free baking powder
- 1 tbsp kosher salt
- 1 tbsp freshly ground black pepper
- 1 tbsp sweet paprika
- 1/2 tbsp smoked paprika
- 2 tbsp Chinese five spice
- 1 tbsp granulated garlic
- 1 tbsp granulated onion
For the glaze
- Equal parts honey and garlic chili paste (Sambal Oelek), quantity is up to you
- 1 tbsp fresh ginger, grated (feel free to add more)
- 1-2 tbsp rice wine vinegar
- 1 tbsp low-sodium soy sauce
- 1/4 tsp toasted sesame oil
For the garnish
- Lime zest
- Chives
- Cilantro (optional)
- Toasted sesame seeds
Method
- Preheat oven to 425 degrees Fahrenheit.
- In a small bowl, combine all glaze ingredients, taste, and adjust, then set aside.
- Thoroughly coat chicken with baking powder mixture, and bake in the center of your oven on a baking rack over a foil-lined baking sheet for 20 minutes.
- Remove from oven, flip all pieces over and bake for an additional 20 minutes.
- Lastly, remove from oven and flip once more and cook for an additional 10-15 minutes or until chicken is crisp. Let chicken rest for 5 minutes, then toss in 1/2 of your glaze mixture to coat. If it needs more, add more.
- Garnish with chives, lime zest, cilantro (if using), and toasted sesame seeds. Serve.
Chana masala

(From MasalaChilli)
Chana masala is a popular Indian chickpea curry made with a basic onion-tomato gravy and select Indian spices. Serve it with basmati rice and Indian bread for the full feel.
Ingredients
- 2 cups soaked chickpeas (read notes below)
- 2 cups water (for pressure cooking chickpeas extra as required to adjust gravy consistency)
- Salt to taste
For the gravy
- 3 onions medium size, finely chopped
- 3 tomatoes medium size, pureed
- 2 green chillies
- 6-7 garlic cloves
- 1 tbsp ginger paste
- 2 tbsp oil (use vegetable oil or any neutral oil)
- 2 bay leaves
- Cinnamon stick
- 2 tsp garam masala powder
- 1 tsp turmeric powder or haldi powder
- 1 tsp coriander powder or dhania powder
- 1 tsp jeera powder or cumin powder
- 1 tsp Kashmiri red chilli powder
- 1 tbsp finely chopped coriander leaves (for garnish while serving)
Method
- Pressure cook 2 cups of overnight soaked chickpeas with 4 cups of water. Add salt while pressure cooking so the chickpeas don’t taste bland. After pressure cooking, drain the water and keep aside. This will be used to adjust the gravy consistency. Do not discard.
- Prep the ingredients while the chickpeas are pressure cooking. Finely chop the onions, Puree the tomatoes and mince ginger paste, garlic cloves, and green chilies in the mixer grinder, and set aside.
- Heat a pan or thick-bottom kadhai, add oil and whole spices (bay leaf, cinnamon sticks).
- Now add the minced ginger-garlic-green chilies paste and saute well until there is no raw smell.
- Now add the chopped onions and cook them on low heat until they are brown in color.
- Add the tomato puree and the spices (coriander powder, turmeric powder, jeera powder, red chili powder and garam masala)
- Cook this mixture (bhuno) well until there is no raw smell of the tomatoes or the spices. It should be dry and leave some oil on the sides
- Once the gravy base has cooked well. Add the cooked chickpeas.
- With the back of your spoon, mash some chickpeas lightly (this makes the gravy thicker)
- Once the masala has coated the chickpeas, add the reserved chickpeas water along with some salt to taste. Adjust water consistency by adding some more water and let the chana masala simmer for at least 15 minutes on low heat (covered with a lid)
- This helps the masala to penetrate the chickpeas and a thick, luscious gravy forms. Once you notice the gravy thickens, switch off, add some coriander leaves and serve hot.
Vegan enchiladas
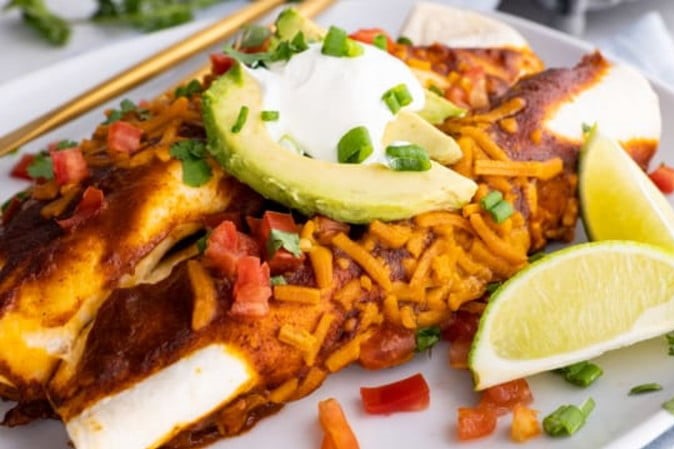
( From Jessica In The Kitchen)
Vegan enchiladas are a delicious and easy weeknight recipe. Made with black beans and sweet potatoes, these meatless enchiladas are healthy, and they’ll fill you right up, and you won’t even miss the meat.
Ingredients
- 2 tbsp coconut oil
- 1 medium sweet potato peeled and diced
- 1/2 large purple onion sliced or diced
- 1/2 tsp ground black pepper
- 1/2 tsp sea salt
- 2 tbsp water
- 3 cloves garlic minced
- 1/2 tsp cumin
- 1 tsp chili powder
- 3/4 to 1 cup cooked black beans drained
- 1 3/4 cups vegan mozzarella shreds
- 6-8 tortillas
- 2 cups enchilada sauce
- 1/4 avocado chopped (for garnish)
- 1 small Roma tomato chopped (for garnish)
- Cilantro (for garnish)
- Vegan sour cream (for garnish)
Method
- Preheat oven to 350 degrees Fahrenheit. Prepare a 13-by-9-inch casserole dish by greasing and set aside.
- In a skillet over medium heat, heat the coconut oil. Add the onion and sweet potatoes in the oil and coat. Sprinkle the ground black pepper and sea salt over the mixture to combine.
- Add the water. Cover the pot and cook until potatoes are crispy on the outside but cooked through on the inside, about 8 minutes, stirring often so that the onions don’t burn.
- Add the garlic, cumin and chili powder and stir to combine with the sweet potato and onions.
- Add the black beans. Lower heat to medium and cook for 3-5 minutes. Stir once more.
- To prevent soggy enchiladas, you can optionally fry the tortillas in a bit of hot oil (about 1/4 cup oil) for a few seconds on each side, then dip them in sauce and set them aside. Then continue with the rest of the recipe.
- To assemble enchiladas, scoop the sweet potato black bean mixture evenly among the tortillas. Top with a tablespoon of cheese and enchilada sauce each and roll together tightly.
- Pour 3/4 cup enchilada sauce on the bottom of the casserole dish. Add the rolled tortillas side by side to pack the casserole dish. Pour the rest of the enchilada sauce on top and the rest of the cheese.
- Bake for 20 to 25 minutes in the oven. Remove and allow to cool slightly for about 2 minutes.
- Garnish chopped tomatoes, avocados, enchiladas sauce, and green onions and serve immediately.
Steak cobb salad
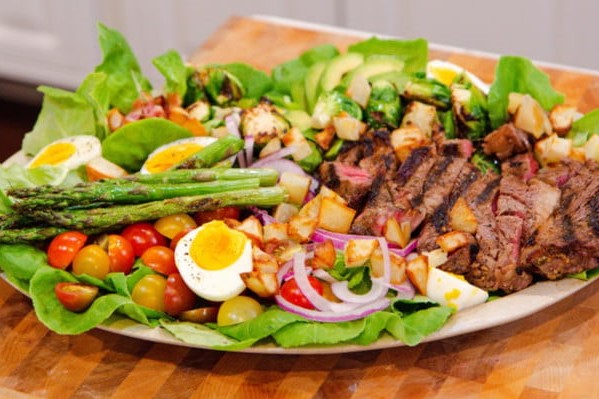
(From The Today Show)
This easy steak cobb salad is just as healthy as it is delicious! Loaded with juicy sliced steak, bacon, tomatoes, avocados, and hard-boiled eggs, and more veggies and then served with a creamy dressing. Any steak will work with this marinade; the vinegar helps tenderize it, so even a less fancy piece of steak will taste amazing
Ingredients
For the steak
- 3 tbsp low-sodium soy sauce
- 1 tbsp Worcestershire sauce
- 1 tbsp olive oil
- 1 tbsp white vinegar
- 1 tbsp salt-free steak seasoning
- A few cloves garlic, smashed, peeled, and roughly chopped
- 1/4small onion, sliced
- Salt and freshly ground black pepper to taste
- 1 (1 1/2-pound) boneless rib-eye steak
For the dressing
- 2/3 cup mayo
- 2 anchovy filets
- 2 cloves garlic
- 2 tbsp olive oil
- 2 scallions
- 1 cup loosely packed parsley
- 1/4 cup loosely packed tarragon
- 2 tbsp lemon juice
- Salt to taste
For the salad:
- Bibb lettuce
- Cherry tomatoes, halved
- Sliced red onion
- Cooked bacon, chopped
- Sliced avocado
- Soft-boiled eggs
- Grilled asparagus
- Grilled brussels sprouts
- Crumbled blue cheese
Method
For the dressing
- Add all the dressing ingredients to a food processor and blend until smooth, cover and refrigerate for a few hours before serving.
- In a container just big enough to hold the steak, add all the ingredients for the marinade, mix to combine, nestle your steak right in, cover, pop it in the fridge, and marinate for about 6 hours, making sure to flip the steak halfway through.
- Preheat a grill to high heat.
- Allow the steak to come to room temperature for about 15 minutes before you cook it. Once the grill is hot, remove the steak from the marinade, pat off some of the excess marinade, and place it on the grill.
- Cook the steak for about 4-5 minutes on each side, or until it reaches your desired temperature (I take mine off the grill when it reaches 130 degrees Fahrenheit), then cover and let it rest for 10 minutes before carving.
- Assemble your salad and top with the thinly sliced steak and dressing.
Mediterranean sardine pasta
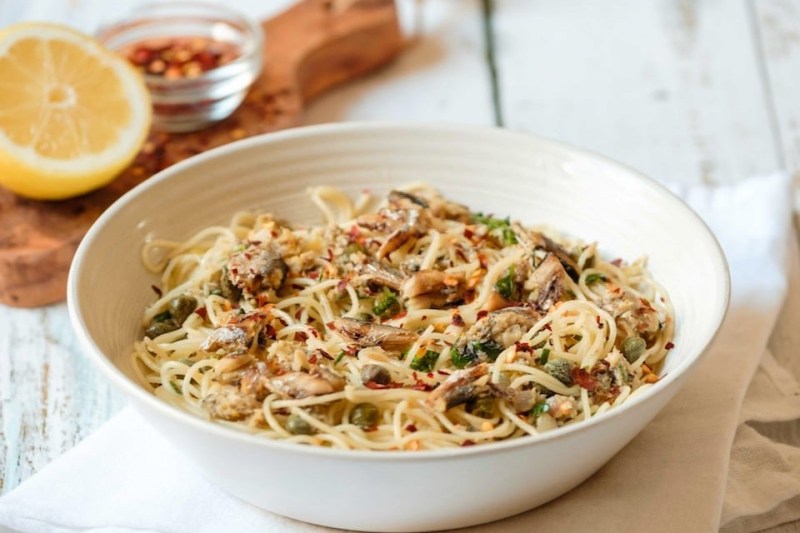
(From Tori Avery)
In this healthy recipe, pasta plays host to a bounty of coastal Mediterranean flavors. Sardines, fresh lemon juice, capers, chili flakes, and olive oil combine to create a flavorful pasta dish. Most of the ingredients are probably already in your pantry or fridge. The result is a light yet filling, nourishing entrée.
Ingredients
- 8 oz angel hair (capellini) or spaghetti pasta
- 6 tbsp extra virgin olive oil
- 1/4 cup shallots minced
- 2 tsp lemon zest
- 1/2 tsp crushed red pepper flakes spicy (use more or less to taste)
- 1/2 tsp salt or more to taste
- 1 package Season brand sardines in pure olive oil, drained 4.375 oz
- 3 tbsp capers rinsed
- 5 tbsp lemon juice or more to taste
- 3 tbsp fresh parsley or basil chopped
Method
- Set a large pot of water over high heat to boil (this will be your pasta cooking water). Meanwhile, in a large saute pan or skillet, heat olive oil over medium heat. Once the olive oil is hot, add the shallots, lemon zest, crushed red pepper, and salt. Cook until the shallots are soft and translucent (careful, don’t let them burn!).
- Add the sardines and capers to the pan. Sauté for about 2 minutes until warmed through, breaking up the sardines into smaller pieces as you sauté.
- When the sardines begin to turn golden, slowly stir in the fresh lemon juice. Turn the heat to the lowest setting to keep warm while you cook your pasta.
- When pasta water boils, cook the pasta according to package directions. Drain, reserving a cup of the pasta cooking water.
- Add the cooked pasta and fresh chopped parsley or basil to the pan with the sauce (alternatively, you can put the pasta back in the large pasta pot and pour the sauce over it). Toss pasta to evenly coat with sauce, mixing well with the other ingredients. If the pasta seems too dry, add a little of the reserved pasta cooking water, 1 tbsp at a time, to loosen it a bit. It should not be thick or heavy, and the noodles should be lightly coated with oil.
- Add additional salt, lemon, or chili pepper flakes to taste, if desired. Serve hot.
Mediterranean turkey burgers
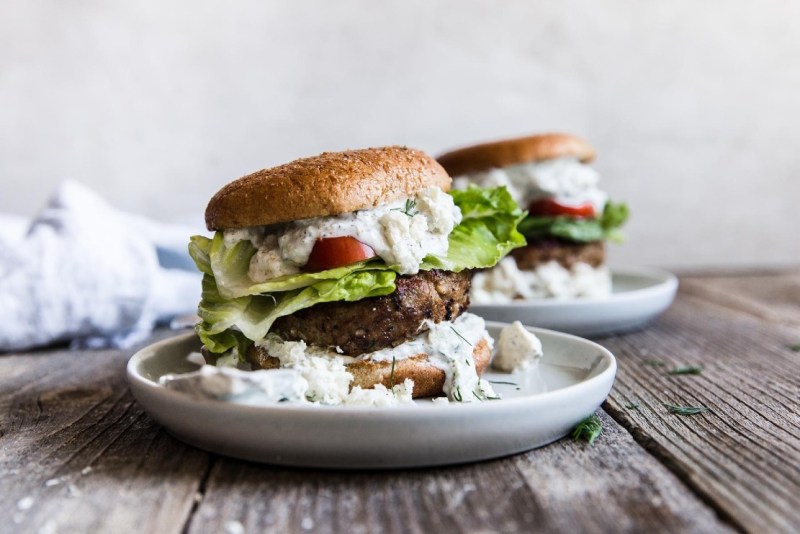
(From The Modern Proper)
Adding spices and herbs to the patties and slathering them in a creamy tzatziki sauce makes for a healthier take on burger night that’s still plenty flavorful. Make extra sauce and thank us later. This easy Mediterranean turkey burger recipe goes beyond the basic — and predictable — meat/cheese/bun burger formula and adds in unexpected flavorful elements, like fresh parsley, feta cheese, and a creamy homemade tzatziki sauce you’ll basically want to put on everything.
Ingredients
For the turkey patties
- 2 pounds ground turkey
- 2 tsp oregano
- 4 garlic cloves, minced
- 1 small onion, grated
- 1/4 cup flat leaf parsley, chopped
- 1 tsp cumin
- 1 tsp pepper
- 2 tsp salt
- 2 tbsp olive oil
For the tzatziki sauce
- 1 cup Greek yogurt
- 1/2 English cucumber, grated
- 1 tbsp dried dill or 2 tbsp fresh dill
- 2 tsp za’atar, optional
- 1-2 garlic cloves, minced
- 1/2 tsp salt
- 1/4 tsp pepper
For the burger
- 6 romaine lettuce leaves
- 2 tomatoes, sliced
- 4 oz feta, crumbled
- 6 hamburger buns, toasted
- 1 cup tzatziki sauce
Method
- In a small bowl, combine the ingredients for the tzatziki sauce. Cover and place it in the fridge for 1 hour to allow flavors to meld (optional).
- To make the burger patties, mix the ground turkey, oregano, garlic, onion, parsley, cumin, pepper, and salt in a bowl with your hands until fully combined. Divide the mixture into 6 evenly sized burger patties, slightly larger than the hamburger buns.
- Heat the oil in a large cast iron skillet set over medium heat. Season the outside of the patties with a little sprinkle of salt. Cook the patty for 4-5 minutes on each side. Use a food thermometer to be sure they have reached a safe minimum internal temperature of 165 degrees Fahrenheit.
- To assemble the burgers, layer them with tzatziki sauce, the patty, tomato, lettuce, more tzatziki sauce, and feta.
Green goddess lasagna
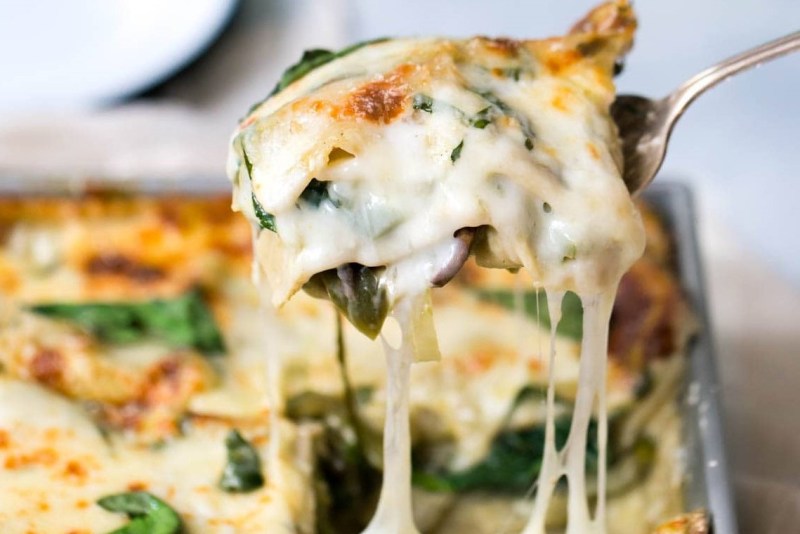
(From Broma Bakery)
This is no regular vegetarian lasagna recipe. This green lasagna has five different vegetables, each bursting with flavor, along with a delicious béchamel sauce, goat cheese, and fresh mozzarella. Other than the cheese, it truly is all veggies and a little bit of whole-wheat lasagna noodles.
Ingredients
- 1 large white onion, sliced thin
- 2 green peppers, sliced thin
- 8 oz white or cremini mushrooms, chopped
- 1 bunch asparagus, chopped into 1-inch pieces
- 2 cloves garlic, minced
- 4 cups fresh spinach
- 3 cups green chili enchilada sauce
- 15 sheets whole wheat lasagna noodles (the no-cook kind)
- 3/4cup fresh basil, julienned
- 4 oz goat cheese, crumbled
- 2 cups part-skim mozzarella cheese
For the bechamel
- 4 tablespoons butter
- 1/4 cup all-purpose flour
- 2 cups skim or low-fat milk
- A dash nutmeg
- Salt and pepper to taste
Method
- In a large saucepan over medium heat, saute onion and green peppers in 2 teaspoons olive oil until tender (about 10 minutes). Remove from heat and place on a large plate, reserving for later.
- In the same pan, sauté mushrooms and asparagus until mushrooms are browned and asparagus is cooked but still slightly hard to the touch (about 10 minutes). Remove from heat and place on a large plate, reserving for later.
- In the same pan, cook the garlic and spinach until the spinach is slightly wilted (about 3 minutes). Remove from heat and place on a large plate, reserving for later.
- Preheat oven to 350 degrees Fahrenheit.
- To make the béchamel, melt butter in a medium pan over medium heat. Whisk in flour and allow to cook for 1 minute. Whisk in milk and nutmeg and season with salt and pepper to taste. Whisk for 5 minutes until the sauce thickens. Remove from heat.
- Place 1/2 cup of the enchilada sauce on the bottom of a 9-by-13-inch baking pan. Line with five sheets of lasagna noodles. Place half of the green peppers/onion mixture, then half of the mushroom/asparagus mixture, then half of the sautéed spinach over the noodles. Drizzle with a third of the béchamel and the basil, then half of the goat cheese and 1/2 cup of the enchilada sauce. Repeat with a second layer of noodles in the same fashion.
- Top everything with the final layer of noodles, then with the remaining béchamel, enchilada sauce, and basil. Top everything with shredded mozzarella cheese.
- Cover with aluminum foil and bake for 30 minutes covered. Remove aluminum foil and bake for an additional 15 minutes, uncovered. Serve!
Herbs de Provence roasted chicken
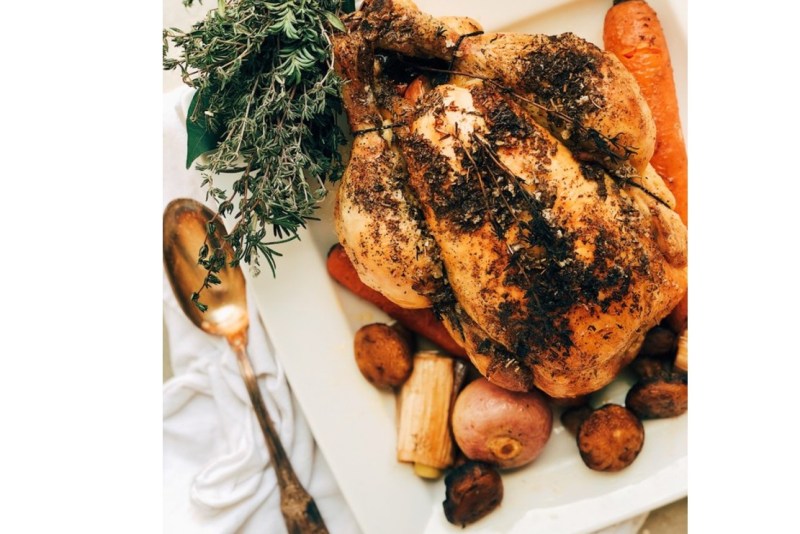
(From lpfedme on Instagram)
Herbs de Provence roasted chicken is a simple but classic way to bring the tastes of the French countryside to your table.
Ingredients
- One 4-pound chicken
- 1/4 cup Herbs De Provence seasoning
- 1 bouquet garni (thyme, bay leaf, and parsley)
- Pot Au Feu vegetables (4 carrots, 2 turnips, 1 leek, 1 onion, mushrooms)
- 6-8 small Monalisa potatoes
- 1/4 cup olive oil or ghee
- Fresh ground black and white pepper
- 1 lemon, halved
- 1 garlic bulb, peeled
- Sea salt
Method
- Preheat oven to 475 degrees Fahrenheit. Remove the giblets – rinse and pat dry chicken. Coat the skin in ghee or oil.
- Mix herbs de Provence seasoning with salt and pepper. Rub seasonings over the skin of the chicken (save some for the veggies). Inside the chicken place the bouquet garni — 1/2 lemon and 1/2 garlic with 1 tablespoon ghee.
- In a roasting pan, place the vegetables, garlic, and potatoes and sprinkle with seasoning. Add chicken. Squeeze the juice of the remaining lemon over everything.
- Roast until chicken is golden brown, about 25-30 minutes. Reduce heat to 350 degrees Fahrenheit and add water to the pan if needed. Roast another 25-45 minutes longer ( or until thigh temp reads 165 degrees Fahrenheit).
- Let it rest for 10 minutes before carving.
General tips when cooking restaurant-quality dinners at home
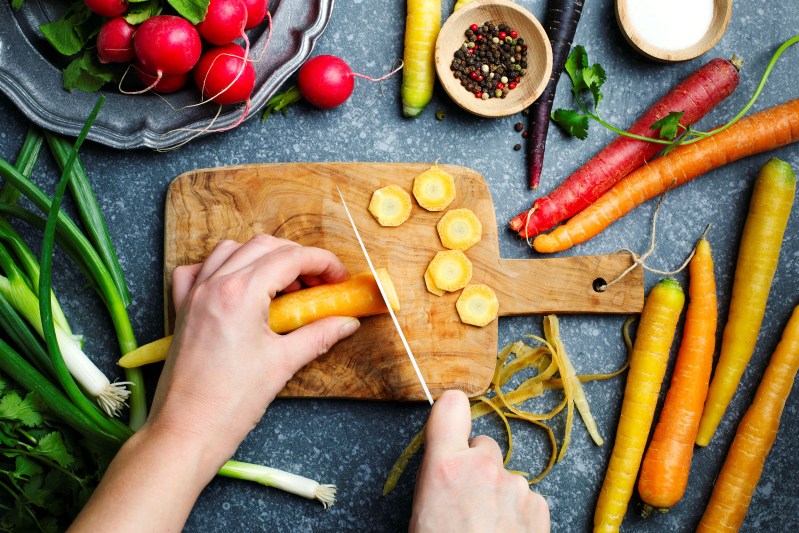
Here are some tips to help you elevate your home cooking to restaurant-worthy status.
- Freshness matters: Prioritize fresh, seasonal produce for peak flavor. Visit your local farmers market or opt for the freshest options at the grocery store.
- Invest in good cuts: When it comes to meat and fish, quality makes a difference. Choose well-marbled cuts of meat and opt for fish with bright, clear eyes and firm flesh.
- Don’t skimp on pantry staples: Use high-quality olive oil, vinegars, salts, and spices. Fresh herbs can add a vibrant touch compared to dried ones.
- Preparation is key: Like professional chefs, prep all your ingredients beforehand. Wash, chop, slice, and measure everything before you start cooking. This allows for smoother cooking and reduces stress.


