It used to be that every good frontiersman had a solid felling axe and a set of woodworking tools. Give a 19th-century ranch hand a summer and he could build you a decent cabin. How many of us today could walk into the woods, pick a tree, and chop it down? If you’re itching to play the part of a lumberjack beyond the flannel and selvedge denim, you’re in the right place. After spending an early Rocky Mountain spring chopping down a few problem trees in our yard and horse pasture, we’ve learned how to fell a tree with an axe like an expert backwoodsman.
Pick Your Gear
You Will Need:
- An Axe
- Safety Glasses
- Gloves
The key tool is obviously your axe. We choose Hults Bruk for everything from a little car camping hatchet to heavier tools. The Atran felling axe ($129) is indispensable when you’re working with large growth and will make quick work of any tree trunk. Once you’ve got your trunk cut to size, the Bjork splitting axe ($119) is an efficient tool that will impress even the most discerning gear junkie.
A good pair of safety glasses is a must-have. Smith’s Elite line are built to exacting military standards for ballistic protection, and our favorites are the Frontman. We also suggest grabbing some gloves. You can go bare handed, but this pair from Carhartt ($19) are a reliable and affordable option for all kinds of work.

Select Your Tree
The most important step is picking a tree. Whether you’re looking for firewood during a camping trip (make sure you have a permit to cut wood on state or federal property) or clearing some problem trees from your own land, you should look for two things: a safe direction for the tree to fall and a good avenue for you to escape (just in case).
Once you’ve found your tree, check to see if it naturally leans a little to one side. Prevailing winds may have made your job easier if it is already primed to fall in one direction. Next, scope out surrounding trees to make sure the tree won’t snag branches on the way down. Finally, before you start chopping, plan your escape route. When a few hundred- or thousand-pound trunk comes down, you want to be well away from the action.
Cut Your Notches
Chopping down a tree comes down to geometry and physics. You want to ensure notches create a pivot point so the tree falls in the direction you want it to. Your first swings of the axe should create a notch in the tree in the direction you want it to fall. Aim between knee and waist high, and penetrate about one-third of the way through the trunk. Ideally, you’ll end up with a triangular cut out with a flat bottom and a 45-degree slope up and out from the center of the trunk. Alternate between straight chops for the lower portion of the triangle (these should be perpendicular to the ground) with a diagonal downswing up higher.
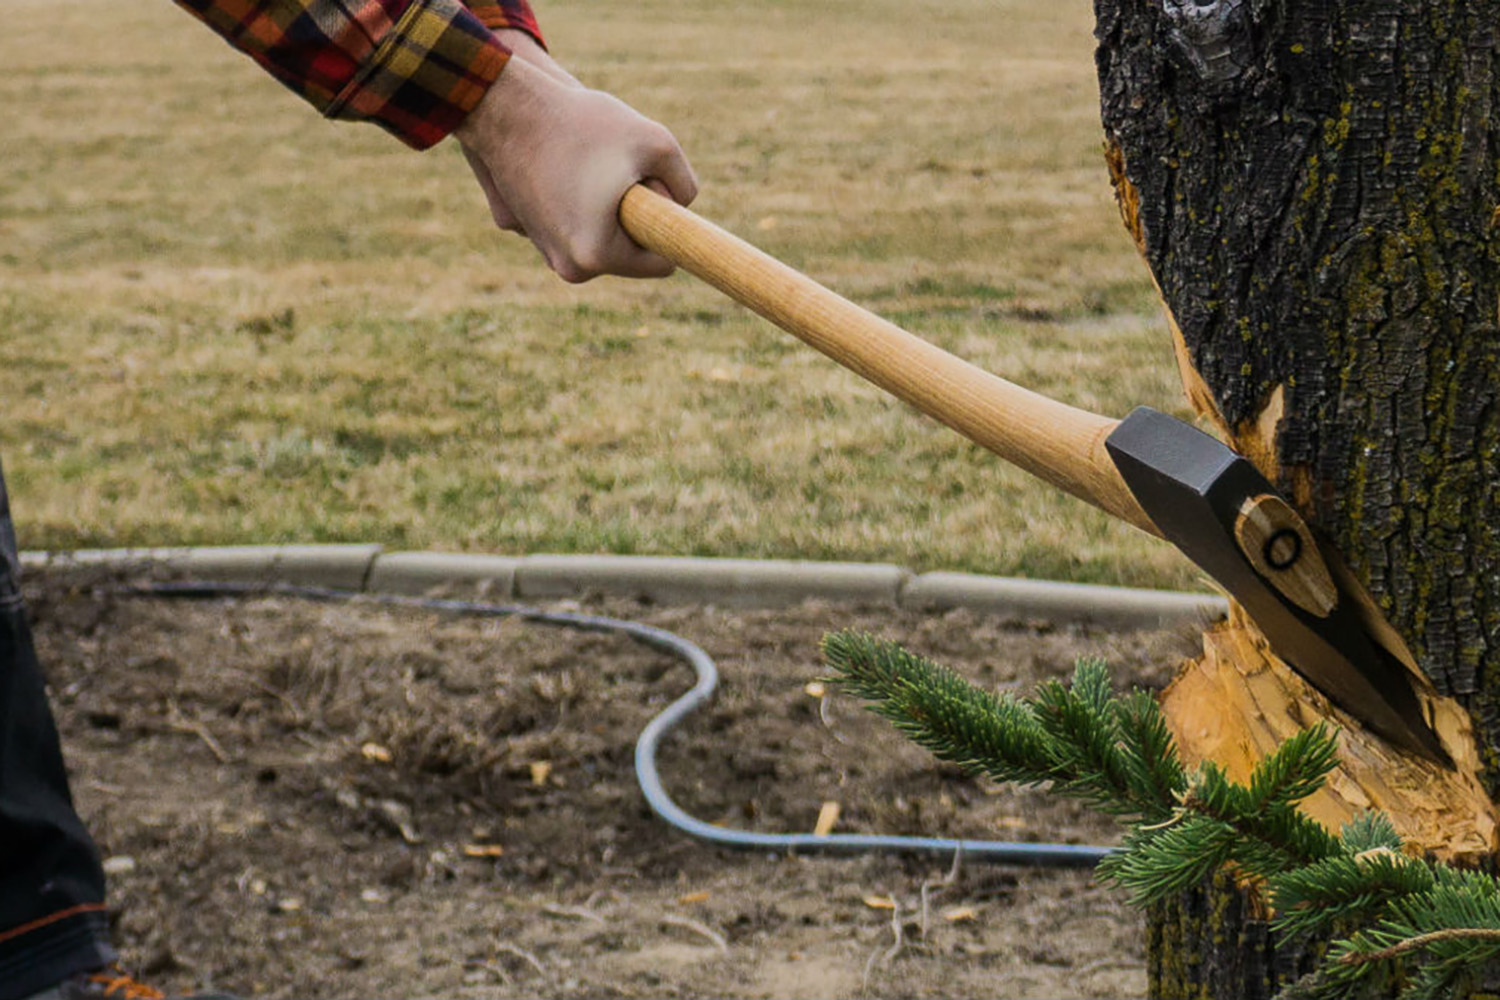
- 1. Photo courtesy of Matthew Parker
- 2. Photo courtesy of Matthew Parker
After you’ve set up your first cut, switch sides. You want your next notch to be about a foot above your first and on the opposite side of the tree. This will create a balanced pivot for the tree to fall on, making sure it ends up in the direction you want it to rather than rolling to one side or the other. Like the first, cut a notch with alternating flat and downswings. Once you are about one-third of the way through the tree, stop.
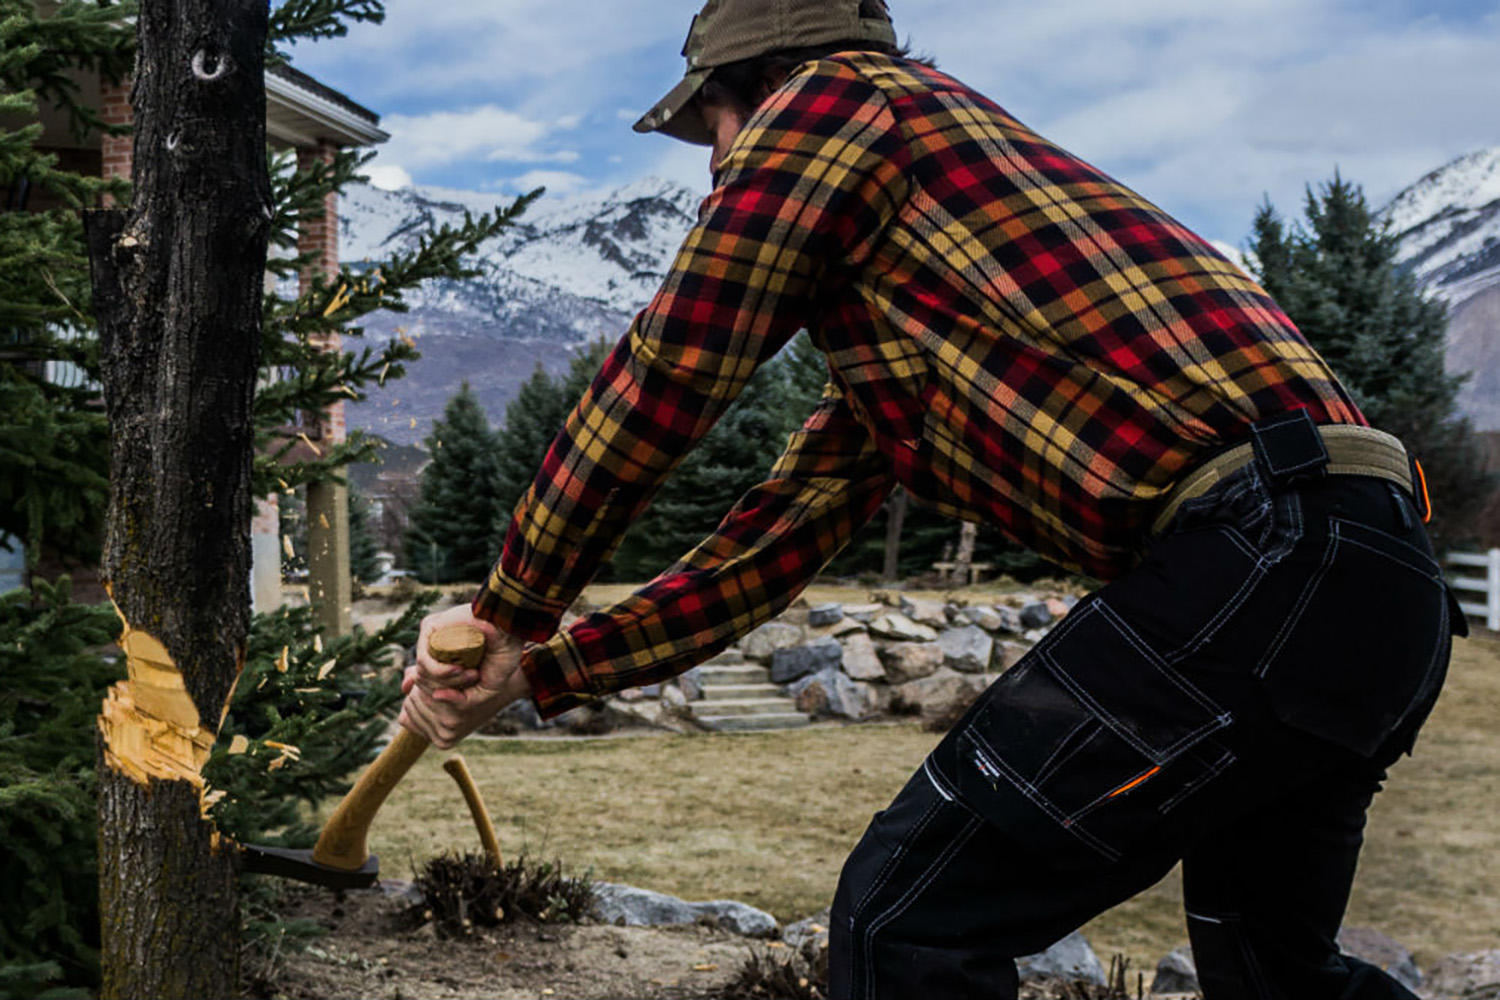
Bring the Tree Down
Now comes the dangerous part. Move back to your original notch, and start to deepen it. Go slower here, because each chop is making that tree a little more unstable. Stick to the same pattern as before, switching between flat swings at the bottom of your notch with steeper downswings from the top. Listen for any cracking, and watch for any swaying or leaning. Some trees will give you a good warning, while others will fall quietly — and very fast. Be ready to step out of the way quickly, and keep moving away from the fall line. If you’ve done your job well, you should be 15 to 20 feet away when the trunk hits the ground, and ready to start trimming it down to split into firewood.
Article first published by Austin Parker in March 2016. Last updated by Nicole Raney in December 2018. Notch images courtesy of Matthew Parker/Green Goat Collective.
Editors' Recommendations
- Camper van vs Class B RV: How to choose which to buy for your outdoor adventures
- A beginner’s guide on how to read a topographic map
- Get ready for outdoor season and learn how to build a fire pit in your backyard
- How Vail Resorts is hoping to improve your ski season using AI
- This man fell overboard, and wearing a watch helped save his life