Drip, French press, espresso, Americano, latte, cold brew, or cappuccino? From the lightest breakfast blend to the darkest Italian roast, we want you to break the chains of corporate coffee and start brewing your own much more delicious cup of brew.
We sat down with our friends at Rose City Coffee Company in Sellwood, Oregon, for a conversation on roasting, brewing, and staying caffeinated. Here’s what you need to know about how to make the perfect cup of coffee, examining each critical step in the process.
How to make the perfect cup of coffee

Several important components are involved in making the perfect cup of coffee, from the beans themselves to the type of roast used.
The coffee beans
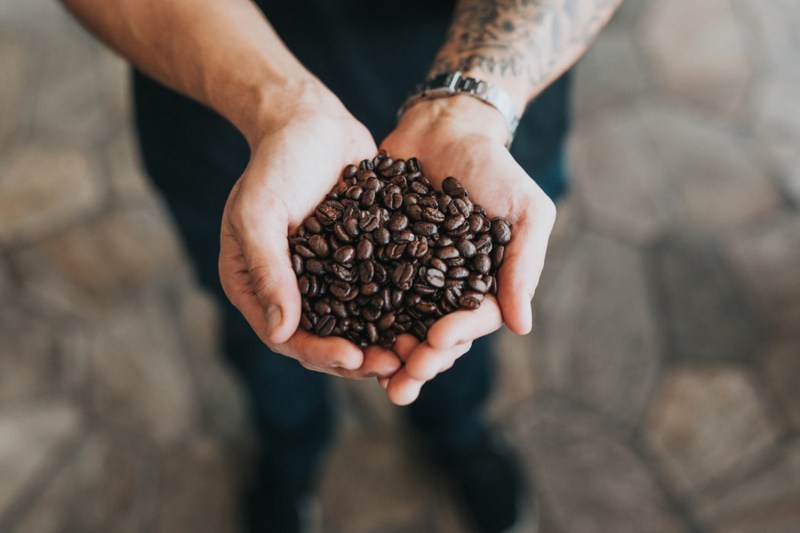
No matter what part of the process you’re considering, one of the keys to the perfect cup of coffee is freshness at every step. Skip the rows of coffee bags on the shelf and instead find a local roaster that lets you see the beans, ask questions, and get scoops of the perfect roast.
Steven Morrison, formerly of Rose City Coffee, recommends a single-source bean if you can find it. Knowing your beans are all from the same region will give you a more consistent flavor and aroma and help you start to discern the difference between roasts and varieties.
The roast

Unroasted or green coffee beans arrive at the roaster and must be dried and heated before they can be used for coffee. The roast directly affects the flavor, aromas, textures, and even caffeine content of the coffee it produces. Like finding a local brewery you like, there are many roasters, and it’s essential to find one that prepares coffee the way you like it. We want Rose City Coffee Company because it roasts in small batches and uses single-source beans, pairing the proper origin with the right roast and blend, and they roast every day, so it’s always fresh.
Freshness is a part of the process here, too, since you want to use your beans within a few days, 72 hours or so, of exposing them to air. You might not notice it if you can’t see the grounds while you make the coffee, but when hot water is first introduced to the grounds, you will get a bloom. The bloom is just what it sounds like a swelling of grounds and foam that reacts to the oils and particulate matter, which dries out with time. The best part of brewing a nice cup of coffee is when the bloom expands into a beautiful marbled foam, letting forth a burst of aroma and flavor that you can’t help but hold your nose over.
The grind

Using a coffee grinder will ensure fresh, quality grounds. You can ask any coffee enthusiast, and they’ll all tell you that a burr grinder is the only way to go from beans to grounds. While you can get a standard blade grinder for less than money than $20, you’ll find that the grind is not as consistent as you want for a nice cup, and you also won’t have much control over how fine the end product is. If you don’t mind spending a few minutes doing it, you can use a hand burr grinder.
It’s important to remember that freshness is key. Grinding beans with a burr grinder exposes as much surface area as possible for more excellent saturation of the product, but this is a double-edged sword since the grounds will dry out faster due to greater exposure to air. You want to grind only as much as you need and only grind right before you’re ready to brew. You’ll get a much fresher taste with a more fragrant bloom.
The brew

There are so many different methods for brewing coffee that it’ll make your head spin faster than after a triple latte. Your brewing method is largely based on what you want from your coffee. Generally, two factors contribute to the bitter taste that most people associate with coffee: the first is using water that is too hot, which will cause the coffee to burn without extracting the oils and flavors, and the second is letting the coffee sit in the water for too long, which will cause a bitter taste due to over-extraction of those same oils. We’ll look at two different brewing methods that produce clean, strong coffee that will challenge how you think about your morning.
If you’re all about the perfect pour and have a stopwatch and gram scale handy, then a pour-over is the classic option. There’s a challenge to it, a tangibility that many people find very appealing, and with a bit of work, it will turn your perfect cup into muscle memory. The is an evolution of the drip coffeemaker that looks modern but was created in 1941 to create a glass coffeemaker that wouldn’t impart any of the material flavors into the coffee. The device is still in heavy use today and owes the high quality of its coffee to a number of factors, including the specially designed filters and the wider hole so the beans don’t soak for as long.
The French press method is another tried-and-true method for brewing delicious coffee, but has drawbacks. While some people prefer the grittier mouthfeel of French press coffee and the heavy taste you get from a long extraction, those aren’t always appealing to us first thing in the morning.
AeroPress

When it comes to precise control over your coffee, there’s no beating the pour-over, but it has a learning curve before you can start pouring a perfect cup. Among the advantages of AeroPress is the ability to push the ideal amount of water through your coffee in a precise amount of time, limiting the coffee’s exposure to the water.
It’s surprisingly easy to use but leaves much room to learn, as evidenced by the World AeroPress Championship, a tournament series designed to find the best recipe for the perfect pour. The tournament results are a great place to find timings and measurements to brew different strengths and varieties of coffee. Still, one of our favorites is super easy, and its creator, Jeremy Moore of , took home the gold with it at the 2014 United States AeroPress Championships.
While some of the recipes involve specific amounts of stirs and carefully measured and sifted coffee, Moore’s relies on the bean’s natural flavors and the clean taste the provides. The recipe included in your AeroPress instructions will work well, but if you want to impress the stingiest of your coffee-drinking friends with a top-notch cup, use Moore’s method, courtesy of the U.S. AeroPress Championships.
AeroPress method

- Rinse the filter with hot water to remove any paper taste.
- Add 17 grams of fine to medium-ground coffee.
- Slowly pour 260 grams of 202-degree water over 46 seconds, then give it one stir.
- Set the plunger in and wait another 47 seconds, then plunge for 48 seconds.
The sip

If you followed our AeroPress instructions or have your way of getting there, you’re hopefully staring at a mug with two beautiful shots of dark, fragrant espresso. What you decide to do with that espresso is as important as how you prepared it, but it has much more to do with personal taste than ratios and timing.
The Americano
Unless you’re a fan of straight espresso, the Americano drink is probably the easiest option for freshly brewed coffee. If you boil more water than you need during the AeroPress process, you can simply pour it over your espresso to cut its thickness. How much water comes down to taste, based on how strong you want your coffee and how much cream and sugar you add. If you’re going to up the fanciness a little more, you can slowly pour the espresso shots on top of some hot water to preserve the crema, the creamy foam top created when you brew espresso, for a creamier variation known as a “long black.”
The Americano is also easy to make in an iced variety, simply mixing cold water, espresso, and ice for a cool and refreshing variety of this drink. The Americano is the right blend between strong but not as robust as drinking straight espresso.
The latte
The fancy level of the latte falls somewhere between the Americano and the cappuccino and is prepared in much the same way as the Americano but with steamed milk instead of hot water. Usually, to create steamed milk with foam, you would need an espresso machine with a steam arm, but there’s an easy trick that you can use to make it in your microwave.
Fill up a microwave-safe jar with a lid up to less than halfway with cold milk, put the lid on, and shake until the foam fills the jar. Take the lid off, pop the jar in the microwave for 30 seconds, and you should have rich, creamy milk foam. Hold a spoon at the edge of the jar to slowly add as much milk as you want to the espresso, then spoon some of the foam on top of your drink. The beloved latte, like the Americano, can also be made iced. Try adding a few iced coffee cubes to your iced latte to help keep its strong flavor, even when it melts.
The cappuccino
Impress your friends and loved ones with your ability to pour the perfect cappuccino. This tiny-mugged classic preparation eschews full cups of hot water or milk to preserve the espresso’s taste and consistency. The process is almost the same as the latte, but only pour a little milk in and one healthy dollop of milk foam on top for a beautiful beverage you won’t want to drink.
The macchiato
Making a macchiato not only sounds fancy, but it’s easy to make. This Italian-inspired espresso drink is made with about 3 to 4 ounces total of liquid, made of a shot of espresso and a cup of steamed milk. The ratio of this drink is around 2/3 espresso and 1/3 steamed milk. The porportions are essentially the exact opposite of a latte.
The shot in the dark
Depending on where you are in the country, this drink may also be known as a sledgehammer, a black eye (or red or dead eye), or a black hole. All these names are just ways of pointing out that what you’re about to consume is going to hit you like a brick in the face. The process is simple: Brew yourself a big cup of drip coffee using your normal coffee maker, add cream and sugar to taste, then dump in two shots of espresso. That’s all there is to it — don’t plan on sitting still any time soon.