Thanksgiving is just around the corner. Your pint glass is full of pumpkin beer or a warm, hot chocolate cocktail. You toss on your apron, rub your hands together, and smile. It’s turkey time. Let’s assume this isn’t your first rodeo. By now, you can brine a turkey like a pro. Smoked turkey is yesterday’s news. And you’ve tried all the roasted turkey alternatives the world has to offer. You’re ready for something different. Something next-level: Deep-fried turkey.
Looking for a turkey-cooking technique that’s tastier, faster, and more dangerous? Then, you might want to consider learning how to deep-fry a turkey for your Thanksgiving feast.
How to deep-fry a turkey: The basics

- Gather your supplies and materials. You’ll need a turkey, peanut oil, propane burner, stockpot, frying basket, temperature gauge, meat thermometer, rod, apron, and fire extinguisher.
- Prep the turkey and cooking area by filling the pot with oil, following the directions and guidelines below.
- Fry the turkey carefully to prevent oil spills, grease fires, and injury.
- Remove the turkey, again, without blowing yourself up, burning your house down, or dropping that perfectly cooked turkey on the ground.
- Eat, clean up, and nap.
Warning: If you don’t know already, deep-frying a turkey can be very, very dangerous. You might practice frying smaller items before tackling a turkey or enlist a helper who knows something about deep-frying. Seriously. Improper frying techniques can lead to severe burns and house fires. Don’t be the guy who burns down his neighborhood for a deep-fried turkey.
What you’ll need

Food and liquid
- One 8- to 14-pound turkey (larger turkeys are difficult to deep-fry)
- 3 to 5 gallons of peanut oil
- 3 to 5 gallons of water
- Your favorite seasoning or marinade
Hardware
- 1 propane burner and propane tank
- 1 giant stockpot (at least 30 quarts)
- 1 large frying basket, lift hook, or makeshift metal handle
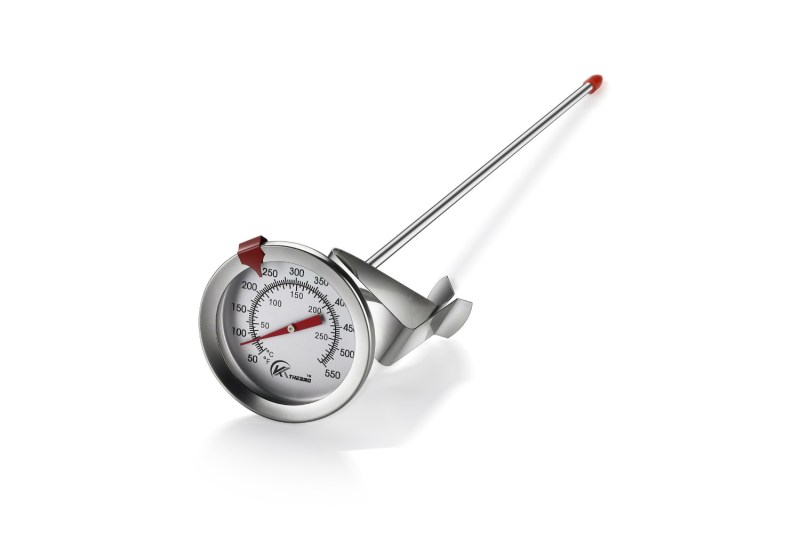
- 1 temperature gauge
- 1 meat thermometer
- 1 large rod for lowering the turkey
Safety gear
- 1 pair of goggles for each cook
- 1 apron for each cook
- 1 pair of gloves for each cook
- 1 fire extinguisher (you never know!)
Preparation

- Important: Soak the turkey in cold water and make sure it is completely thawed.
- Remove the turkey’s giblets (internal organs) and set them aside. While you’re busy frying, you might have someone make them into a tasty gravy. You should also cut off the protruding tail section and the extra neck skin since these will burn off anyway.
- Find a flat surface on which to fry your turkey. Be sure to do it outdoors, far away from anything that could conceivably catch fire. A concrete driveway or patio is a great place. Do not attempt to fry your turkey on a wooden deck. Set up your propane burner with the propane tank as far from the burner as possible.
- Cut small incisions beneath the wings, legs, and neck of the bird. This will allow oil to drain from the turkey after you’ve finished cooking.
- Super important: One common mistake is filling the pot with too much oil. Upon dunking, the turkey displaces the oil, causing it to overflow and ignite, creating a grease fire of epic proportions. You probably don’t want to spend Thanksgiving at your local burn center — follow these steps to ensure you use the right amount of oil. Before you start pouring oil in willy-nilly, you should:
-
- Place the turkey into your stockpot.
- Pour water into the pot until the turkey is covered by an inch of water.
- Remove the turkey from the pot.
- Score the waterline with a knife or mark it with a food-safe pencil or marker—this will be your oil fill line.
- The fill line should be no more than 3 inches from the top of the pot. Try to aim for 5 or more inches below the rim. Any higher than that and the oil is liable to boil over and ignite.
-
- Dump the water and thoroughly clean and dry the stockpot—any remaining moisture will seriously disagree with the oil.
- It’s also important to dry the turkey with paper towels. Once it’s as dry as possible, put it in the fridge for about 20 minutes so it can dry out even more. Remember: oil + water = apocalypse!
- Apply your favorite seasoning or marinade to the turkey. You might rub herbs into the skin or use a marinade injector to get the flavor deep into the meat.
- Pour peanut oil into the stockpot until it reaches your predetermined fill line. Ignite the burner and attach the temperature gauge so the tip is beneath the oil’s surface. Allow the oil to heat up to 375 degrees Fahrenheit. Incredibly important: Never, ever leave your oil unattended while cooking.
Frying the turkey

- Ensure the turkey is properly secured in the fry basket or lift hook. The turkey’s head — or what used to be its head — should be facing down. Once the oil reaches 375 degrees Fahrenheit, have an assistant help you lower the turkey into the oil.
- Put on your gloves, goggles, and apron.
- Stupendously important: Turn the propane burner off before you dunk the turkey. This will eliminate the possibility of a fire caused by overflowing oil.
- Attach your fry basket or lift hook to a hockey stick or another strong stick or rod.
- Position the turkey in the center of the rod. Have your assistant hold one side of the rod while you grab the other.
- Lower the turkey into oil very slowly to prevent splashing.
- Set your timer for about 3.5 minutes times your bird’s weight in pounds. For example, a 10-pound turkey should cook for 35 minutes.
- After you add the turkey, the oil temperature will drop about 50 degrees Fahrenheit. Turn the propane burner back on high.
- Watch the temperature gauge carefully. Once the oil temperature climbs back to 375 degrees Fahrenheit, turn the heat down so the temperature levels out at 375 degrees Fahrenheit.
- Do not leave your turkey unattended. Watch it constantly during the cooking process to make sure nothing goes awry. Enjoy a beer during this process (but only one!).
- As the end of the cooking time draws near, pull the turkey out just enough so you can stick a meat thermometer into the thickest part of the thigh. If the meat thermometer reads 165 degrees Fahrenheit, you’re done! If not, put the turkey back in and cook for a few more minutes until that temperature has been achieved. Once that happens, you’re good to go!
Removing the turkey

- You’re ready to take out the turkey once the thigh temperature reaches 165 degrees Fahrenheit.
- Turn off the burner. Seriously, please remember to turn it off.
- Remove the turkey with the same rod (and preferably, assistant) you used before.
- Let the turkey linger over the pot for a minute so the oil can drain out (remember those slits you made?).
- Place the turkey onto a platter with several paper towels.
- Let the turkey sit for about 20 minutes after removing it from the oil, then carve it up.
- You did it! Enjoy your delicious turkey, and be thankful that your face wasn’t burned off.
- Aftermath: After belts are unfastened, dishes are stacked high, and leftovers are stowed in the fridge, it’s time to face reality. You should let the oil cool overnight, then dispose of it or store it for later. If you filter and store your oil properly, you can use it to deep-fry other tasty foods almost indefinitely.
Get the gear
Here’s all you need to deep-fry your bird this year.
Outdoor gas propane cooker

Frying basket

Long-stem fry thermometer

Deep-fry meat thermometer
Peanut oil

Kitchen fire extinguisher

How to spice up a deep-fried turkey

Do you want to jazz up your deep-fried turkey with a little flavor and step outside the box on Thanksgiving? Here are some ideas to consider:
- Use a flavorful rub. Many spice rubs are available, and some popular ingredients include paprika, chili powder, garlic powder, onion powder, black pepper, and cayenne pepper.
- Brine the turkey. Brining the turkey before frying it will help to keep it moist and flavorful. There are several brine recipes you can turn to or create your own. Some ingredients include salt, sugar, herbs, and spices.
- Inject the turkey with a marinade. Injecting the turkey with a marinade is a great way to add flavor and moisture to the meat. Some ingredients to use include fruit juices, vinegar, herbs, and spices.
- Add spices to the oil. Spices you could add to the oil include bay leaves, cloves, and peppercorns.
Southern deep-fried turkey

Now that we’ve walked you through all of the safety tips for deep-frying a turkey (and please take those tips seriously, it’s not worth getting hurt on Thanksgiving over a turkey!), we’re going to give you a recipe to try if you decide to attempt deep-frying this Thanksgiving. This recipe from the National Turkey Federation (and if anyone’s going to know about turkey, it’s them), puts a southern-style twist on your Thanksgiving table.
Ingredients:
- 10- to 12-pound turkey, non-self-basting
- 2/3 cup vinaigrette dressing
- 1/3 cup dry sherry
- 2 teaspoons lemon pepper seasoning
- 1 teaspoon garlic powder
- 1 teaspoon onion powder
- 1 teaspoon cayenne pepper
- Peanut oil
Method:
- Remove the giblets and neck and pat dry thoroughly with paper towels. Dry both inside and outside the turkey. To allow for good oil circulation throughout the cavity, do not truss or tie the legs together.
- In a medium bowl, mix the vinaigrette, dry sherry, and seasonings. Strain the marinade.
- Place the marinade in an injection syringe and inject it into the turkey breast, thighs, and legs.
- Place the bird in a large food-safe plastic bag, refrigerate, and marinate for at least 2 hours. Turn the bag and massage the turkey from time to time.
- Drain the marinade from the turkey and discard it. Place the turkey, neck down, in the fryer basket or on a rack.
- Place the outdoor gas burner on a level dirt or grassy area.
- Add oil to a 7- to 10-gallon pot with a basket or rack. At the medium-high setting, heat the oil to 375 degrees Fahrenheit (depending on the amount of oil, outside temperature, and wind conditions; this should take about 40+ minutes).
- Slowly lower the turkey into the hot oil when the oil temperature registers 375 degrees Fahrenheit on a deep-fry thermometer. The level of the oil will rise due to the frothing caused by the turkey’s moisture but will stabilize in about a minute. (Safety tips: To prevent burns from the splattering oil, wear oven mitts/gloves, long sleeves, heavy shoes, and even safety glasses. It is wise to have two people lower and raise the turkey.)
- Immediately check the oil temperature and increase the flame so it is maintained at 350 degrees Fahrenheit. Oil will seep into the turkey if the temperature drops to 340 degrees Fahrenheit or below.
- Fry for about 3-4 minutes per pound, or about 35-42 minutes for a 10- to 12-pound turkey. Stay with the cooker, as the heat must be regulated to maintain 350 degrees Fahrenheit.
- When cooked to 165 degrees Fahrenheit, carefully remove the turkey from the hot oil and allow it to drain for a few minutes.
- Remove the turkey from the rack and place it on a serving platter. Let it rest for 20 minutes before carving.