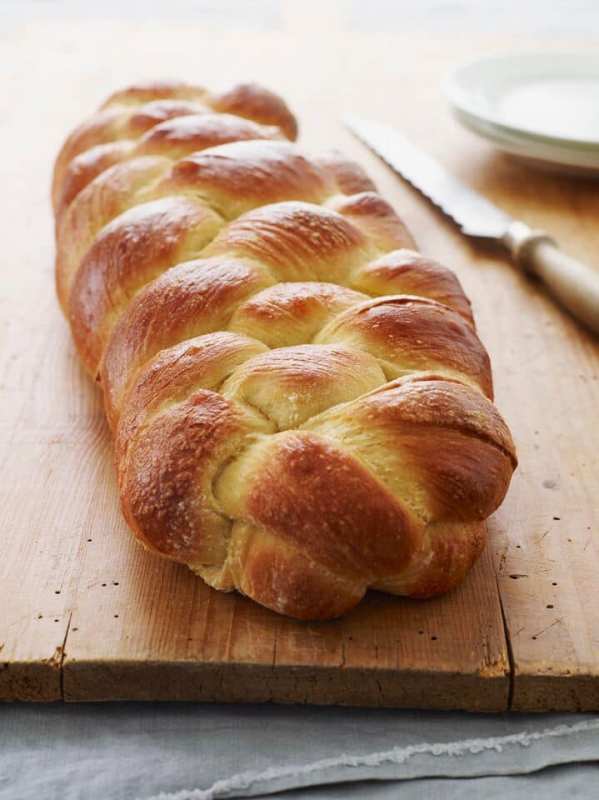
While Jewish cuisine offers an abundance of our favorites — bagels and lox, matzo ball soup, knishes, and babka (to name just a few), one of the most well-known, iconic, and symbolic foods is challah bread.
Challah is a celebratory yeast bread, enriched with eggs and oil, and braided into a stunningly beautiful loaf. It is enjoyed on most Jewish holidays and has many possible representations. One is that the braids, resembling intertwined arms in an embrace, represent love. Another interpretation is that the three strands of the braid represent truth, peace, and justice. There are many takes on this, each deeply meaningful.
One would think that something so important and beautiful, not to mention absolutely delicious, would be terribly complex and complicated to create. The good news is that you can make your own challah at home quite easily. If you’re worried about the design, it’s truly not as intimidating as it looks. If you’ve ever braided hair (or even if you haven’t), you should get the hang of it pretty quickly.
Challah recipe
(From Once Upon a Chef)
This challah recipe truly creates a delicious and gorgeously impressive challah. If you’re of the Jewish faith, make it to serve at your own Hanukkah celebration this year. If not, make and enjoy it simply as a delicious loaf of bread, and an acknowledgment and appreciation of a wonderful culture.
Ingredients:
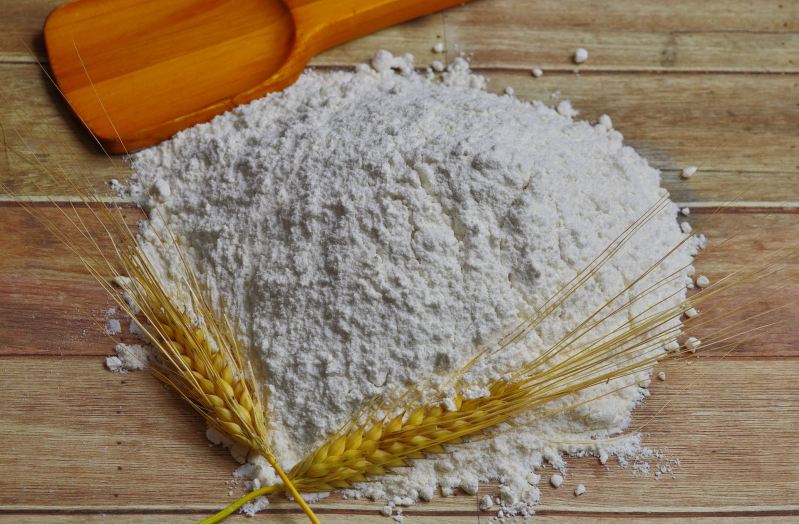
- 4 1/4 cups all-purpose flour, plus more for dusting
- 1 tablespoon rapid-rise yeast
- 2 teaspoons salt
- 3/4 cup lukewarm water
- 6 tablespoons vegetable oil
- 6 tablespoons honey
- 3 eggs, at room temperature
- 1 egg yolk, at room temperature
Method:
-
In a stand mixer bowl, combine the flour, yeast, and salt. Mix with the dough hook attachment on a low speed for 30 seconds to combine.
-
In a separate bowl, whisk together the lukewarm water, oil, honey, 2 of the eggs, and the egg yolk.
-
Add honey mixture to the dry ingredients and knead on medium-low speed until dough forms and becomes sticky. This should take about 5 to 7 minutes.
- Coat hands in flour and transfer the dough to a lightly floured work surface. Dust the top of the dough with flour and knead briefly into a smooth ball.
- Transfer dough into a large bowl that has been greased with cooking spray, flipping once so all the dough is oiled. Cover the bowl with plastic wrap, and allow it to rise in a warm space until it has doubled in size. This should take from 2 to 3 hours.
- Transfer the dough onto a lightly floured surface and dust with flour to deflate. Cut the dough into four even 9-ounce pieces and then shape the pieces into ropes about 20 inches long. Lay the ropes side by side vertically. Pinch them tightly together at the top, and then fan them out.
- Begin by taking the strand farthest to the right and weave it toward the left through the other strands using this pattern: over, under, over. Repeat this pattern, always starting with the strand farthest to the right, until the whole loaf is braided. Tuck the ends under to give the loaf to complete braid.
- Carefully transfer the loaf to a 13-by-18-inch baking sheet, lined with parchment. Cover gently with plastic wrap and let it rise in a warm space until it has expanded about 1.5 times in size. This will take 1 to 2 hours. Nearing the end of this time, preheat the oven to 350 degrees Fahrenheit and place the oven rack in the middle position.
- In a small bowl, beat the remaining egg and brush over the risen dough.
- Stack the baking sheet onto another baking sheet before placing it in the oven; this will prevent the challah’s bottom crust from overcooking.
- Bake for 25 to 35 minutes, until the crust is a deep golden color and the internal temperature is between 190 degrees Fahrenheit and 200 degrees Fahrenheit on an instant-read thermometer.
- Remove the bread from the oven and place it on a rack to cool before serving.
Notes on making challah
- The recipe calls for instant or rapid-rise yeast. This is different from active dry yeast, which you may have in your pantry. Rapid-rise yeast has smaller granules that dissolve, and therefore rise, more quickly than active dry yeast. You may see rapid-rise yeast labeled and sold as “a Bread Machine Yeast.” Rest assured, this is the same product.
- Be sure to bring your eggs to room temperature. Because challah is a slow-rising dough, the chill from eggs can really hinder the rising process.
- The bottom of challah can burn quite easily if steps are not taken to prevent it. We like the double baking sheet method mentioned in the recipe above, but silicone mats are good for this as well, if you have one.
- While this is a very sticky dough that requires flour to handle properly, be careful not to use more than necessary. Too much added flour can create an unappetizingly tough and dense challah.
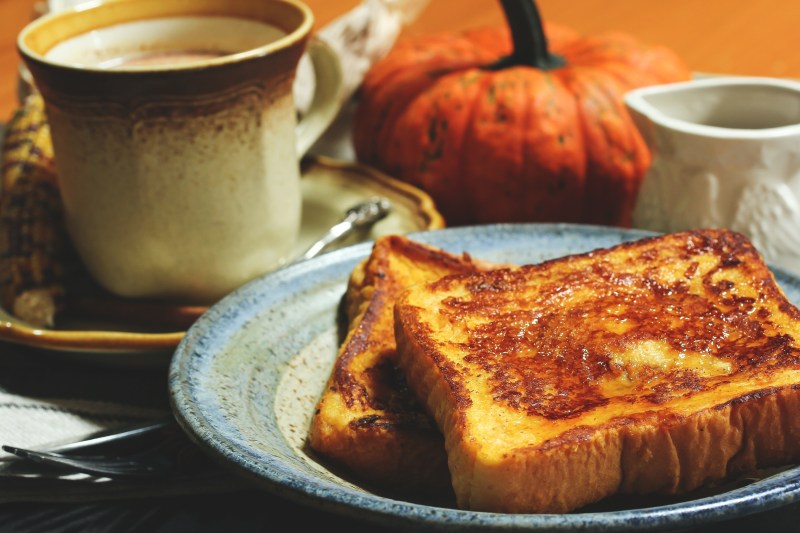
Use leftover challah to make French toast
(From thekitchn)
If you’ve got some leftover challah, don’t worry, we’ve got the perfect use for it. Save it for breakfast to make French toast that everyone will love.
The first piece of advice is to make sure your challah is dry, which will prevent the bread from becoming soggy. About 15 minutes in a 300-degree oven will do it. Second, always use full-fat dairy, either milk or cream, as it makes a better custard for the bread. Finally, use butter, not oil, in the cooking pan, which will give the bread more flavor.
Ingredients:
- 1 pound loaf challah bread
- 1 1/2 cups whole milk or heavy cream (or a combination)
- 6 large eggs
- 2 tablespoons maple syrup
- 1 tablespoon vanilla extract
- 1/2 teaspoon ground cinnamon
- 1/4 teaspoon salt
- 2-3 tablespoons unsalted butter
Method:
-
Preheat the oven to 300 degrees Fahrenheit.
-
Using a wire rack on a baking sheet, put the bread in the oven for 15 minutes, making sure to flip the slices halfway through. Remove from the oven and let cool for at least 5 minutes.
-
Put the milk or cream, maple syrup, eggs, vanilla, and cinnamon in a medium bowl and whisk until no streaks of egg are visible. Pour the mixture into a 9-by-13-inch baking dish.
- Add the bread slices, do not overcrowd the baking dish. Soak for 1 to 2 minutes per side, making sure the bread doesn’t soak to the point of falling apart. Return the slices to the wire rack and repeat until all the bread is coated.
- Melt 2 tablespoons of the butter in a large nonstick skillet over medium heat. When the butter is sizzling but not brown, add four of the slices of bread. Cook until the bottoms are golden brown and crispy, 3 to 4 minutes.
- Flip and brown the other side, for about 3 minutes more.
- Add butter to the pan between batches, making sure it doesn’t burn.
- Serve warm with more maple syrup.
Editors' Recommendations
- These are the 7 classic tequila cocktail recipes you need to know
- 9 delicious drink recipes for Cinco de Mayo (that aren’t all margaritas)
- The 11 best grill and smoker recipes to make now
- When lunchtime (or anytime) hunger strikes, these are 13 best sandwich recipes to make
- How to make the Earthquake cocktail in just 4 simple steps


