Some folks love Valentine’s Day, spending the day with your special someone, fully embracing the hearts and flowers of it all. Others take great pride in declaring it a commercial greeting card holiday, and rebelling against the societal pressures set upon them. But no matter how you look at the day, it has one benefit for all: it’s an excuse to make really good desserts. These 10 Valentine’s Day dessert recipes range from entry-level to expert offering sugary bliss to cooks and bakers of any level. They also vary in prep and cook time, so no matter how busy you are you’ll be able to whip one of these up no problem.
These Valentine’s Day desserts would be great after a delicious Valentine’s Day dinner or while watching a Valentine’s Day movie.
Related Guides
- The 12 Best Valentine’s Day Cocktail Recipes to Make
- The Lady-Approved List of Valentine’s Day Gift Ideas for Her
- Unpacking the Fascinating History of Valentine’s Day
Easy Valentine’s Day Dessert Recipes
Dark Chocolate Raspberry Truffles Recipe
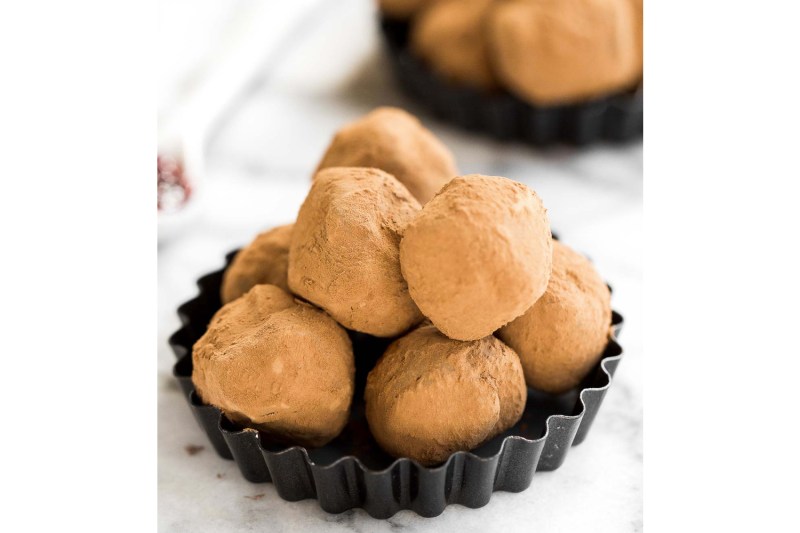
Ahead of Thyme created these melt-in-your-mouth truffles that combine tart raspberry jam with rich dark chocolate for a decadent dessert.
Prep Time: 30 minutes
Total Time: 2 hours 30 minutes
Yield: 18-20 truffles
Ingredients:
- 8 ounces dark chocolate, chips or chopped
- 4 ounces heavy cream
- 2 tablespoons raspberry preserves (jam)
- ½ cup dark chocolate cocoa powder
Method:
- Place chocolate in a medium mixing bowl and set aside.
- Pour heavy cream into a shallow saucepan or cooking pot and heat over medium-high heat until almost boiling. Once you see it begin to steam and form small bubbles on the side, pull it off and immediately pour it over the chocolate.
- Let the mixture sit for 5 minutes, then stir together. The mixture should be extremely smooth, with all the chocolate melted. If needed, microwave the cream and chocolate together in 15-second increments, stirring when finished, until completely smooth.
- Add raspberry preserves/jam and stir to combine. Place uncovered in the refrigerator for 2 hours, or until the chocolate ganache has hardened and is scoopable.
- Line a large half-pan baking sheet or tray with parchment paper. Use a melon baller or a tablespoon to scoop out small portions of the ganache. Use your hands to roll them into 1-inch balls.
- Place on the baking sheet and freeze for 15 minutes.
- Place cocoa powder in a small bowl. Drop each truffle in the cocoa powder and roll until completely coated. Store in an airtight container in the refrigerator until ready to serve.
Chocolate Covered Strawberries Recipe
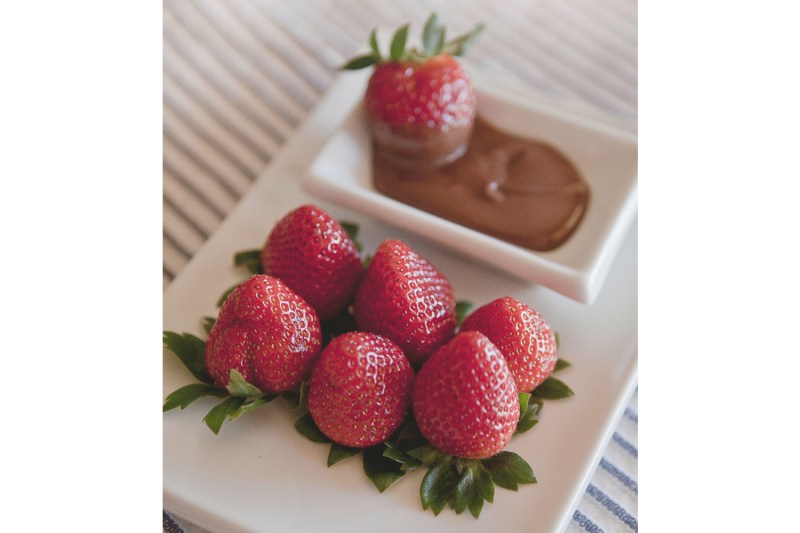
From the Food Network, this is a classic. And thankfully, not that difficult to make.
Prep Time: 10 min
Total Time: 1 hr 5 min
Yield: 1 pound chocolate covered strawberries
Ingredients:
- 6 ounces semisweet chocolate, chopped
- 3 ounces white chocolate, chopped
- 1 pound strawberries with stems (about 20), washed and dried very well
Method:
- Put the semisweet and white chocolates into 2 separate heatproof medium bowls. Fill 2 medium saucepans with a couple of inches of water and bring to a simmer over medium heat. Turn off the heat; set the bowls of chocolate over the water to melt. Stir until smooth. (Alternatively, melt the chocolates in a microwave at half power, for 1 minute, stir and then heat for another minute or until melted.)
- Once the chocolates are melted and smooth, remove from heat. Line a sheet pan with parchment or waxed paper. Holding the strawberry by the stem, dip the fruit into the dark chocolate, lift and twist slightly, letting any excess chocolate fall back into the bowl. Set strawberries on the parchment paper. Repeat with the rest of the strawberries. Dip a fork in the white chocolate and drizzle the white chocolate over the dipped strawberries.
- Set the strawberries aside until the chocolate sets, about 30 minutes.
- After dipping the strawberries, let the dark chocolate set slightly before drizzling on the white chocolate. You can leave them out 30 minutes at room temperature, or speed the process by popping them into the refrigerator for 15 minutes.
Valentine’s Day Cake Recipes
A classic Valentine’s Day cake can be easy and also delicious. Read on to see some of our favorites.
Chocolate Lava Cake Recipe
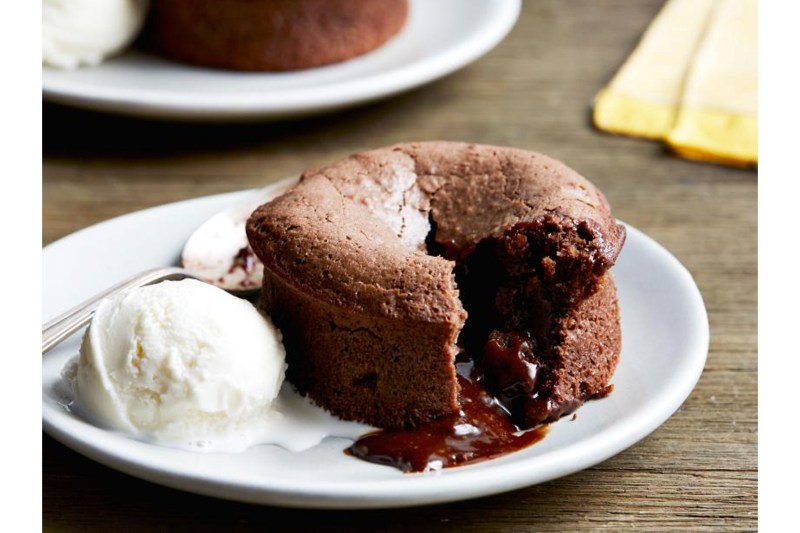
Another Food Network recipe that is quick and tasty. Mix the ingredients, bake, and serve with ice cream.
Prep Time: 10 minutes
Total Time: 20 minutes
Yield: 4 servings
Ingredients:
- Baking spray, for spraying custard cups
- 1 stick butter
- 2 ounces bittersweet chocolate
- 2 ounces semisweet chocolate
- 1 1/4 cups powdered sugar
- 2 whole eggs
- 3 egg yolks
- 1 teaspoon vanilla
- 1/2 cup all-purpose flour
- Vanilla ice cream, for serving
Method:
- Preheat the oven to 425 degrees F. Spray four custard cups with baking spray and place on a baking sheet.
- Microwave the butter, bittersweet chocolate, and semisweet chocolate in a large bowl on high until the butter is melted, about 1 minute. Whisk until the chocolate is also melted. Stir in the sugar until well blended. Whisk in the eggs and egg yolks, then add the vanilla. Stir in the flour.
- Divide the mixture among the custard cups.
- Bake until the sides are firm and the centers are soft, about 13 minutes. Let stand 1 minute. Invert on individual plates while warm and serve with vanilla ice cream.
Broken Heart Chocolate Cake Recipe
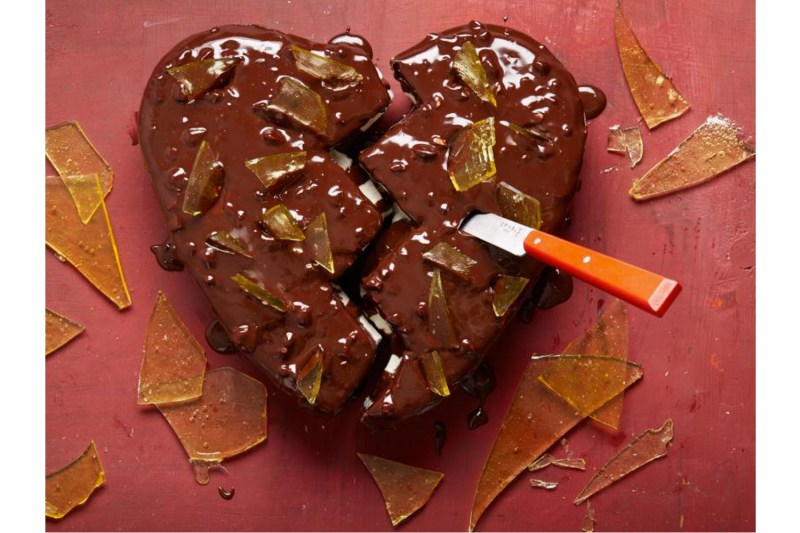
Food Network is really into desserts. If Valentine’s Day isn’t your thing (maybe you just went through a breakup), or your tradition is to rebel against the holiday, or you’ve been invited to an ironic Valentine’s Day party, whatever the situation, this cake is for you. Note that you will need a heart-shaped pan to bake this cake.
Prep Time: 55 minutes
Total Time: 2 hours 30 minutes
Yield: 1 broken-hearted cake
Ingredients:
- Cake:
- Nonstick cooking spray, for greasing the pan
- All-purpose flour, for dusting the pan
- One 15.25-ounce box chocolate cake mix (plus required ingredients)
Sugar Glass:
- 2/3 cup granulated sugar
- 1/4 cup light corn syrup
- 1/4 teaspoon cream of tartar
Frosting:
- One 12-ounce box assorted mixed nuts and chews chocolates (about 24 pieces), such as Russell Stover
- 1/4 cup heavy cream
Whipped Cream:
- 1 1/2 cups heavy cream
- 1/4 cup granulated sugar
Method:
- Special equipment: a 9-inch heart-shaped cake pan
- For the cake: Preheat the oven to 350 degrees F. Spray a 9-inch heart-shaped cake pan with cooking spray and dust with flour, tapping out the excess.
- Prepare the cake batter according to the package directions and pour into the prepared pan. Bake until a toothpick inserted into the center comes out clean, 40 to 45 minutes. Remove to a rack to cool for 10 minutes. Invert the cake pan onto a plate to remove the cake from the pan, then invert back onto the rack to let cool completely.
- For the sugar glass: Line a baking sheet with parchment. Stir together the sugar, corn syrup, and cream of tartar in a small microwave-safe bowl. Heat in the microwave in 2-minute intervals, stirring in between each, until the sugar starts to dissolve and the mixture turns a very light golden, about 4 minutes. Pour the mixture onto the prepared baking sheet and smooth with an offset spatula into a thin rectangle about 9 inches by 7 inches. Refrigerate until hardened completely, about 15 minutes. Use a meat mallet to break the sugar so that it resembles broken glass.
- For the frosting: Melt the chocolates and heavy cream in a small saucepan over medium-low heat, stirring frequently, until smooth. Set aside to cool slightly.
- For the whipped cream: Whip the heavy cream and sugar in a bowl with an electric mixer on medium speed until stiff peaks form.
- Assemble the cake: Once the cake has cooled, use a serrated knife to shave off the top to make it flat (it domes as it bakes). Cut the cake in half horizontally to make 2 even layers, then, keeping the layers stacked, use a paring knife to cut jagged edges in a zigzag formation down the middle of the cake so that you have 2 halves of a broken heart.
- Place the 2 bottom halves on a cake stand or plate so they are separated a little. Spread the whipped cream evenly over the bottom halves. Top with the 2 top halves and drizzle the melted frosting over the top so that it covers the top and drips down the sides of the cake. Decorate with the broken sugar glass and refrigerate until the chocolate has hardened, about 15 minutes.
- Slice and serve.
Tiramisu Recipe

This Tiramisu recipe comes from the New York Times and is a favorite any time of the year. Coffee, cream, cake. What’s not to love?
Prep Time: 25 minutes
Total Time: 1 hour
Yield: 6-8 servings
Ingredients:
- Cream:
- 4 large egg yolks
- ½ cup/100 grams granulated sugar, divided
- ¾ cup heavy cream
- 1 cup/227 grams mascarpone (8 ounces)
- Assembly:
- 1 ¾ cups good espresso or very strong coffee
- 2 tablespoons rum or cognac
- 2 tablespoons unsweetened cocoa powder
- About 24 ladyfingers (from one 7-ounce/200-gram package)
- 1 to 2 ounces bittersweet chocolate, for shaving (optional)
Method:
- Using an electric mixer in a medium bowl, whip together egg yolks and 1/4 cup/50 grams sugar until very pale yellow and about tripled in volume. A slight ribbon should fall from the beaters (or whisk attachment) when lifted from the bowl. Transfer mixture to a large bowl, wiping out the medium bowl used to whip the yolks and set aside
- In the medium bowl, whip cream and remaining 1/4 cup/50 grams sugar until it creates soft-medium peaks. Add mascarpone and continue to whip until it creates a soft, spreadable mixture with medium peaks. Gently fold the mascarpone mixture into the sweetened egg yolks until combined.
- Combine espresso and rum in a shallow bowl and set aside.
- Using a sifter, dust the bottom of a 2-quart baking dish (an 8×8-inch dish or a 9-inch round cake pan would also work here) with 1 tablespoon cocoa powder.
- Working one at a time, quickly dip each ladyfinger into the espresso mixture — they are quite porous and will fall apart if left in the liquid too long — and place them rounded side up at the bottom of the baking dish. Repeat, using half the ladyfingers, until you’ve got an even layer, breaking the ladyfingers in half as needed to fill in any obvious gaps (a little space in between is O.K.). Spread half the mascarpone mixture onto the ladyfingers in one even layer. Repeat with remaining espresso-dipped ladyfingers and mascarpone mixture.
- Dust top layer with remaining tablespoon of cocoa powder. Top with shaved or finely grated chocolate, if desired.
- Cover with plastic wrap and let chill in the refrigerator for at least 4 hours (if you can wait 24 hours, all the better) before slicing or scooping to serve.
Valentine’s Day Cookie Recipes
Bake up a batch of these tasty Valentine’s Day cookies for your loved one, or for yourself. They won’t disappoint.
Chocolate Dipped Shortbread Heart Cookies Recipe
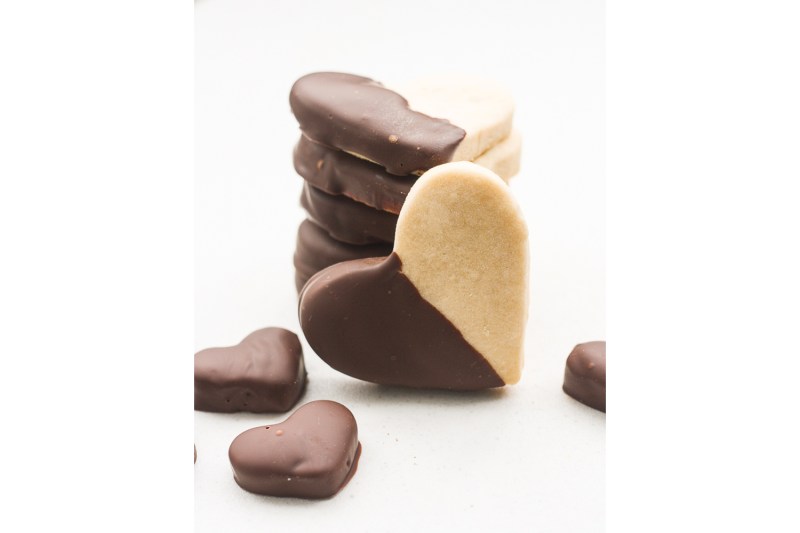
Ahead of Thyme offers up this simple and delicious shortbread cookie that is quick to make and will be eaten just as quickly.
Prep Time: 30
Total Time: 45 minutes
Yield: 20 cookies
Ingredients:
- 1 cup butter, softened
- ½ cup Confectioner’s sugar (icing sugar)
- 1 teaspoon vanilla extract
- ¼ teaspoon salt
- 2 cups all-purpose flour
- 1 cup semi-sweet baking chocolate (or chocolate chips)
- 2 teaspoons vegetable oil
- assorted sprinkles (optional)
Method:
- Preheat oven to 350 F.
- Line a baking tray with parchment paper.
- Cream the butter and sugar together for a couple of minutes using a stand mixer or hand mixer on medium speed.
- Add the vanilla and salt and continue to beat on medium until fully incorporated.
- Add the flour gradually until your mixture has formed a dough.
- Sprinkle some flour onto a clean surface and roll out the dough until it i roughly ¼ inch thick.
- Cut out your cookie shapes with a heart-shaped cookie cutter.
- Place cookies on baking tray 1-inch apart and place tray in the refrigerator to chill while the oven is preheating.
- Bake the cookies for 10-12 minutes or until bottoms are lightly browned. Allow cookies to cool completely on a cooling rack.
- Once the cookies are cooled, break up the chocolate into smaller chunks and melt with oil. Stir until smooth. Dip the cookies halfway into the chocolate and, if desired, sprinkle with assorted sprinkles. Place cookies on parchment paper and allow chocolate to set completely in the refrigerator.
Inside Out Red Velvet Cookies Recipe
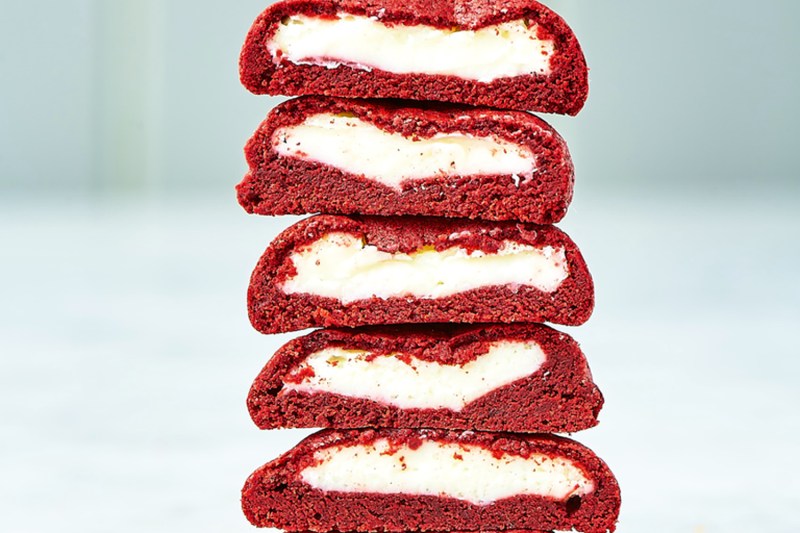
Delish is showcasing this classic red velvet cake, just with a slight twist.
Prep Time: 20 minutes
Total Time: 1 hour 10 minutes
Yield: 18
Ingredients:
For Cream Cheese filling:
- 6 ounces cream cheese, softened
- 1/4 cups plus 2 tablespoons powdered sugar
- Pinch Kosher salt
For Cookie Dough:
- 1 1/4 cups all-purpose flour
- 1/4 cups unsweetened cocoa powder
- 1/2 teaspoons baking powder
- 1/2 teaspoons Kosher salt
- 1/2 cup (1 stick) butter, softened
- 1/2 cup granulated sugar
- 1/4 cup packed brown sugar
- 1 large egg
- 1 tablespoon red food coloring
- 1/4 teaspoon pure vanilla extract
Method:
- Preheat oven to 350° and line a large baking sheet with parchment paper.
- Make cream cheese filling: In a small bowl, combine cream cheese, powdered sugar, and salt. Mix until smooth. Cover with plastic wrap and refrigerate until slightly firm, about 25 minutes.
- Make cookie dough: While the filling is being chilled, in a medium bowl, whisk flour, cocoa powder, baking powder, and salt. Set aside. In a large bowl using a hand mixer, cream butter and sugars until light and fluffy. Beat in egg, food coloring, and vanilla until incorporated. Add flour mixture to the dough, mixing until just combined.
- Make cookies: Scoop heaping tablespoons of the cookie dough, rolling into balls until you have 13 even-sized portions. Using palms and fingertips, flatten each into a 3 ½” circle that is about 1/4” thick.
- Place about 2 teaspoons of cream cheese filling in the center of each round, keeping the edges clean. Bring the edges of the dough around the filling and pinch the edges together to seal. Gently roll the filled dough into a ball. Space cookies about 3″ apart on a prepared baking sheet.
- Bake cookies for 15 to 17 minutes. Let cool slightly before serving.
Chocolate Macarons with Orange Ganache Recipe
The Chocolate Macarons with Orange Ganache from Bon Appetit are delicious. If you’ve never made macarons before, there can be a bit of a learning curve. A few suggestions, let the macarons sit for long enough to develop their shell (this will make more sense later). We suggest at least an hour of sitting on the counter. And then, while some folks suggest parchment paper, non-stick baking sheets are the best for these (try for yourself and see).
Prep Time: 25 minutes
Total Time: 1 hour 30 minutes
Yield: 36
Ingredients:
Cookies:
- 2 cups powdered sugar, divided
- 1 1/4 cups slivered almonds
- 3 tablespoons natural unsweetened cocoa powder
- 1/3 cup plus 3 tablespoons egg whites (from about 3 large eggs), room temperature, whisked to loosen
- 1/4 cup sugar
Ganache:
- 3 1/2 ounces bittersweet chocolate (do not exceed 61% cacao), finely chopped
- 2 tablespoons (1/4 stick) cold unsalted butter, cut into 1/2′ cubes
- 1/2 cup heavy cream
- 1 tablespoon finely grated orange zest
- 1/2 teaspoon ground cloves
- 1/8 teaspoon ground allspice
- 1/8 teaspoon kosher salt
- Gold dust (optional)
Method:
- Arrange racks in lower and upper thirds of the oven; preheat to 325°. Line 3 rimless baking sheets with parchment paper (OR use baking sheets). Pulse 1 cup powdered sugar and almonds in a food processor until nuts are very finely ground (but not to a paste), 60–90 seconds. Add cocoa powder and remaining 1 cup powdered sugar; process to blend well. Sift the mixture through a medium-mesh strainer into a large bowl; discard larger almond pieces remaining in the strainer (if more than 1 Tbsp. remains, pulse nuts again in processor and re-sift).
- Using an electric mixer, beat 1/3 cup egg whites in a medium bowl on medium speed until white and frothy, about 1 minute. With the mixer on medium-low speed, gradually add sugar by teaspoonfuls. Increase speed to medium-high; beat until firm peaks form.
- Stir in remaining 3 Tbsp. egg whites. Fold meringue into dry ingredients in 2 additions, mixing well between additions.
- Spoon meringue into a pastry bag fitted with a 1/4″ tip. Alternatively, spoon into a plastic freezer bag, then cut 1/4″ off a corner of the bag. Twist the top of bag and pipe quarter-size rounds onto 2 of the 3 prepared baking sheets, spacing 1″ apart. Let stand until tops appear dry, about 10 minutes (though longer is often better, up to an hour).
- Bake cookies, rotating sheets halfway through baking, until puffed and dry, about 16 minutes. Slide cookies on parchment onto a wire rack. Let cool completely. Repeat with remaining batter on third baking sheet.
- GANACHE: Place chocolate and butter in a medium bowl. Bring cream just to a boil in a small saucepan over medium-high heat. Remove from heat; stir in orange zest, cloves, allspice, and salt. Pour hot cream mixture over chocolate and butter; whisk until smooth. Refrigerate until firm, about 20 minutes.
- Spoon ganache into a pastry bag fitted with a 1/4″ tip. Alternatively, spoon into a plastic freezer bag, then cut 1/4″ off a corner of the bag. Twist top of bag and pipe about 1 tsp. ganache onto flat side of 1 cookie, leaving 1/4″–1/8″ plain border. Top with a second cookie, flat side down. Repeat with the remaining cookies and ganache. Brush tops with gold dust, if desired. Layer in an airtight container between sheets of parchment paper and refrigerator overnight. DO AHEAD: Can be made 2 days ahead. Keep chilled. Let them return to room temperature before serving.
Other Dessert Recipes for Valentine’s Day
Classic Cannolis Recipe
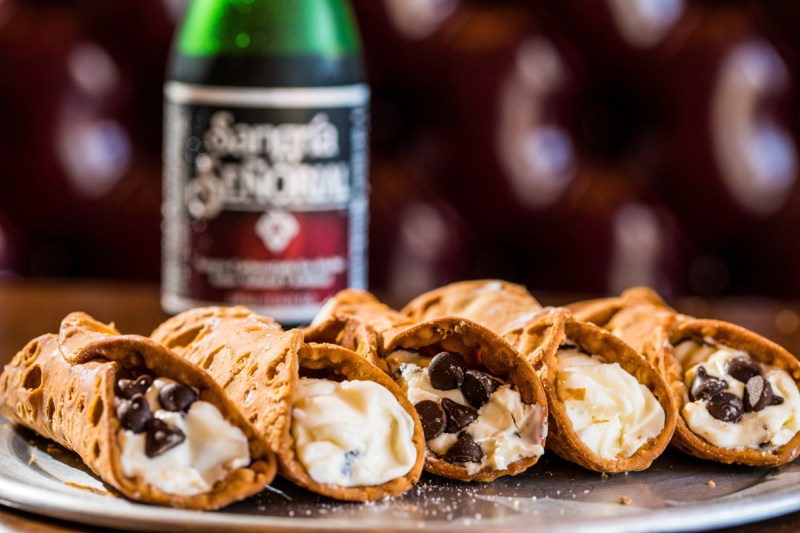
Delish has this Cannoli recipe that has a fried, crispy exterior and creamy mascarpone filling. What’s not to love? Note that you can make these in an air fryer if you have one.
Prep Time: 20 minutes
Total Time: 3 hours
Yield: 20
Ingredients:
For the Filling:
- 1 (16-ounce) container ricotta
- 1/2 cup mascarpone cheese
- 1/2 cup powdered sugar, divided
- 3/4 cup heavy cream
- 1 teaspoon pure vanilla extract
- 1 teaspoon orange zest
- 1/4 teaspoon kosher salt
- 1/2 cup mini chocolate chips, for garnish
For the Shells:
- 2 cups all-purpose flour, plus more for surface
- 1/4 cups granulated sugar
- 1 teaspoon kosher salt
- 1/2 teaspoon cinnamon
- 4 tablespoon cold butter, cut into cubes
- 6 tablespoon white wine
- 1 large egg
- 1 egg white, for brushing
- Vegetable oil, for frying
Method:
- Drain ricotta by placing it in a fine-mesh strainer set over a large bowl. Let drain in the refrigerator for at least an hour and up to overnight.
- In a large bowl using a hand mixer, beat heavy cream and 1/4 cup powdered sugar until stiff peaks form.
- In another large bowl, combine ricotta, mascarpone, remaining 1/4 cup powdered sugar, vanilla, orange zest, and salt. Fold in whipped cream. Refrigerate until ready to fill cannoli, at least 1 hour.
- In a large bowl, whisk together flour, sugar, salt, and cinnamon. Cut butter into flour mixture with your hands or pastry cutter until pea-sized. Add wine and egg and mix until a dough forms. Knead a few times in a bowl to help the dough come together. Pat into a flat circle, then wrap in plastic wrap and refrigerate for at least 1 hour and up to overnight.
- On a lightly floured surface, divide dough in half. Roll one half out to ⅛” thick. Use a 4” circle cookie cutter to cut out dough. Repeat with remaining dough. Re-roll scraps to cut a few extra circles.
- Wrap dough around cannoli molds and brush egg whites where the dough will meet to seal together.
- In a large pot over medium heat, heat about 2″ of oil to 360°. Working in batches, add cannoli molds to oil and fry, turning occasionally, until golden, about 4 minutes. Remove from oil and place on a paper towel-lined plate. Let cool slightly.
- When cool enough to handle or using a kitchen towel to hold, gently twist shells off of molds to remove.
- Place filling in a pastry bag fitted with an open star tip. Pipe filling into shells, then dip ends in mini chocolate chips.
- Working in batches, place molds in the basket of an air fryer and cook at 350° for 12 minutes, or until golden.
- When cool enough to handle or using a kitchen towel to hold, gently remove twist shells off of molds.
- Place filling in a pastry bag fitted with an open star tip. Pipe filling into shells, then dip ends in mini chocolate chips.
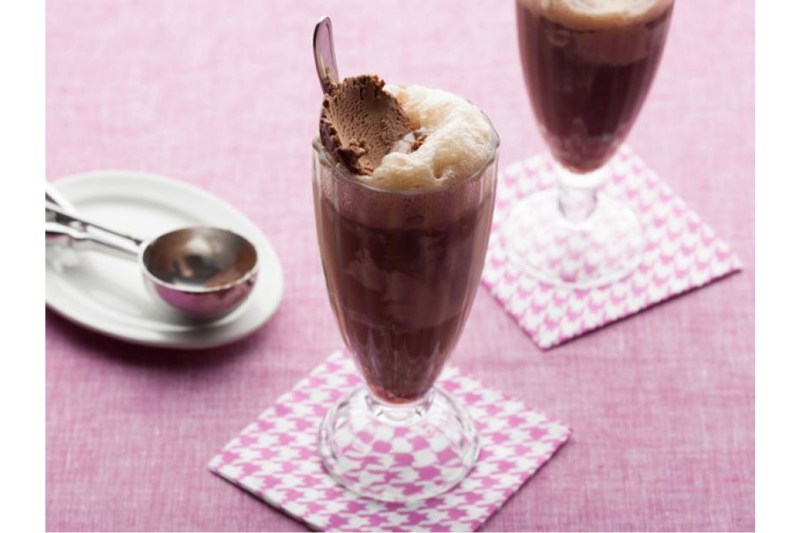
Chocolate Stout Affogato Egg Cream Recipe
This Food Network dessert is for the 21+ crowd because this dessert combines stout beer, coffee liqueur, seltzer, and ice cream.
Prep Time: 5 minutes
Total Time: 5 minutes
Yield: 4 servings
Ingredients:
- 2 ounces coffee liqueur, such as Kahlua
- 16 ounces plain seltzer
- One 12-ounce bottle stout or chocolate stout, such as Guinness
- 1 pint chocolate ice cream, slightly softened
Method:
- In each of 4 tall glasses, add 1 tablespoon coffee liqueur. Pour in 1/2 cup seltzer. Divide the beer among the glasses and stir to combine.
- Add 1 or 2 scoops of ice cream to each glass. Drink immediately or allow to sit a few minutes to let the ice cream melt in the glass. Enjoy!

