Knowing how to do a pushup doesn’t always come naturally. Many know Clarence Hairston as one of the more motivating Tempo coaches, leading seven or eight live fitness classes each week, as well as a few goal-focused programs a month. Each program is designed to build strength and lose weight. Before getting into fitness class instruction, the PT stud was just a lowly Air Force recruit in boot camp looking to prove himself at pushups.
“I thought I was the coolest guy ever, and in 60 seconds, I was able to do 12,” Hairston, from his home in Alameda, California, told The Manual. But rather than washing out and returning home with his head hung in shame, he began to work in earnest, striving to get better every day. By training’s end, he could do 30 pushups — a modest improvement compared to his capability now, but proof of the payoff that comes with consistent and careful work.
Today, when clients come to him with the mistaken belief that he came out of the womb a fully formed pushup god, he quickly corrects them. “It’s a process,” he said, in reference to learning how to do a pushup. “Trust the process.” Hairston was like many people are now: convinced of the value of the pushup but severely deficient in its application. While it’s thought of as being all about body weight, which suggests more cardio than muscle-building, it’s just the opposite, of huge benefit to just about everything from looking good with your shirt off to increased performance in any sport or activity. “It’s an all-purpose exercise,” he said, citing its practice among triathletes and bodybuilders alike.
So what do you have to do to climb from a pushup neophyte to the Olympus that Hairston and others inhabit? As he tells it, all it takes is time. Below, he’s broken down how to do pushups in simple, actionable steps.

Step 1: The rule of thumbs
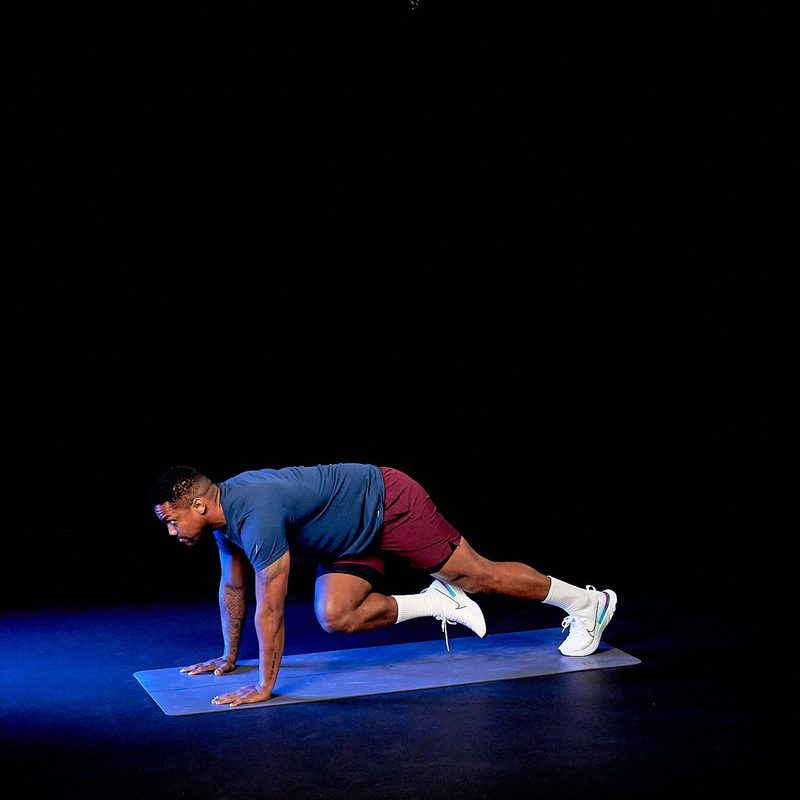
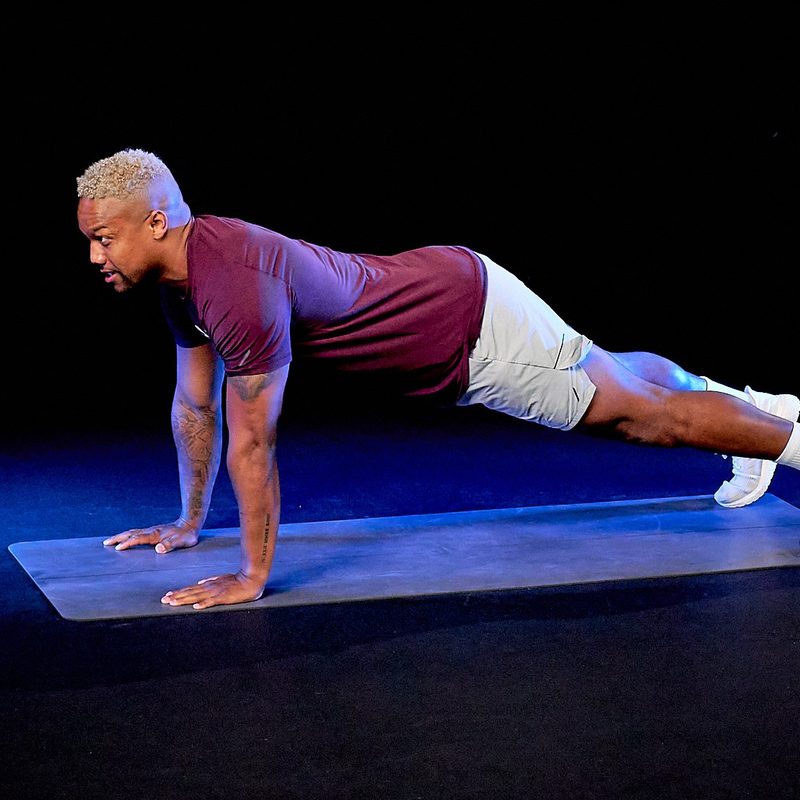
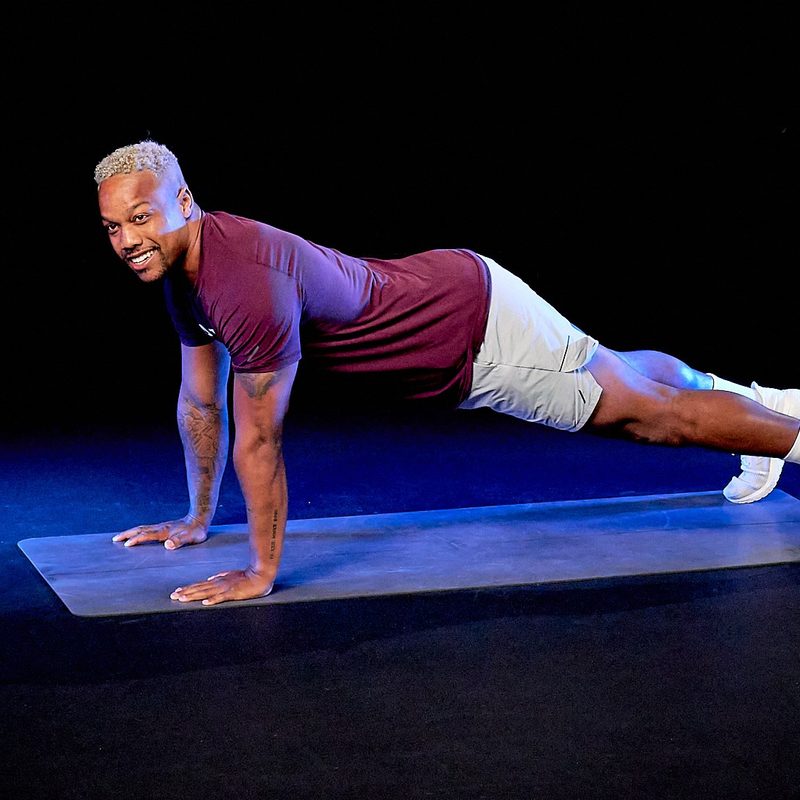
The proper pushup form begins in the high plank, Hairston said, so start right: with your hands following “the rule of thumbs.” Plant your palms underneath your shoulders top to bottom, with their width just outside your shoulders. If correctly positioned, you’ll be staring at your thumbs. Wiggle them to say hello.
Step 2: Table legs
“If a table had two legs really close and two legs really far apart, that’s not a sturdy table,” Hairston said. The point is that your hands, positioned under you and just wider than your shoulders, may be perfectly placed, but if your feet are together, you’re going to be more wobbly than an Applebee’s four-top. Instead, “Think about trying to make a rectangle with your hands and your feet,” he said. This will create a solid platform on which to build.
Step 3: Mission impossible
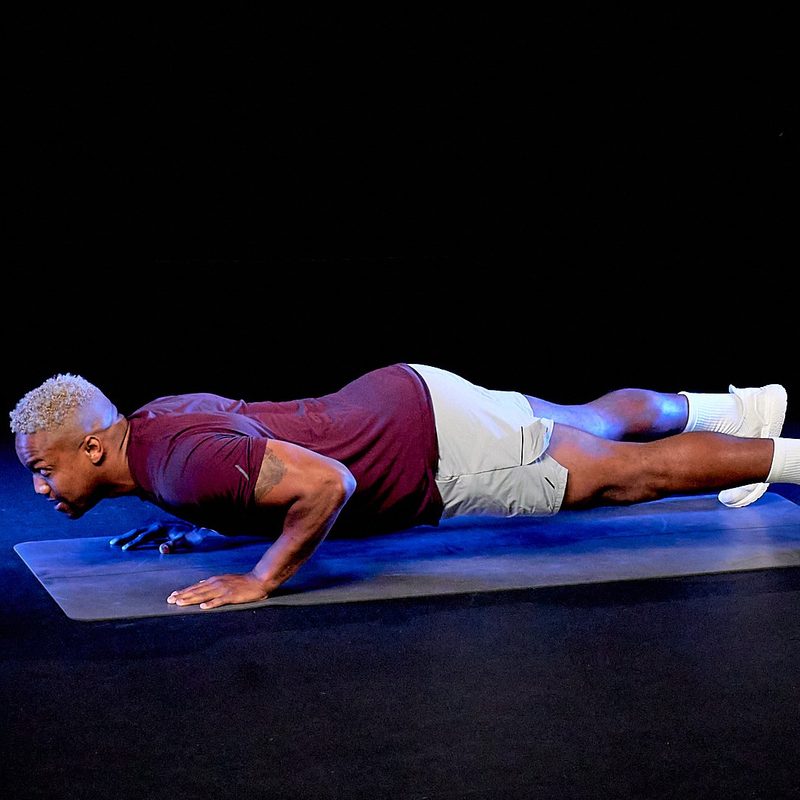
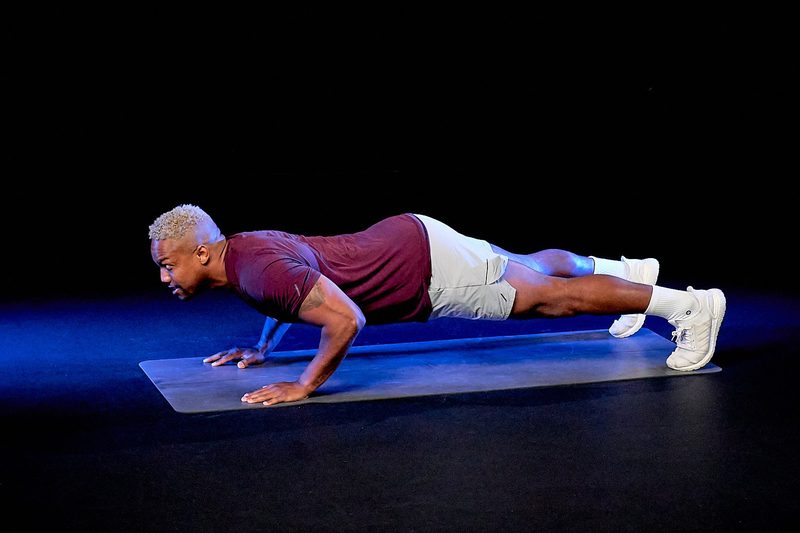
Bad news, you who can scratch your kneecap without bending over: The longer your arms, the farther it is to the floor, and that’s where you’re headed. Once your arms and feet are in place, you’re going to slowly lower to the point where your chest is just above the floor. How close is close enough? Closer. “Think Tom Cruise, Mission: Impossible,” Hairston said, your nips floating just above.
Step 4: Elbow angle
And on that lowering, what happens to your elbows? Tight to your ribs? Flared out? Hairston recommends somewhere in the middle, at 45 degrees between the ribs and straight out from the shoulder. Think of yourself making a V-shape. This will not only help you maximize your strength but will also prevent wrist pain over time.

Step 5: Reengage
You’ve seen them: Those videos of guys bouncing their chests off the floor as they bob during pushups. Don’t be those guys. Instead, after you complete each rep, stop at the top of the movement, reengage your core, and ensure you haven’t shifted your hands or feet. Then lower again. There’s little benefit to poor form and only increased risk of injury, so don’t flop.
Step 6: The return
We all want to be like Hairston: a pushup stud carved out of wood. But if you’re coming back to pushups after an extended layoff, there’s no point in trying to rush into a hundred from the gun. “People want to jump right back in where they left off, and unfortunately, that’s just not how the body works,” he explained. “I mean this wholeheartedly: Let’s start with one rep.”
Are pushups hard at first?
Pushups are notorious for their reputation as a very tough exercise to master. However, once you can master them, they are extremely effective at working multiple muscle groups. You might only be able to a do single, solitary pushup, as learning how to do pushups is a process that takes time.
Maybe that’s all you can do on day one. But Hairston encourages athletes to come back tomorrow and go for two. Progress, he continued, is more important than overdoing it. “Step by step, page by page, just work on doing a little bit better every single day.” In no time, you’ll master how to do pushups with ease.