Angie Mar is a badass. This is not something anyone can deny. Not only is she the chef at the lauded Beatrice Inn, which makes some of the best food in New York City, but she is also a master at breaking down whole animals.
We couldn’t think of a better teacher for a butchering class.
For two hours, we learned how to cut, clean, and truss a pork crown roast. The talented Clint Spaulding was there to photograph every step so you can tackle this beautiful beast of a meal. Check out the recipe and butchering process below, try it at home, and blow everyone’s mind the next time it’s your turn to host bridge night (just make sure you have some good red wines on hand).

Pork Crown Roast With Challah, Apple, and Chestnut Stuffing
Ingredients:
For the pork:
- 2 tomahawk racks of pork, 8 bones each; frenched
- .5 cups fresh savory herbs, picked
- 6 whole garlic cloves, peeled and germ-removed
- 1 bunch thyme
- Kosher salt
- Olive oil
- Trussing twine
- Trussing needle
For the stuffing:
- 8 cups challah bread, torn into 1-2 inch pieces, crust left on
- 4 cups chicken or pork stock
- 2 cups peeled chestnuts, roasted until meats are tender or frozen and peeled
- 1 cups bacon, chopped
- .5 cups sage, chopped
- .25 cups rendered pork fat (see butchering instructions)
- 3 firm apples, preferably Honeycrisp, cut into wedges
- 1 large onion, small dice
- ½ head celery, sliced
- ½ bunch of parsley, chopped
- Salt
- Pepper
Method:
How to butcher and form the crown roast:

Remove the meat from above the eye of the roast that runs along the rib bones. Trim any fat and render, as you will use it for the stuffing.
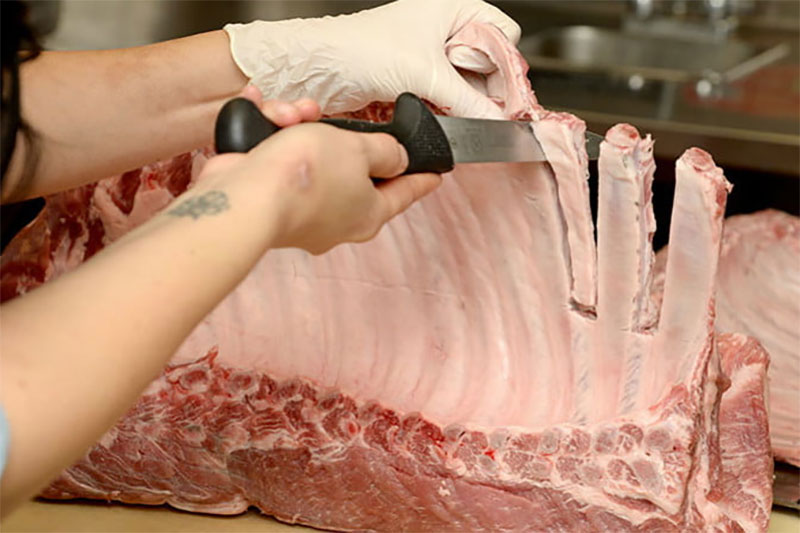
Working between the bones, run your knife down, against the first bone, and then up, against the bone that it sits next to. Repeat on both racks until all the meat from between each bone is removed.

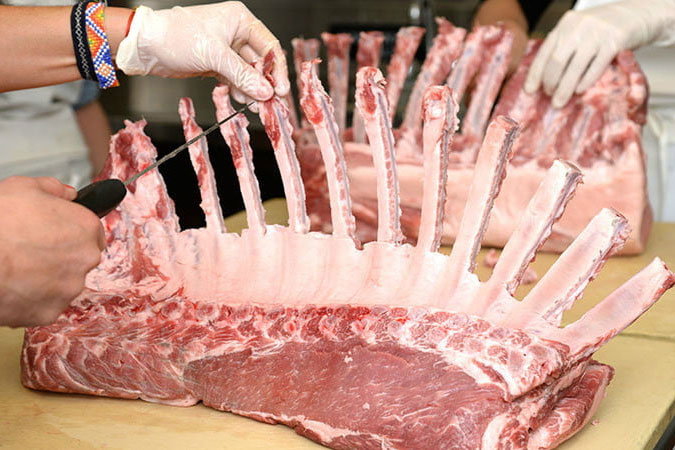
To clean, or “french” each bone, run a sharp knife along each bone, scraping the cartilage away until it is clean.
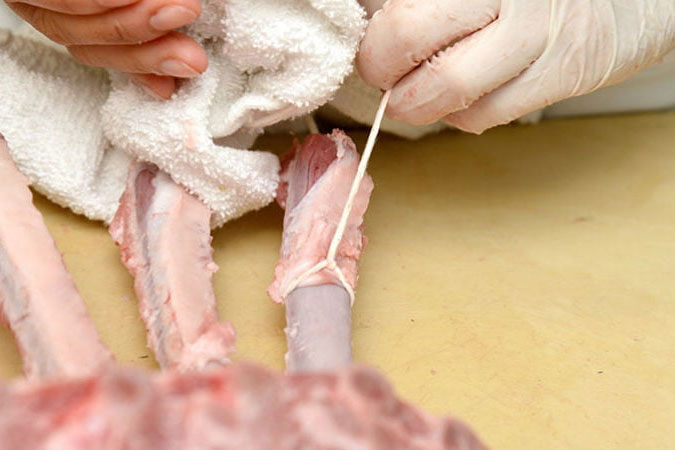
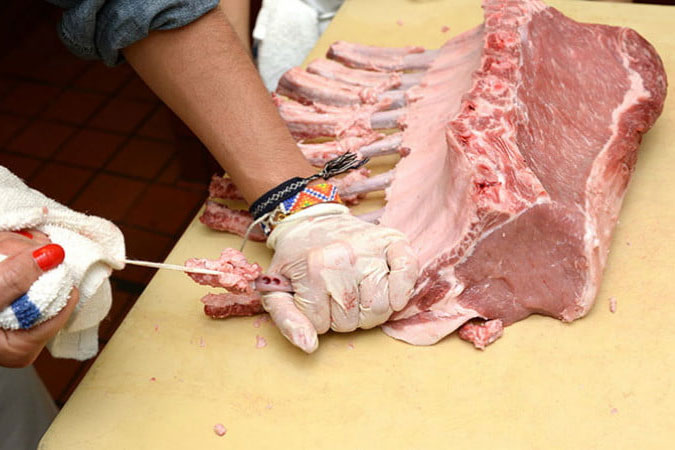
Or, tie trussing twine around each bone and pull sharply to remove the remaining meat and cartilage.

On each rack, with the bones facing up, cut slits into the meat, about 1 inch deep, in between each bone on the rack. This will give the meat the flexibility it needs when you’re forming it into a crown.
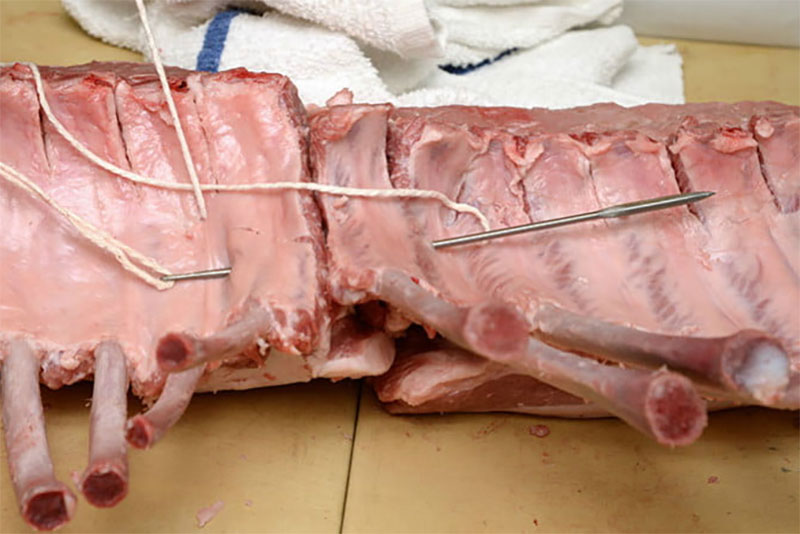
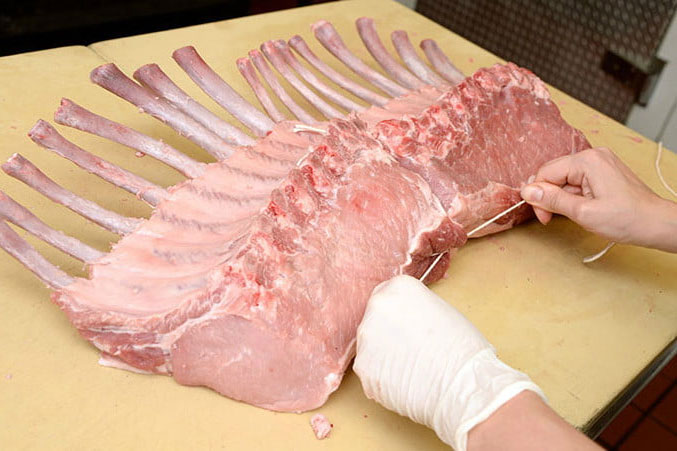
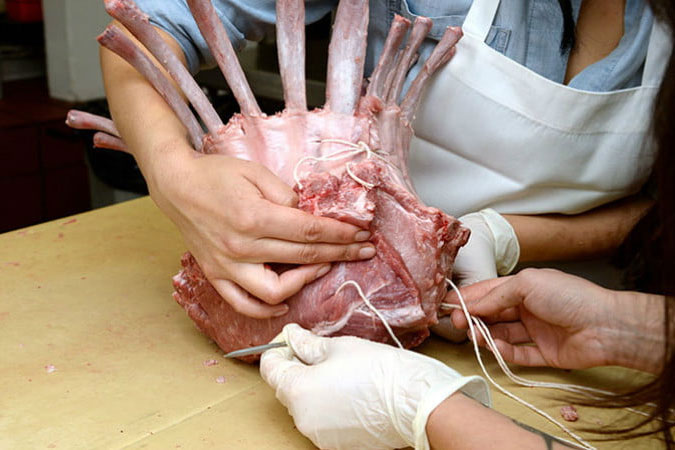
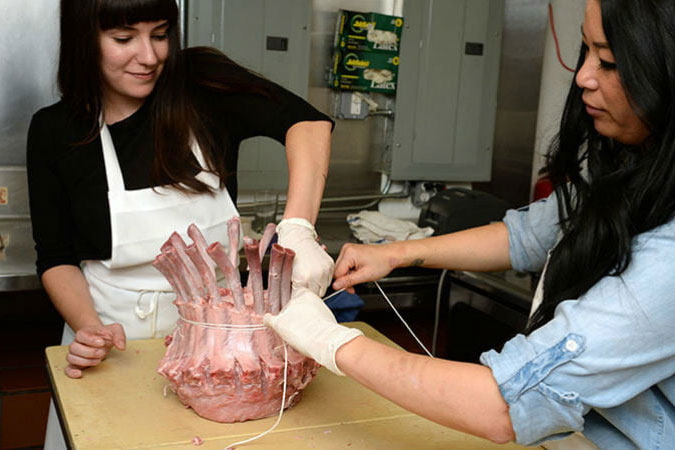
With the bones facing up, place the two racks next to each other. Using a trussing needle and thread, stitch both racks together along the seam. Lace the twine through the inter-coastal meat that lies in-between the first and second rib bones on each rack, and the eye of the meat between the first and second rib bones on each rack as well.
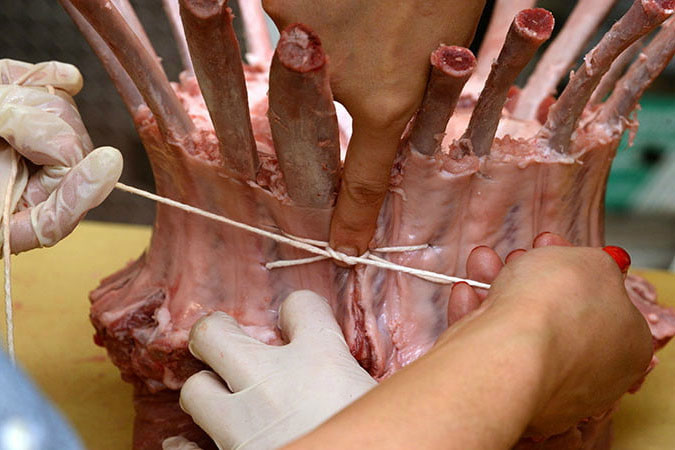
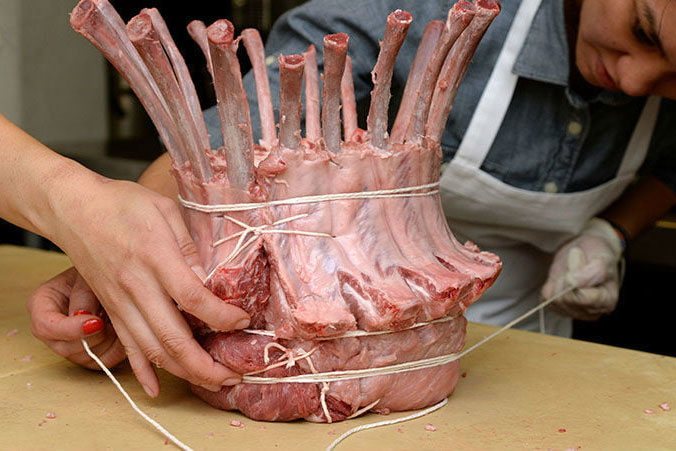
Sit the racks on your board, right side up. With the bones facing out, bend the rack into a crown and, using trussing twine, stitch the other side of both racks together, as you did the first side. Tie trussing string around the crown at the base of the roast, the bottom of the bones and the top of the meat, right where the bones are clean. Using your hands, mold the crown until you form a perfect circle. You are now ready to season and cook. Season aggressively with salt and store in the refrigerator while you make stuffing.

How to make the stuffing:
- Preheat the oven to 350 degrees Fahrenheit.
- Toast the challah pieces until golden brown. Transfer to large baking dish or casserole.
- In a large skillet, heat pork fat over medium-high heat. Sauté apples until they turn golden. Season with salt and pepper. Add one ladle of stock and cook until just tender. Allow to cool and then chop into bite size pieces and add to bread.
- In another large skillet, sauté bacon pieces over medium-high heat. When fat begins to render and bacon turns golden, add onion and celery. Season to taste with salt and pepper, sautéing until golden and soft. Add herbs and chestnuts and toss to incorporate. Add to bread mixture.
- Heat stock and season lightly with salt to taste. Pour over stuffing mixture and toss to incorporate so the bread absorbs it. Check seasoning and set aside to cool. Note: This can be made up to two days before, and the flavor will actually improve with time.
How to put it all together:
- After letting the crown sit seasoned for at least an hour, cut small slits into the eye of the meat with a paring knife, evenly around the crown, about a half-inch deep. Insert one garlic clove into each slit.
- Roughly chop the savory; mix with about 2 tablespoons of olive oil and 2 tablespoons more salt. Coat the roast inside and out in the herb mixture.
- Preheat oven to 450 degrees Fahrenheit.
- Place a resting rack in the center of a baking dish. Scatter the thyme sprigs all around and place the crown roast on top. Note: “At the restaurant, I like to clean, French, and season the racks with salt a day before I form and cook the roast. This allows the meat to cure and the seasoning to permeate the entire roast. If you have the time, it’s well worth it,” says Mar.
- Bake at 450 degrees Fahrenheit until golden all around, about 20 minutes, rotating halfway through.
- Lower the heat to 325 degrees Fahrenheit. Continue to cook until a thermometer inserted at the center reads 120 degrees Fahrenheit (about 30 minutes).
- Remove the roast from the oven and stuff the center with apple stuffing.
- Return to oven and cook until the center of the meat registers at 135 degrees Fahrenheit for medium, and the stuffing is heated through and golden brown (about 20 minutes).
- Remove and let rest for 15-20 minutes before serving.
Article originally published December 28, 2015. Last updated February 8, 2018.
Editors' Recommendations
- How to cook lobster the right way — boiling, grilling, and roasting
- How to Make the Best Pot Roast According to Chefs, Plus Leftover Recipes
- How To Make the Perfect Sushi at Home, According To a Master Sushi Chef


