For many people, just the thought of tying on an apron to start baking can seem intimidating. Whether you’re baking a celebratory layer cake or simply stirring up a sweet late-night treat, creating something loving from the oven doesn’t have to be complicated. Regardless of where you’re at your baking journey or level of kitchen experience, there’s a recipe out there to fit each and every baking craving, ability, and need.
Related Guides
From the simplest set it and forget it cookies to baked goods with a bit more sprinkles and skill, we’ve gathered eleven of the best baking recipes for every type of flour-based situation and kitchen education.
Beginner
If you’ve just been bitten by the baking bug these ideas are a great starter (baking joke)! These basic baking recipes don’t require any fancy equipment or special steps and come together quickly with only a few simple ingredients.
Homemade Artisan Bread

Courtesy of Sally’s Baking Addiction
Ingredients:
- 3 and 1/4 cups (423g) bread flour (spoon & leveled), plus more for hands and pan
- 2 teaspoons instant yeast
- 2 teaspoons coarse salt (see note)
- 1 and 1/2 cups (360ml) cool water
- optional: cornmeal for dusting pan
Method:
- In a large un-greased mixing bowl, whisk the flour, yeast, and salt together. Pour in the cool water and gently mix together with a rubber spatula or wooden spoon. The dough will seem dry and shaggy, but keep working it until all the flour is moistened. If needed, use your hands (as I do in the video tutorial above) to work the dough ingredients together. The dough will be sticky. Shape into a ball in the bowl as best you can.
- Cover the dough tightly with plastic wrap or aluminum foil and set it on the counter at room temperature (honestly any normal room temperature is fine!). Allow to rise for 2-3 hours. The dough will just about double in size, stick to the sides of the bowl, and have a lot of air bubbles.
- *You can continue with step 4 immediately, but for the absolute best flavor and texture, I strongly recommend letting this risen dough rest in the refrigerator for at least 12 hours and up to 3 days.* I usually let it rest in the refrigerator for about 18 hours. The dough will puff up during this time, but may begin to deflate after 2 days. That’s fine and normal – nothing to worry about.
- Lightly dust a large nonstick baking sheet (with or without rims and make sure it’s nonstick) with flour and/or cornmeal. Turn the cold dough out onto a floured work surface. Using a sharp knife or bench scraper, cut dough in half. Some air bubbles will deflate as you work with it.
- Place dough halves on a prepared baking sheet. Using floured hands, shape into 2 long loaves about 9×3 inches each (doesn’t have to be exact) about 3 inches apart. Loosely cover and allow to rest for 45 minutes. You will bake the dough on this prepared baking sheet.
- During this 45 minutes, preheat the oven to 475°F (246°C).
- When ready to bake, using a very sharp knife or bread lame (some even use kitchen shears), score the bread loaves with 3 slashes, about 1/2 inch deep. (“Score” = shallow cut.) If the shaped loaves flattened out during the 45 minutes, use floured hands to narrow them out along the sides again.
- Optional for a slightly crispier crust: After the oven is preheated and the dough is scored, place a shallow metal or cast iron baking pan or skillet (I usually use a metal 9×13 baking pan) on the bottom oven rack. Carefully and quickly pour 3-4 cups of boiling water into it. Place the scored dough/baking pan on a higher rack and quickly shut the oven, trapping the steam inside. The steam helps create a crispier crust.
- Place the shaped and scored dough (on the flour/cornmeal-dusted pan) in the preheated oven on the center rack. Bake for 20-25 minutes or until the crust is golden brown. Gently tap the loaves– if they sound hollow, the bread is done.
- Remove the bread from the oven and allow to cool for at least 5 minutes before slicing and serving.
Store leftovers loosely covered at room temperature for up to 5 days or in the refrigerator for up to 10 days.
Read more: How to Make Bread
3 Ingredient Peanut Butter Cookies
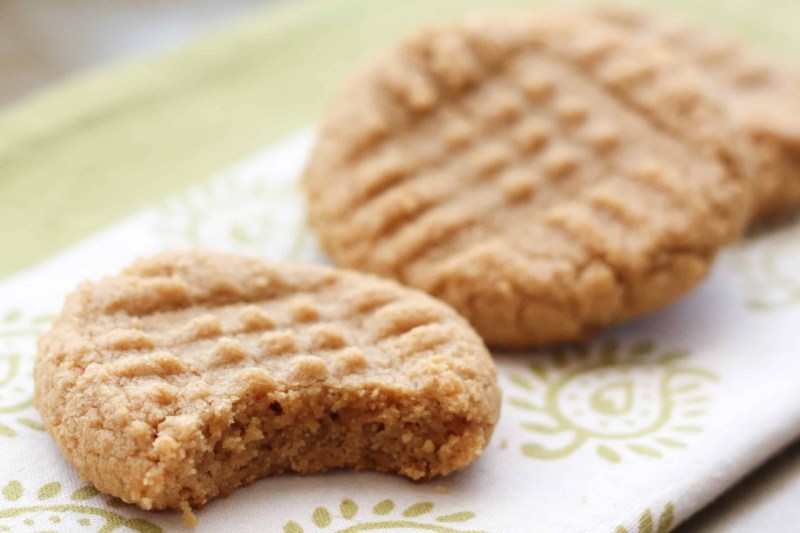
Courtesy of Barefeet in the Kitchen
Ingredients:
- 1 cup sugar
- 1 cup peanut butter
- 1 egg
Method:
- Preheat the oven to 350 degrees.
- Stir the ingredients together until smooth. Scoop onto a parchment or Silpat lined baking sheet. (Roll into 1″ balls with your hands, if you do not have a scoop.) Press down with the back of a fork and then press again from the opposite direction, to form the criss-cross pattern on top. These cookies will not spread at all. You can bake the full recipe on a single tray if you would like.
- Bake for 12 minutes and then let cool on the tray for 1-2 minutes before removing to a wire rack to finish cooling. Store in an airtight container.
Chocolate Depression Cake

Courtesy of Budget Bites
Ingredients:
Chocolate Cake
- 1 1/2 cups all-purpose flour
- 1 cup granulated sugar
- 1/2 tsp salt
- 1 tsp baking soda
- 1/3 cup unsweetened cocoa powder
- 1/3 cup cooking oil
- 1 tbsp vinegar
- 1 tsp vanilla extract
- 1 cup water
Chocolate Icing
- 1 1/2 cups powdered sugar
- 1/4 cup cocoa powder
- 3 tbsp water
- 1 tsp vanilla extract
Method:
For the Chocolate Cake:
- Preheat the oven to 350ºF. In a large bowl, stir together the flour, sugar, salt, baking soda, and cocoa powder until well combined.
- Add 1 cup water to a liquid measuring cup, then add the vanilla extract and vinegar to the water.
- Add the oil to the bowl of dry ingredients, followed by the water mixture. Stir until the chocolate cake batter is mostly smooth. Make sure no dry flour remains on the bottom of the bowl.
- Pour the cake batter into an 8×8″ or 9×9″ baking dish. Transfer the baking dish to the oven and bake the cake for 35 minutes.
- If using the chocolate icing, let the cake cool for at least an hour after baking before adding the icing.
For the Chocolate Icing
- Add the powdered sugar, cocoa powder, and vanilla extract to a bowl.
- Begin adding water, 1 tablespoon at a time, until it forms a thick but pourable icing (about 3 tbsp total). If you let the icing sit, it may begin to dry, but you can add a splash more water to make it moist again.
- Pour the icing over the cooled cake and spread until the cake is evenly covered. Slice the cake into 9 pieces and serve.
3-Ingredient Buttermilk Biscuits

Courtesy of Divas Can Cook
Ingredients:
- 2 cups self-rising flour
- 1 stick frozen butter (1/2 cup) + more for brushing
- 1 cup cold buttermilk
Method:
- Preheat oven to 450 F.
- Add flour into a large bowl. Grate the frozen butter into the flour.
- Using a pastry cutter, cut in the butter until the mixture resembles coarse crumbs.
- Pour in the cold buttermilk and stir with a rubber spatula until a dough forms.
- Lightly flour a work surface, and turn the dough out onto the work surface.
- Flour your hands and gently knead the dough, add more flour as needed but not too much. The dough should be slightly sticky.
- Fold the dough several times to create layers. Work quickly to prevent the dough from warming, which could result in a flat, dry biscuit.
- Finally, pat the dough into a 1-inch thick rectangle.
- Using a 3-inch biscuit cutter, cut out 4 biscuits. ( Regather the dough and pat it back out to cut the remaining biscuits.) Place biscuits on a baking sheet, with the sides touching.
- Bake for 12-14 minutes. (Optional, during the last minute or two: Brush the tops lightly with extra melted butter and then switch the oven to broil to brown the tops if needed. Keep an eye on it the entire time while broiling since the browning happens quickly.)
- As soon as biscuits come out of the oven, brush with melted butter. Once the butter has absorbed, brush them once more.
Intermediate
For the adventurous new baker with some extra time to spare, these baking recipes are delicious but a bit more detailed. With a just few more ingredients and some handy kitchen equipment, you’ll be baking your way to a whole new level of tasty treats in no time.
Red Velvet Cinnamon Rolls

Courtesy of Jo Cooks
Equipment:
- KitchenAid Classic 4.5 Quart Stand Mixer
- Glass Mixing Bowl Set (3 pieces)
- Keep Calm And Bake On Spatula
- 9×13-inch Baking Pan (set of 2)
Ingredients:
Dough
- 1 box red velvet cake mix
- 2 ½ cups all-purpose flour
- 2 tsp instant yeast
- 1 ¼ cups warm water
Filling
- 1 cup brown sugar packed
- 1 tbsp cinnamon ground
- ⅓ cup butter melted
Cream Cheese Icing
- 6 tbsp butter unsalted, softened
- 1 ½ cups powdered sugar
- ¼ cup cream cheese at room temperature
- ½ tsp vanilla extract
- ⅛ tsp salt
Method:
- Combine cake mix, 1 cup of flour, and yeast. Add water; beat on medium speed for 2 minutes. Change to the dough hook attachment and stir in enough remaining flour to form a soft dough (dough will be sticky).
- Place in a greased bowl, turning once to grease the top. Cover and let rise in a warm place until doubled about 1 1/2 hours.
- Combine the brown sugar and cinnamon in a bowl.
- Grease a 9×13 inch baking dish with cooking spray or butter.
- Roll the dough out on a lightly floured surface, until it is approximately 16 inches long by 12 inches wide. It should be approximately 1/4 inch in thickness.
- Spread the 1/3 cup of butter evenly over the dough, then sprinkle with the sugar evenly over the surface of the dough.
- Working carefully, from the long edge, roll the dough down to the bottom edge.
- Cut the dough into 1 1/2 inch slices, and place in a lightly greased baking pan. You can also use floss to cut into slices. Place the cut rolls in the prepared pan. Cover with a clean kitchen towel or plastic wrap and let them rise for another 30 minutes, or until doubled in size.
- Preheat oven to 350 degrees.
- Place the baking pan in the oven and bake for 20 minutes or until golden brown. Cooking time can vary greatly!
- While the rolls are baking make the icing by mixing all the icing ingredients and beat well with an electric mixer until fluffy and smooth.
- When the rolls are done, spread generously with icing.
Cheddar Bacon Blueberry Scones

Courtesy of Cooking Bride
Ingredients:
For the scones:
- 2 cups all-purpose flour
- 4 tablespoons sugar divided
- 2 teaspoons baking powder
- 1/2 teaspoon baking soda
- 1/2 teaspoon salt
- 1/2 teaspoons ground cinnamon
- 1/3 cup cold Minerva Dairy unsalted butter cubed
- 3/4 cup buttermilk
- 1 tablespoon canola oil
- 2 large eggs divided
- 1 cup fresh or frozen blueberries
- 4 bacon strips cooked and crumbled
- 1 cup shredded sharp cheddar cheese
- 1 tablespoon milk
For the cinnamon sugar spread:
- 1/2 cup (1 stick Minerva Dairy) unsalted butter, softened
- 1 teaspoon cinnamon
- 1 teaspoon sugar
Method:
For the scones:
- Preheat oven to 425 degrees.
- In a large bowl, combine flour, sugar, baking powder, baking soda, salt, and cinnamon.
- Cut in butter (I prefer to grate cold butter using a box grater and mix it into the flour mixture until it resembles coarse crumbs.
- In a separate bowl, whisk together buttermilk, oil, and one large egg. Add the wet ingredients to the dry ingredients and mix until just moistened (do not overmix).
- Gently fold in the blueberries, bacon, and cheese.
- Turn dough out onto a well-floured surface. Knead 10 times. You can sprinkle a little flour over the dough if the dough is a little sticky.
- Form the dough into a ball. Then pat down until you have an 8-inch circle (about the size of a salad plate).
- Cut the circle into eight wedges. Place the wedges on a greased baking sheet.
- Mix together the remaining egg and milk. Brush egg wash over the top of the wedges. Sprinkle the wedges with the remaining two tablespoons of sugar.
- Bake for 15-20 minutes or until a toothpick inserted near the center of a scone comes out clean. Allow the scones to cool for five minutes.
For the cinnamon sugar spread:
- Combine all ingredients in a small bowl until well combined. Store in an airtight container in the refrigerator. Allow the butter to soften at room temperature before serving.
Double Decker M&M Brownie

Courtesy of Whisking Up Yum
Ingredients:
- 3/4 cup butter, softened
- 1 cup sugar
- 1 cup firmly packed light brown sugar
- 3 large eggs
- 1 teaspoon vanilla
- 2–1/4 cups all-purpose flour, plus more below
- 2–1/2 teaspoon baking powder
- 1/2 teaspoon salt
- 1/3 cup cocoa powder
- 1 tablespoon butter, melted
- 1/4 cup all-purpose flour
- 1 cup M&Ms, divided
Method:
- Preheat oven to 350 degrees. Spray 9×13 pan with cooking spray and set aside.
- In a large bowl, cream together the butter and sugars. Add eggs and vanilla and mix well. Add flour, baking powder, and salt. Stir well until thoroughly combined.
- Split batter in half and set aside.
- In a small separate bowl, microwave 1 tablespoon butter until melted. It took 15 seconds for my butter to melt. Add cocoa powder to the bowl and mix together. Mix really well until the chocolate is fully combined. Carefully spread brownie batter into an even layer on the bottom of the pan using a small spoon. Spray the bottom of the spoon with cooking spray to help the batter spread.
- Take the second bowl of batter and add the remaining 1/4 cup of flour and 1/2 cup of the M&Ms and stir together well. Gently add this layer of batter on top of the brownie layer and spread it into an even layer, being careful not to mix the two layers together. You will want to spray the cooking spray on the spoon again as it really helps to spread the batter. Scatter the remaining M&Ms onto the top and pop into the oven.
- Bake for 25-30 minutes or until the edges start to pull away from the pan. You can also check for doneness by inserting a toothpick into the center of the pan. Small crumbs may come out with the toothpick, but the toothpick should come out dry. Cool completely and cut into squares. Store tightly in a covered container.
Focaccia Bread

Courtesy of Ruchi’s Kitchen
Equipment:
- Stand Mixer
- Glass Mixing Bowls
- 9-inch Square Baking Pan
- Basting Brush
Yeast Ingredients:
- 2¼ teaspoon active dry yeast
- 1 tablespoon sugar
- ¼ cup lukewarm water
Dough Ingredients
- 3 cups all-purpose flour
- 1½ teaspoon salt
- 3 tablespoon olive oil
- 2 tablespoon Italian herb seasoning
- ¾ cup warm water
- 2 tablespoon all-purpose flour – to finish the dough
Optional Toppings
- 1 teaspoon dried rosemary
- ¼ teaspoon sea salt
- 1 teaspoon coarsely crushed black peppercorns
- 2 tablespoons olive oil
Method:
- Combine active dry yeast, sugar, and lukewarm water in a bowl. Give it a good stir. Let this mixture rest for 5-10 minutes to foam up.
If your yeast fails this step – please discard the yeast and start all over again. Do not proceed to the next step or you will end up with dense and sticky bread. - Add flour, olive oil, Italian herb seasonings, proofed yeast, and salt to the stand mixer bowl. Pour water into the bowl. Using the dough hook, mix the ingredients on medium speed until it forms a smooth dough.
- Spray a bowl with oil. Transfer the dough into that greased bowl. Brush the top of the dough with oil. Cover the bowl with a plastic wrap or a wet kitchen towel and let it rise in a warm, draft-free environment or inside your oven for 1-2 hours. After the resting time is over, the dough will double in size and look all fluffy and airy.
- Remove the dough from the bowl, sprinkle it with a bit of flour, and punch the dough down. Knead the dough by stretching and pulling the dough. This step is necessary – if the dough is not kneaded well, the bread will turn out dense.
- Grease a 9×9 inch baking tray and transfer dough onto that baking tray. Stretch the dough to fit the entire pan.
- Cover and let it rise for another 30-40 minutes or until doubled in size. Once the dough has doubled in size, make about 15-16 indents all over the dough. You can use your fingers or the back of a spatula to make dimples in the focaccia dough.
- Preheat your oven to 400 degrees F.
- While the oven is heating, you can top your bread with crushed black pepper, rosemary, and sea salt. Finally, drizzle olive oil all over the unbaked focaccia bread or you can create a veggie art all over your focaccia bread.
- Bake the focaccia bread in the preheated oven for about 20 minutes or until lightly browned.
- Once done, remove from oven and brush with more olive oil if desired. Let the freshly baked focaccia bread cool in the pan for 5 minutes then transfer to a cooling rack. Slice the focaccia bread into squares pieces and serve warm.
Advanced
If you’re feeling confident in your carb creation skills, these recipes are the perfect kitchen projects to test your baking dedication. To master these classic baked goods and come out on the other side unburnt, you’ll need a lot of experience, precision, and patience.
Homemade Croissants

Courtesy of Half Baked Harvest
Ingredients:
- 4 1/2 teaspoons yeast
- 1/4 cup sugar
- 6 tablespoons warm water
- 2 teaspoon salt
- 4 tablespoon butter melted
- 2 cups cold milk
- 5 cups flour plus more for working
- 2 cups cold unsalted butter 4 sticks
- 1 large egg beaten
Optional Fillings
- 3/4 – 1 1/2 cups pure pumpkin
- 36 squares chopped chocolate
- 3/4 – 1 1/2 cups peanut butter
- 36 teaspoons cinnamon sugar
- 3/4 – 1 1/2 cups Nutella
Method:
- In a small bowl or bowl of a stand mixer, dissolve the yeast and a pinch of the sugar in the warm water. Let stand until foamy, about 5 to 10 minutes.
- To mix the dough by hand, In a large bowl, combine the remaining sugar, the salt, melted butter, milk, the yeast mixture and 1/2 cup of the flour, and mix with a wooden spoon until blended. Gradually add the remaining flour 1/2 cup at a time and mix just until the dough comes together in a sticky ball.
- To mix the dough by stand mixer, In the large bowl of a stand mixer fitted with the paddle attachment, combine the remaining sugar, the salt, melted butter, milk, and the yeast mixture and mix on medium speed until combined. Gradually add the flour 1/2 cup at a time and mix just until the dough comes together in a stickball.
- On a lightly floured surface, roll out the dough into a rectangle about 1/2 inch thick. Transfer to a large baking sheet and cover with plastic wrap. Place in the fridge until chilled, about 40 minutes.
- While the dough is chilling make the butter package. I found it was easiest to place all four sticks of butter together in a gallon size Ziplock bag. Then using a rolling pin, beat the butter on a work surface to flatten it. Continue to gently beat the butter with the rolling pin to shape the butter into a 6-by-8-inch rectangle. This part was really kind of hard, but just keep working it. Once the butter is in the shape of a rectangle place it back in the fridge to stiffen up again. Don’t worry if your butter is not in a perfect rectangle. It’s still going to work.
- Now it is time to laminate the dough, which just means fold the dough with the butter to create layers. On a lightly floured work surface, roll out the dough into a 16-by-10-inch rectangle. With a short side facing you, place the butter in the middle of the dough. Fold the ends up like a letter. Fold over the upper half to cover the butter and press the edges together to seal. Then fold over the remaining lower half and press the edges together to seal. Turn dough again so the short side is facing you, and use the rolling pin to press down equally on the dough to help flatten it. Roll dough into a 15 x 10-inch rectangle. Then fold the dough like a letter again, with a short side facing you, fold the bottom third up, then fold the top third down. Use your hands to pull the dough into a rectangle shape. You should now have a roughly 11 x 6-inch rectangle. This completes the first turn. Wrap in plastic wrap and place in the fridge to chill for 45 minutes.
- Return the chilled dough to the lightly floured work surface with a folded side to your left and repeat the process to make 3 more turns, rolling, folding, and chilling the dough each time, for a total of 4 turns. After the final turn, refrigerate the dough for at least 4 hours or overnight (I chilled mine overnight).
- To form the croissants, cut the dough in half and place one half in the fridge while working with the other half. Roll out one half of the pastry on a lightly floured work surface into a 9-by-18-inch rectangle. Using a pizza cutter or sharp knife cut the dough in half lengthwise, and then cut the dough into triangles. Cut a small vertical slit right into the middle of the straight end, and using both hands, roll the croissant up pushing the sides out to either side. Place on a baking sheet about 2-3 inches apart, cover with a towel and set in a warm place to rise for 1-2 hours. The croissants will not double in size like other yeast doughs do. After one hour position a rack in the middle of the oven and preheat to 425 degrees F.
- Lightly brush the tops of the pastries with the egg mixture. Bake the pastries, 1 sheet at a time, until golden brown, 15-18 minutes. Transfer to a wire rack and let cool on the pan. Serve warm or at room temperature. Store in an airtight container at room temperature for up to 1 day. Makes 25-32 croissants.
- To freeze the croissants before baking, complete the steps through step 8. Once all the croissants have been rolled place them on a baking sheet lined with wax or parchment paper. Cover the baking sheets and freeze for about 2 hours. Remove the pans and place the croissants in a freezer safe bag and seal. Immediately place back in the freezer and freeze for up to 6 months. To bake, allow the croissants to thaw overnight in the fridge and then bake as directed.
- Optional fillings for the croissants:
1-2 teaspoons of pure pumpkin
1 -2 teaspoons peanut butter + 1 square of chocolate
1 teaspoon cinnamon sugar
1-2 teaspoons Nutella - Roll each triangle up as directed. Brush each top with egg wash and for the pumpkin and cinnamon sugar croissants, sprinkle with more cinnamon sugar. Bake as directed.
Chocolate Soufflé

Courtesy of The Brown Eyed Baker
Ingredients:
- 1/2 cup unsalted butter
- 8 ounces dark chocolate finely chopped
- 1 teaspoon vanilla extract
- Pinch salt
- 5 egg yolks room temperature
- 1/3 cup + 2 tablespoons granulated sugar divided
- 8 egg whites room temperature
- 1/4 teaspoon cream of tartar
Method:
- Preheat the oven to 375 degrees F and adjust the rack to the lower-middle position.
- Generously butter a 2-quart souffle dish (or eight 8-ounce ramekins), then sprinkle with granulated sugar, tapping and turning the bowl until the sugar has completely coated the butter. Place in the refrigerator until needed.
- In a medium heatproof bowl, melt together the butter and dark chocolate (microwave on 50% power, stirring every 30 seconds OR place over a small saucepan of simmering water, stirring occasionally until melted). Off heat, whisk in the vanilla extract and salt; set aside.
- Using an electric mixer on medium speed, beat the egg yolks with ⅓ cup of sugar until the mixture is a thick and very pale yellow, 3 to 4 minutes. Use a rubber spatula to gently fold in the chocolate mixture; set aside.
- Using an electric mixer at medium-low speed, beat the egg whites and cream of tartar until frothy. Increase the speed to medium and beat until soft peaks form. Increase the speed to medium-high and gradually add the remaining 2 tablespoons of granulated sugar; continue to beat until stiff, glossy peaks form.
- Add one-quarter of the egg whites to the chocolate mixture and vigorously stir it in to lighten up the mixture (the chocolate egg mixture will have thickened a bit). Add the remaining egg whites all at once and use a rubber spatula to gently fold them in until no white streaks remain.
- Transfer the chocolate mixture to the prepared souffle dish and smooth the top into an even layer. Trace a circle with your finger in the batter about ½-inch from the edge of the pan (this will help give it a nice even rise). Place the souffle dish on a rimmed baking sheet and place it in the oven. Bake until it has fully risen, the outside is set, and the center just barely jiggles when the pan is moved, 30 to 40 minutes (20 to 25 minutes for 8-ounce ramekins). Remove from the oven, dust with powdered sugar, and serve immediately.
Lemon Raspberry Swiss Roll

Courtesy of Foodie In New York
For the cake:
- 4 large eggs
- ½ cup Golden Sugar
- ¼ teaspoon Kosher salt
- 2 tablespoons grated lemon zest (about 2 lemons)
- 2/3 cup all-purpose flour
For the filling & topping:
- ½ cup full fat cream cheese
- ⅔ cup Heavy whipping cream
- 2 tablespoons + more for dusting powdered sugar
- 2 cups, separated fresh raspberries
Method:
- Preheat the oven to 400°F. Spray a 10×15-inch jelly roll pan with non-stick baking spray. Line the bottom of the pan with parchment paper. Set aside.
- Beat the eggs and Golden Sugar with an electric mixer on medium speed for 2 minutes. Add salt and lemon zest and increase speed to medium-high. Continue to beat until thick and pale yellow, 8-10 additional minutes.
- Sift the flour into the batter. Use a large, rubber spatula and fold the flour into the batter until no streaks remain. Pour the batter into the jelly roll pan and use an angled spatula (or butter knife) to smooth the batter into the cake pan in an even layer. Transfer the pan to the oven and bake until springy to the touch, and golden on top, 8-10 minutes. Remove the pan from the oven.
- Dust a kitchen towel with powdered sugar. Flip the cake onto a kitchen towel, with the parchment paper side up. Carefully peel the parchment paper off of the cake. Roll up cake and towel, starting from a short side. Let cool completely on a wire rack. While the cake is cooling, prepare the filling.
- Beat the cream cheese, heavy cream, and 2 tablespoons of Powdered Sugar in a bowl on medium speed until medium peaks form. Roughly chop 1 cup of the fresh raspberries.
- Unroll the cooled cake. Spread the cream cheese filling evenly over the cake and sprinkle the chopped raspberries evenly on top of the filling. Carefully re-roll the cake, using the towel to help to roll it tightly. Place the cake seam side down on a serving platter. Top with whipped cream, and the remaining one cup of fresh raspberries. Sprinkle a dusting of powdered sugar on top and refrigerate until ready to serve.
Editors' Recommendations
- How to make a mojito: The ultimate cocktail recipe
- The 11 best grill and smoker recipes to make now
- The 11 best citrus cocktails to make in 2024
- This is how to make a Bloody Bull – a better, beefier Bloody Mary recipe
- How to make Vietnamese pho, a perfect soup for any time of the year


