By now, you may be used to the frequent thud of ripe fruit falling from the trees and hitting the ground. Harvest time is upon us, and that goes for a large part of the fruit spectrum, from apples and pears to peaches and figs.
Depending on where you live, there may be too much fruit to salvage. But that doesn’t mean you shouldn’t take a stab at holding on to at least some of it. You can enjoy it many ways as fresh as well as preserve it for down the road. Trust us, you’ll need a little jolt of late summer in your life when it’s winter and the pandemic is still making everything, well, strange.
Get Pickling
You should know that pickling is not reserved for just cucumbers (and, for what it’s worth, cucumbers aren’t just for pickles). The briny act of preservation works great on an abundance of things, from veggies like carrots and beets to fruits such as stone fruit and blueberries. Shoot, some even pickle watermelon rinds and serve them as an appetizer or alongside a nice grilled piece of pork.
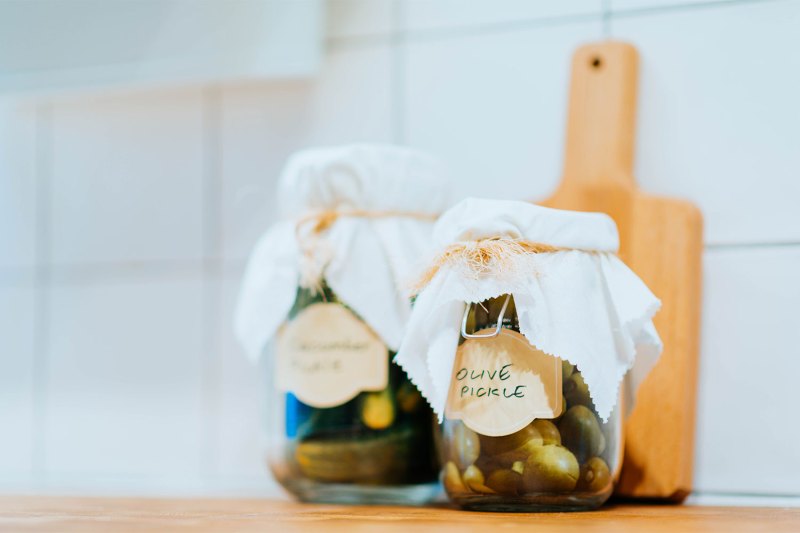
Peaches, plums, cherries, apricots, berries, melon, and more are all great pickled. It’s easy, as the same ratio of four ingredients can be used on just about anything, with tasty results. Use one cup of vinegar, one cup of water, one tablespoon of salt, and .5 cup of sugar as your brining agent. Combine these and bring to a boil on your stove. Pour it atop some diced up fruit in a jar and let it meld in the fridge for a least a full day, although it’ll just get better and more intense the longer you wait.
Preserves
Making jam is a pretty straightforward task and a great way to extend the life of your favorite seasonal fruits. It’s also pretty forgiving, meaning you can find a new use for less famous fruits like nectarines or dates.
Start by rinsing and cutting up the fruit of your choosing. Cook it on medium to concentrate it, making it thick. Stir often and gradually lower the heat over time. Once you achieve a desirable level of gooeyness, move the mixture into sterilized jars, careful to leave a little room at the top. Some argue to dip the sealed mixtures into boiling water for several minutes to sterilize things and set the consistency of the jam. Here’s a good site for added info.
Hooch
You don’t need access to a winery to make a crude but enjoyable batch of homemade wine or brandy. Essentially, you just need a large container to ferment the fruit in, a carboy or wooden vessel to age the stuff in, and things like a hose for transporting liquid and a strainer to filter out the solids.
The basic guidelines apply to just about any fruit you might like to ferment, although apple, pear, and berries are probably the most common. You can go the larger scale route in your garage or basement or small-batch style in your kitchen. Crush the fruit with a masher (or your feet if you feel inspired) and remove the seeds. Add some water and sugar and, if you want a more controlled fermentation, pitch a commercial stain of yeast (although it will likely ferment on its own, that can just be a choppier process).

Cover the juice and let it ferment in a warm environment for several weeks. Strain out the solids and put into a carboy or glass vessel for a few additional days, allowing other solids to settle. The same essentially goes for liqueur or brandy, save the addition of a few other ingredients.
Keeping things sterile is important so be mindful of spills that might attract bacteria or bugs.
Compost
One of the simplest things you can do is put the nitrogen-rich fallen fruit to work as fertilizer. This is a great way to utilize the mushy rotting fruit you might not otherwise try to salvage. It’s also a fine way to complete the agricultural life cycle, inspiring decaying fruit to help spawn new life in your garden. Remember to compost away from your dwelling some as it can attract bugs and insects, and get ahold of some manure to get things going, either from a pet or your local garden supply store. The San Francisco Gate has a nice how-to post on the subject.
Get Sauced
Tomato sauce is versatile and all the better when made with farm-fresh fruit. It’s a simple but fairly time-consuming activity, so maybe crack a bottle of Chianti and sip as you think about pasta recipes you’ll be perfecting this autumn and winter. You can dice up the tomatoes and cook them down or use a food processor to puree them. Cook for just 45 minutes or so to maintain a really fresh, zippy flavor or simmer for multiple hours for a deeper, harmonious sauce. Adding things like garlic, balsamic, tarragon, oregano, and fresh basil is always advised. Also, throw in a little starch or tomato paste if you need to thicken things up some.
For additional details and other ideas like how to dry or freeze certain kinds of fruits, check out this helpful guide from the USDA.
Editors' Recommendations
- 11 Best Meatless Grilling Recipes To Make for Barbecue Season
- How to Cut a Pomegranate
- Canning 101: Everything a Beginner Should Know