
How To Use a Foam Roller Like a Personal Sports Masseuse

Foam roller exercise
Image used with permission by copyright holder

Contrary to their innocent appearance against the backdrop of huge weights and complicated exercise machines at the gym, foam rollers are actually quite powerful tools of self-myofascial release — otherwise known as self-massage — when used the right way. They can help flexibility, boost circulation, reduce soreness, increase range of motion, and remove lactic acid to speed workout recovery. This exercise can be done pre or post-workout, or even at home on off-days. On top of that, foam rollers cost only a fraction of what a sports therapist or deep-tissue masseuse will charge you for a similar experience.

“All men can benefit from foam rolling, whether you’re a weekend warrior or an ultra-marathoner. Stress, diet, and your daily life are also reasons why foam rolling is for everyone. Starting tomorrow with just a couple of minutes of building, the habit and routine will be beneficial for you,” says Bill Elkins, athletic director at New York Health & Racquet Club.

Image used with permission by copyright holder

To help your body continue operating at peak performance, we leaned on Elkins to create the following guide to foam rolling. You can use foam rollers to help you warm up before a difficult workout session, cool down and alleviate soreness, and even speed up recovery time. Learn how to use this powerful tool with the help of Elkin’s tips and stretches below.

How to Use a Foam Roller: Exercises

Image used with permission by copyright holder

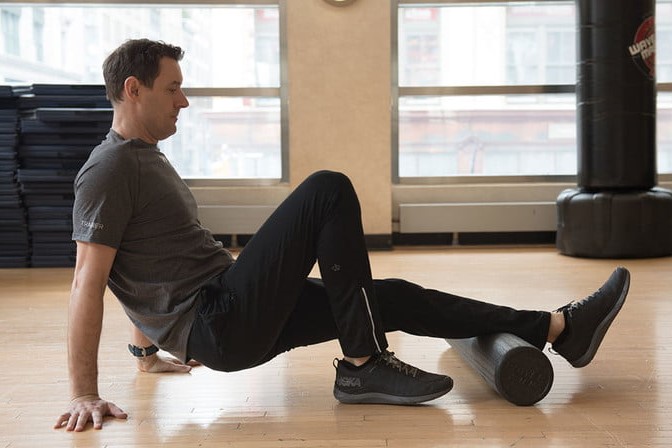
Calves: With the roller placed under the calf, keep your toe pointed toward the sky and roll from the ankle to below the knee. Roll for 30 to 60 seconds and apply pressure as is comfortable. Stack your legs to add pressure.

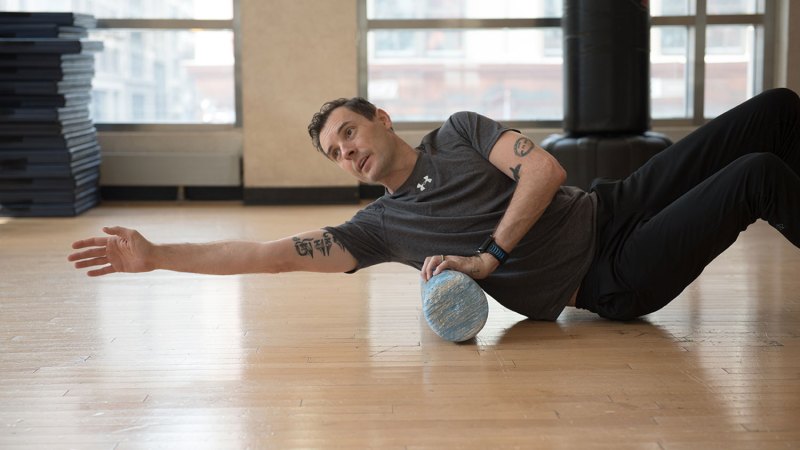
Hamstrings: Similar to the calves exercise, start with your legs out in front of you and place the foam roller beneath your hamstrings below your glutes. Roll up and down between the back of your knees and your glutes, stopping to linger on tender spots.

Foam roller exercise
Image used with permission by copyright holder

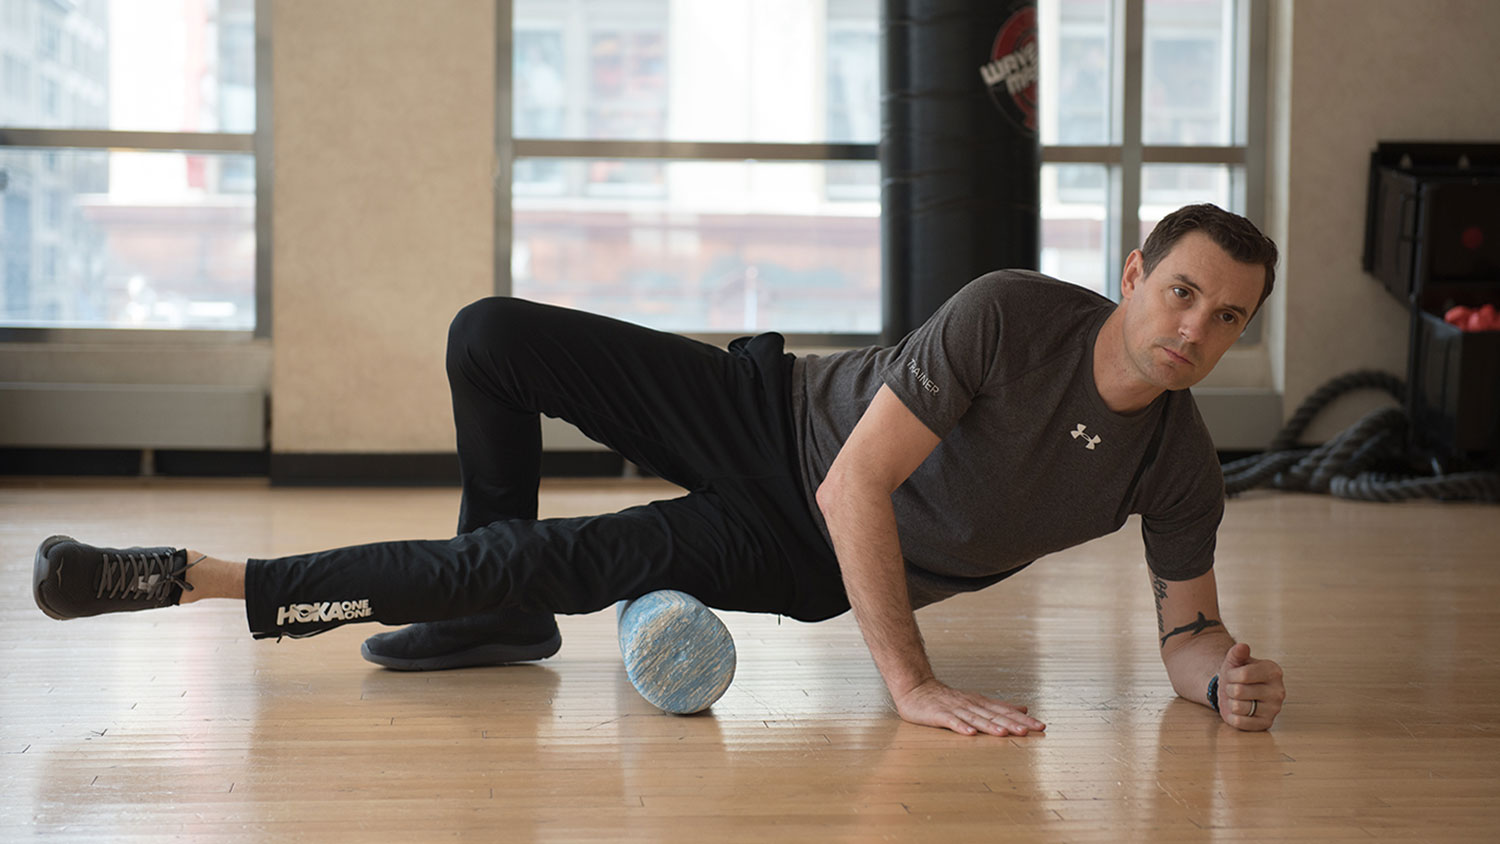
Quadriceps: While lying on the stomach, place the roller under your upper thigh and roll down to the top of the knee and back. Roll for 30 to 60 seconds and apply pressure as is comfortable. Stack the legs to add pressure.

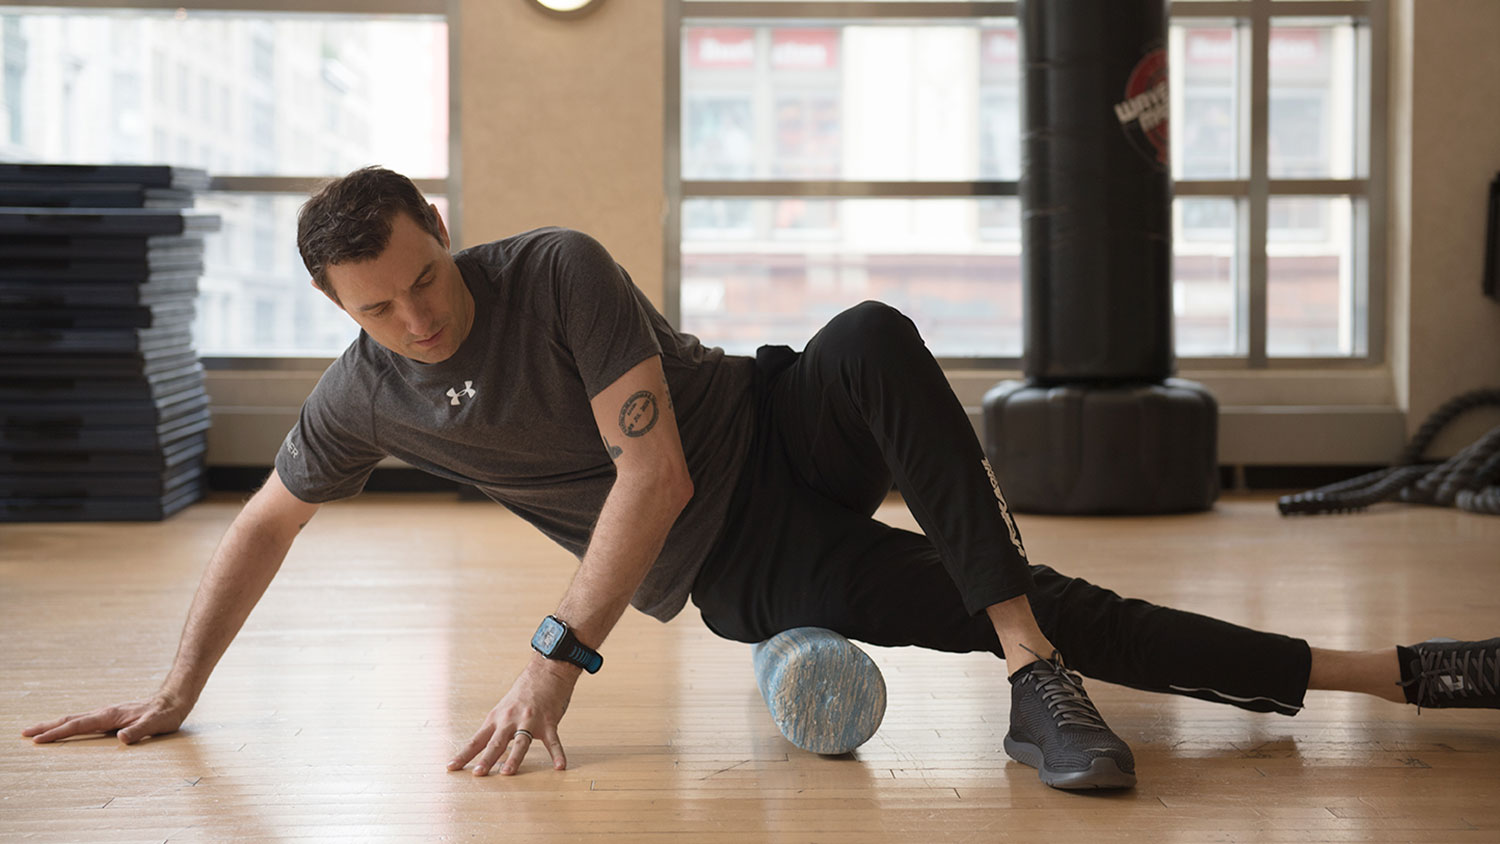
IT Band: The IT band runs along your outer thigh from the hip to the knee and is made entirely of connective tissue. It helps to extend, abduct, and rotate your hip and tends to get sore from sitting for long periods of time.

Image used with permission by copyright holder

While lying on your side, place the roller under the hip. Roll down to your knee then back up to the hip. Place your hands on the ground for balance. Roll for 30 to 60 seconds and apply pressure as is comfortable. Stack your legs to add pressure.

Upper back: If you tend to hold a lot of tension in your upper back, using a foam roller could provide you with some relief. Simply begin by lying with your back on the foam roller, knees bent and feet on the floor. Brace your core and lift to begin rolling up and down the spine, loosening up any tight spots along the way.

Image used with permission by copyright holder

Lats: Recovering from a tough back workout? This stretch can help loosen up the area commonly referred to as the “wings,” located on your back below your armpits. Start by lying on your back at a 45-degree angle with the foam roller resting under your right lat. Bend your legs in a comfortable position, with one lying on the ground and the other foot on the ground with the knee bent. Start rolling from your right armpit down to your mid-back area, focusing on tender areas. Switch sides and repeat.

Nate Swanner
Former Digital Trends Contributor
Nate is General Manager for all not-Digital-Trends properties at DTMG, including The Manual, Digital Trends en Espanol…
How to make nutritious and delicious trail snacks: Your DIY guide
DIY trail snacks are less expensive and better for the environment
Date and cashew bars

Knowing how to properly feed yourself to stay energized throughout the day is essential to success on the trail. Whether you're out hiking for the day or on a multi-day thru-hike, nutrition will make or break your trip. There are loads of trail snacks on the market that you can take in your pack, but if you hit the trail every day, these can be costly.

We all want to be a bit more environmentally conscious. As outdoor enthusiasts, we have a much closer connection with the natural environment than most. Even some of the more environmentally aware companies still wrap their snacks in plastic packaging, and many snacks come individually wrapped for convenience. Save yourself money and look out for your environmental footprint in one move by learning how to make your own trail snacks at home. Here are six of our favorites.
Raisin, cherry, and honey flapjacks

Read more
Camper van vs Class B RV: How to choose which to buy for your outdoor adventures
Class B RV vs Camper Van - who ya got?
Man building a campfire in front of a Winnebago Ekko Springer camper van.

If you would love to go on road trips and experience the best national parks, there is no better way to do it and still feel comfortable like you’re at home than camping in an RV. Let’s be honest: You will enjoy sleeping on a cozy bed in an RV with an air conditioner more than in a moist and chilly tent. It’s also easier to prepare your meals in an RV because of the refrigerator, and you don’t have to worry about packing and unpacking your camping bags every night or morning. 

However, the big RVs can be a headache if you're driving through low-hanging bridges or tight spaces. They’re also more expensive to fuel and maintain compared to smaller-size vehicles. Alternatively, you could choose a Class B RV or a camper van if prefer an RV that strikes a balance between rural camping and big-city adventure. But the question is — what’s the difference between a Class B RV and a camper van? And which one should you buy?
A Class B motorhome is built with all the camping amenities

Read more
Coast’s all-new Model 1 solar electric trailer is a luxe, off-grid-ready stunner
Sleek and luxurious, with a solar power system designed to run almost indefinitely off-grid.
Coast Model 1 solar electric travel trailer/RV parked near a pond.

The last decade has seen an explosion in tech innovation in the RV and travel trailer industry. With batteries and mobile solar setups getting cheaper, better, and more ubiquitous, many of today's recreational vehicles are finally capable of keeping up with the demands of today's tech-obsessed travelers. Case in point: Coast's all-new Model 1. It's a solar-powered travel trailer designed to take you just about anywhere without having to leave your gadgets behind.
Get the details on Coast's Model 1 solar electric trailer

From afar, the exterior of the Model 1 has the same recognizable silhouette as many of today's premium travel trailers. But, decked in jet black or two-tone black-on-white (it's also available in all white), it feels sleeker, more modern, more ... premium. The glossy shell appears vaguely futuristic, a hint of the solar-heavy tech that lies beneath. The genuine composite structure is made by, in Coast's words, "combining differing fully recyclable, re-purposable, and environmentally friendly natural components [that are] virtually waterproof."

Read more