If you are reading this article by the dim glow of your phone as you lie at the bottom of a chasm, one leg broken, an arm gushing blood, and vague feelings of confusion and anger clouding your thinking, then sir, it’s already too late. The time to prepare for a wilderness first aid situation is long before you ever venture out into the backwoods.
You know that sublime quote from Louis Pasteur, “Chance favors the prepared mind?” Well, a chance of survival favors the prepared outdoorsman, too. So before you go for that next hike, mountain bike ride, high alpine climb, or even just a car camping trip in a remote area, bone up on wilderness medical intervention and make sure you pack accordingly.
What to Pack in a Wilderness First Aid Kit
Before we get to the several wilderness first aid techniques you should internalize, there are a few pieces of gear you should never be without when you venture afield, specifically a first aid kit. Know the contents of the one that you purchase. If you’re packing your own, make sure to include, at the minimum:
- Gauze; roll and large pads
- Medical tape and scissors
- Antiseptics; ideally wipes, creams, and fluid like hydrogen peroxide
- Varied bandages, including butterfly bandages
- Ibuprofen and aspirin
- Tweezers
- Sterile gloves
In addition to your first aid kit, there are a few essentials to consider.
- Water and a way to purify more water
- Signaling device; whistle, mirror, and a phone or walkie, even though they might not work
- Rope; at least a couple dozen feet of strong cordage is essential
- Thermal blanket; the thin Mylar kind like marathon runners use
And then, of course, you need proper gear and apparel for the adventure at hand, but this isn’t the time for a complete list of your kit. This is the time to give you the 4-1-1 on five of the most serious injuries you or a member of your crew might face out there in the wild. In addition to my own experience, I also consulted The Survival Hacker’s Handbook by Ted Alvarez, a wonderful resource for all things outdoorsy, and Bushcraft Illustrated, by Dave Canterbury, a book that uses imagery to elucidate the ways of the wild.
One more note: Always keep in mind that wilderness first aid should always end with assistance from certified medical professionals.
Wilderness First Aid Techniques
Bleeding
Whether it’s a severed artery that’s spraying blood into the air caused by a bad fall into a rocky gorge or a half-inch gash across your palm caused by your very own knife as you sliced up dinner, the facts are the same: The first thing you have to do is stop the bleeding.
Steps for Treating a Wound:
- Stop the bleeding
- Elevate
- Clean
- Close
For severe bleeds, use gauze or clean, dry clothes and staunch the flow with plenty of pressure. You can apply a tourniquet to stop a gusher but immediately work on the dressing and get that tourniquet off ASAP; if you are cutting off enough blood flow to stop the bleed, you are also cutting off flow to the entire appendage and it will be headed for amputation all too soon.
Once you have the bleeding stopped with pressure, elevate the wound, large or small, above the heart. If this isn’t possible, at least get the injured person to lie flat so the wound isn’t below the heart.
Don’t close up the injury before you clean it. The temptation to immediately bandage off and tape up that cut, gash, or puncture may well see you sealing in bacteria that leads to much larger issues later. If you have antiseptic products (or hard liquor), use those. If not, flush the wound with purified water. Then close it up as best you can and get out of there as fast as possible.
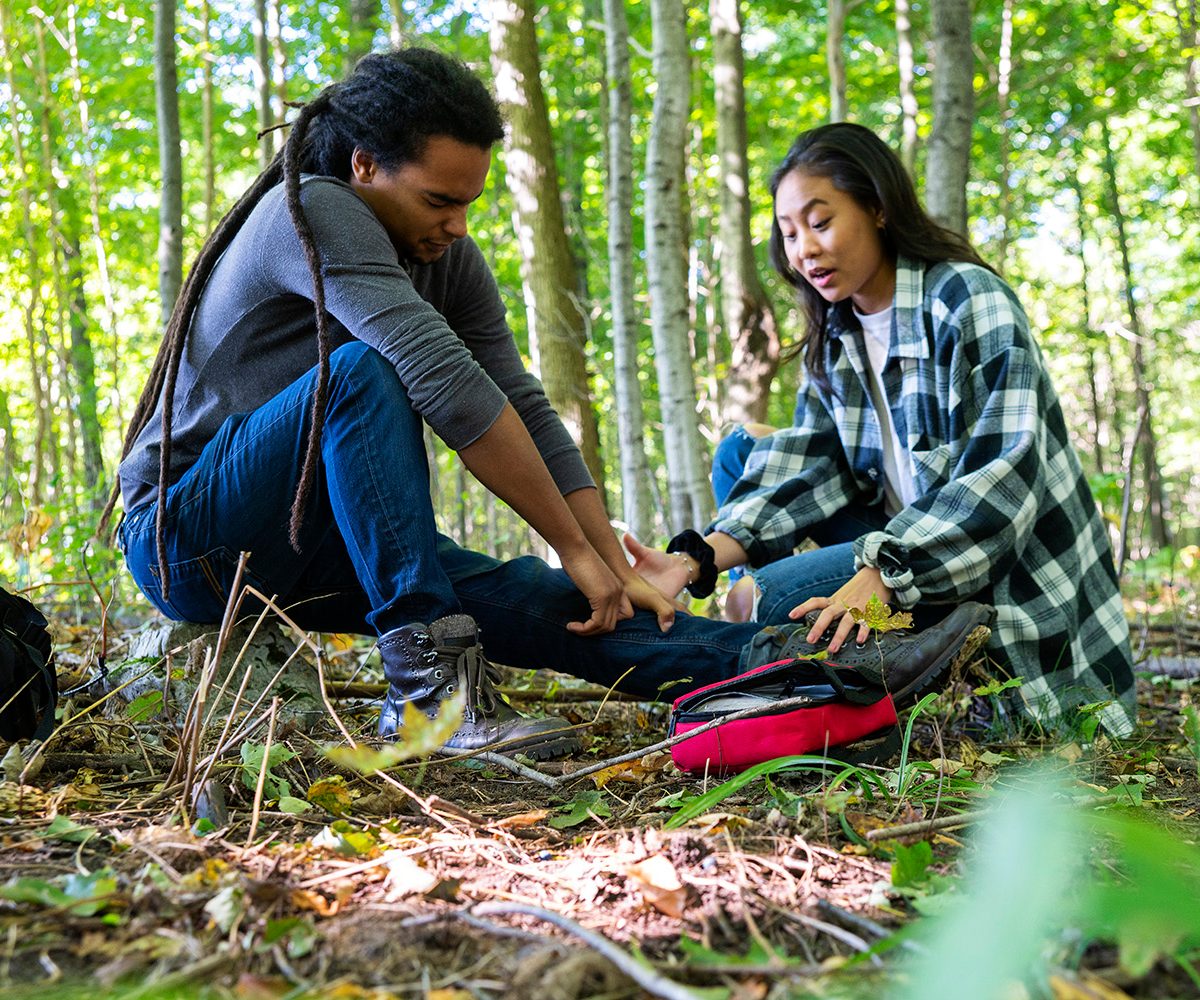
Broken Bones
If you can walk on that ankle, grasp with those fingers, or lift any appreciable load with an arm, your bones probably aren’t broken, painful as life might be at the moment. If you heard a crack, see an angle that wasn’t there, or you are in agony and can’t use a body part at all properly, then you probably broke something, and you need to set it and get out, fast.
You have to stabilize and immobilize a broken bone to prevent more damage and make the process of extraction from the wild less agonizing. Though the techniques are different, dealing with a broken bone in the field essentially involves splinting it.
A section of tent pole, a trekking pole, or a good, strong, straight stick can all be used as splints. But don’t go tying and taping a stick or hiking pole right against your buddy’s broken femur. First, add padding in the form of a wrapped puffer jacket or a portion of a foam sleeping pad. Then lay the solid splint pieces on either side of the broken bone, securing them in place with rope (or with a belt or sleeves cut off a shirt if you forgot rope) above and below the break.
If the break is to a bone in the arm, also create a sling that will restrict motion and reduce further damage.
With a broken ankle, wrap tape (duct if you have it, gauze or medical tape if not) in a figure-eight pattern around the ankle, under the foot, back around the ankle the other way, and repeat several times. If the person with the snapped ankle can bear it, you can use a hiking boot laced tight to provide even more stabilization, but don’t try to hike out on that leg.
Head Injury
If someone in your group has sustained a head injury, proper assessment of the severity is critical, as there is little you can do to treat a serious internal brain injury other than expediting the arrival of or ferrying to professional medical assistance. Know what to look for and know a potentially life-threatening head injury can occur after what seems a minor fall or when another object falls down onto the hapless victim.
Headache, dizziness, lack of coordination, and confusion are all signs of trauma to the brain.
Headache, dizziness, lack of coordination, and confusion are all signs of trauma to the brain. Keep the victim sitting up and talking, then run basic tests like having them follow a finger with only their eyes and reciting data like addresses and dates. Sudden exhaustion, anger, vomiting, and any fluid leaking out of the nose or ears are all signs of severe brain injury, and if any of these present themselves after trauma to the head, you have a real emergency and someone in the gang needs to be sprinting full tilt for help if you can’t call in the medics, ideally via helicopter.
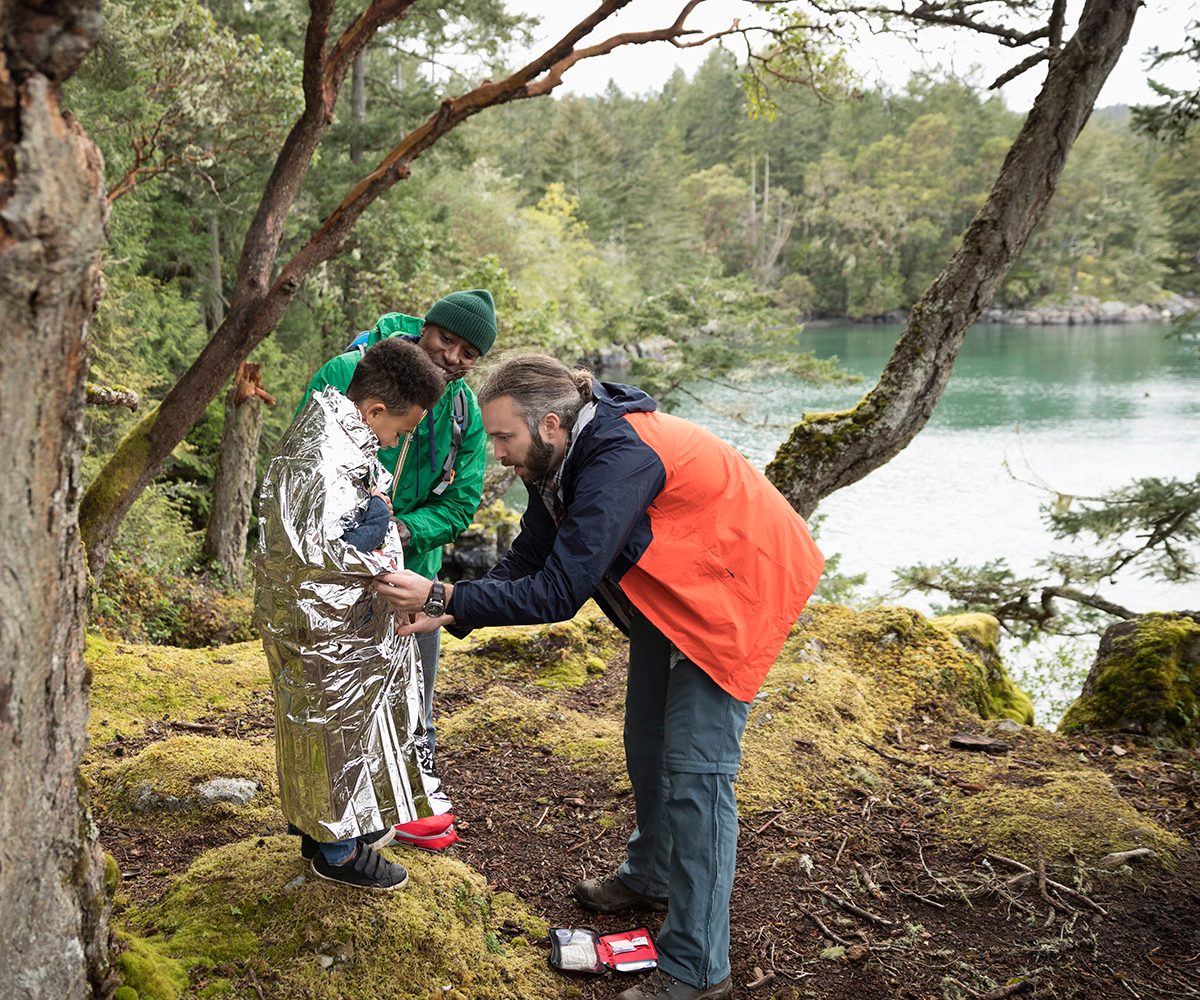
Hypothermia and Frostbite
You’ll know hypothermia when you see (or feel) it. There will be uncontrollable shivers accompanied by a sharp drop in coordination and clarity of thinking. When it goes from bad to worse, the shivering will stop, with life stopping not long after. To treat hypothermia, first, get any wet clothing and gear off the person, then get him or her swaddled in warm, dry clothing, inside a sleeping bag zipped shut (and ideally tucked into another bag). Next, get simple sugars into their system — think sugar water, hot cocoa, or Pixie Stix dust. These will help create some internal heat as the body burns up the sugar.
A frostbitten appendage literally looks frozen; it will be white, bluish, or gray. It will feel numb to its owner, cold to another. The best way to warm up a finger, hand, or foot that has frostbite is to submerge it in warm water. Shoot for water that is about 102 degrees Fahrenheit, just about the same temperature as you’d expect in a hot tub — hotter water will just cause injury on top of the injury. (For reference, coffee is usually served closer to 160 degrees Fahrenheit, which is way too hot for this!) If you don’t have access to warm water, wrap the afflicted body part in as many layers of warm, insulating fabric as you can and encourage the person to stay in motion, running warm blood through the appendage.
Heart Attack
Heart attacks are far and away the leading cause of death in America and the strains the wilderness can put on the body only make a myocardial infarction all the more likely. Knowing how to treat a heart attack is essential for wilderness first aid. The first tip? If you’re administering aspirin, as you should, make sure the victim chews up the aspirin tablet, or else grind and feed it to them yourself. In its tab form, it won’t do much if anything fast enough to help.
Heart Attack Symptoms
- Tightness in the chest
- Shortness of breath
- Nausea
- Dizziness
- Pain in the left upper arm
- Loss of consciousness
Heart attack symptoms include tightness in the chest, shortness of breath, nausea and dizziness, pain in the left upper arm, and often a loss of consciousness.
The most important thing you can do for a heart attack victim is perform between 100 and 120 chest compressions per minute. Place one hand atop the other, press the heel of the lower palm just left of the victim’s sternum, and press down about two inches with each compression. Done properly, CPR will bruise or even break ribs. It’s OK, it beats them dying.
If you have been trained in CPR, also administer three rescue breaths every half minute (or 50 to 60 compressions). Rescue breaths are administered with the victim’s head tilted back, nose pinched closed, and should be only about one seconds of firm exhalation.
All that said, few people die in the wilderness each year, so get out there and have fun! Just stay safe and be prepared.