
These Chili Cheese Nachos are Part Texan, Part Korean, and All Delicious

When it comes to party-ready snack foods, nachos rank pretty highly in terms of ease, share-ability, and deliciousness. How could they not? You can put pretty much anything you want on the chips — meat, cheese, salsa, guacamole, you name it — and the individual chips mean it’s easy to scoop a few onto your plate without making too much of a mess.

One of our favorite toppings to add to nachos is a nice, homemade chili. There’s just something about the mix of meat (and sometimes beans) with spices and dark, savory sauce piled high on a slightly salty nacho chip that gets us.

We love chili, specifically, because of its malleability when it comes to spice. Not to say we wouldn’t top our nachos with spiced brisket or any other meat, though, because we so would, but for all intents and purposes right now, we’re sticking with chili. It can be as mild or as hot as you want to make it. We usually go with as hot as possible, but also understand that sometimes it’s about flavor, not burning your taste buds off.

Chung Jung One Gochujang Korean Chili Sauce square
Image used with permission by copyright holder

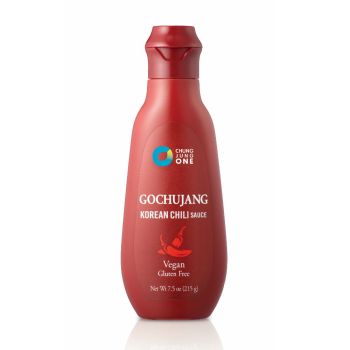
One way to spice up your chili — and by proxy, your nachos — while maintaining a mouth-watering flavor is to switch up the type of hot sauce you’re using. Who says you need to stick to the typical Frank’s Red Hot or Tabasco when there’s a whole wild world of hot out there. (You could use this hot sauce, but you’d have to be a bit crazy to do so.) This time around, we’re going across the world and utilizing the rich sweet and spicy flavors of Korean cuisine to kick this snack time favorite up a notch. Specifically, we’re using Chung Jung One Gochujang Korean Chili Sauce. Sweet, savory, and rich in umami, it has the right amount of heat to liven up just about any meal. When you mix those flavors with beef and cheese, well, you’ve got yourself a surefire winner right there.

Texas-Style Gochujang Chili Cheese Nachos

Gochujang Chili Nachos
Image used with permission by copyright holder

(Serves 6-8)

Chili

Ingredients:

  • 4 lb beef chuck roast, cut into .5-inch cubes
  • 1 bottle dark beer, 12 ounces
  • 1 can diced tomatoes, 28 ounces
  • 4 cups beef broth
  • 6 tbsp Chung Jung One Gochujang Korean Chili Sauce
  • 3 tbsp vegetable oil
  • 2 tbsp brown sugar
  • 1 tbsp ground cumin
  • 5 tsp salt
  • 1 tsp ground coriander
  • 2 oz chipotle peppers in adobo sauce
  • 6 garlic cloves, minced
  • 2 jalapeño peppers, finely chopped
  • 1 large onion, finely chopped

Method:

  1. In a large pot, heat 2 tbsp of oil over high heat. Working in batches, brown the meat and transfer to a paper towel-lined plate.
  2. Add the remaining 1 tbsp of oil and heat over medium heat. Add onion, garlic, and jalapeño pepper. Sauté for 3 minutes until wilted.
  3. Add Gochujang Sauce, chipotle peppers, brown sugar, cumin, coriander, and salt. Cook for another 3-4 minutes. Then add beer, beef broth, and diced tomatoes.
  4. Simmer for about 2 hours, or until meat is very tender. Let cool to room temperature and adjust seasoning with additional salt as needed.
  5. Serve right away, or for best results, let cool in the refrigerator overnight and reheat the next day.*

Sour Cream

Ingredients:

  • 4 oz sour cream
  • 2 tsp Chung Jung One Gochujang Korean Chili Sauce

Method:

  1. Mix Gochujang Sauce and sour cream together in a bowl and keep refrigerated until ready to use.

Nachos

Ingredients:

  • Texas-Style Gochujang Chili
  • 8 oz yellow and blue tortilla chips
  • 2 oz sharp cheddar cheese, shredded
  • 1 serrano pepper, thinly sliced
  • Gochujang sour cream to top

Method:

  1. Lay out the tortilla chips on a plate. Ladle about a quarter of the chili over chips. Sprinkle cheese over chili while still warm, so that the cheese begins to melt.
  2. Dollop sour cream over the cheese and garnish with serrano peppers. Serve immediately.

*Note: Use leftover chili for an additional batch of nachos, topping baked potatoes, or thin with beef broth to serve as a soup.

Sam Slaughter
Sam Slaughter was the Food and Drink Editor for The Manual. Born and raised in New Jersey, he’s called the South home for…
How to start your own home bar: the essential spirits
Home Bar

When you start getting into cocktails, drinking them is only half the fun -- making them is part of the appeal too. If you start making your own drinks at home, you'll soon find that you can often create better or more interesting drinks than what you're served in most bars. And even better, making drinks for other people is a great way to try out new combinations, learn about spirits, and make your friends and family happy too.

However, moving beyond the simple spirit plus mixer style of drinks which most people make at home and into the world of cocktails means that you'll need a wider array of spirits on hand than you might be used to. It can take some time and research to build up a well stocked bar, and choosing high quality spirits isn't a cheap endeavor. It's worth it, though, for the pleasure of being able to try out classic cocktail recipes and experiment with making up your own creations too.

Read more
You’re overlooking the most important ingredient in your cocktail
Steel Hibiscus cocktail.

When you list off the most important parts of making a good cocktail your mind likely goes immediately to good ingredients: quality spirits, freshly squeezed citrus juices, and well-matched mixers. You might also consider the importance of using the right tools, like getting a proper mixing glass so your stirred drinks can be properly incorporated, or a good strainer so that there aren't little shards of ice in your cocktails. And then there are the fun additions like elaborate garnishes, bitters, or home-made syrups which can add a personal touch to your drinks.
All of those things are important, absolutely. However I think there's one ingredient that can make or break a good cocktail, and it's something many drinkers don't ever stop to consider. It's the humble but vital ingredient of ice.

Why ice is so important
In mixed drinks like a gin and tonic or a screwdriver, ice is added to the drink primarily to chill it down to a pleasing temperature. That's a topic we'll come back to. But in cocktails which are shaken or stirred, ice is far more important than that. Cocktails are typically composed of between around 20 to 30 percent water, and this water comes from the ice used in the preparation process.
When you stir ingredients in a mixing glass or shake them in a shaker with ice, you are chipping away small pieces of the ice so that it dissolves and blends with your other ingredients. You might imagine that water doesn't make much of a difference to taste, being tasteless itself. But it's vital in opening up the flavors of other ingredients. That's why many whiskey drinkers like to add a dash of water to their whiskey when they drink it neat.
If you're ever in doubt of how important water is to cocktails, it's worth trying to make a drink with no ice. Even if you mix up the ideal ratios for a drink that you love and put it into the freezer so that it gets to the chilled temperature that you usually enjoy it at, if you sip it you'll find that your drink tastes harsh, unbalanced, and incomplete. Even for special room temperature cocktails like those designed to be drunk from a flask, you'll generally find water being added at a rate of around 30%.
When you make your cocktails you should be sure to stir for a long time – around 30 seconds is a good start – or to shake for a good while too – I typically do around 12 to 15 seconds – in order to melt enough ice to get plenty of water into your cocktail. Despite what you might imagine, this won't make the cocktail taste watery but will rather make the flavors stand out more as well as often improving the mouthfeel of the drink. A good rule of thumb is to mix or shake until the vessel is cold to the touch. That means your ingredients are sufficiently incorporated with the ice.

Read more
How to reverse sear for a flawless steak every time
Trust us, you're going to want to try this method
Sliced steak on cutting board

It seems that every day, there's a new method of cooking that seems, honestly, pretty superfluous compared to the old-fashioned way of doing things. As a cooking purist myself, I sometimes find it difficult not to roll my eyes at many of the new techniques and culinary trends or methods that promise to be "easier than ever" or the "best" way to cook something. Usually, I like to cook the way my Grandmother did. Give me a wooden spoon, a good cast iron pan, an oven, and some fire, and I'll be good to go. Admittedly, I've been pulled out of this way of thinking once or twice - like the time I finally dropped my pride and tried sous vide ribs. Good lord. That one delicious experience showed me that - just maybe - there's still a little room for modern cooking upgrades every now and then. Reverse searing is one of those modern upgrades. And for those of us who still cringe a bit when trying out a new cooking gadget, worry not. Only the process itself is modern. This method requires absolutely no specialized equipment - just an oven and a good-quality pan.

Reverse searing steak allows for a better handle on temperature control, decreasing your chances of overcooking that beautiful ribeye. This method also creates a gorgeously caramelized crust on the outside of your steak. When placed in the oven first, the surface of the meat will dry more thoroughly and make for a better pan-sear later on.
How to reverse sear a steak

Read more