
The Manual may earn a commission when you buy through links on our site.

Why (and How) You Should Start Growing Your Own Hops

Stock-Hops
Image used with permission by copyright holder

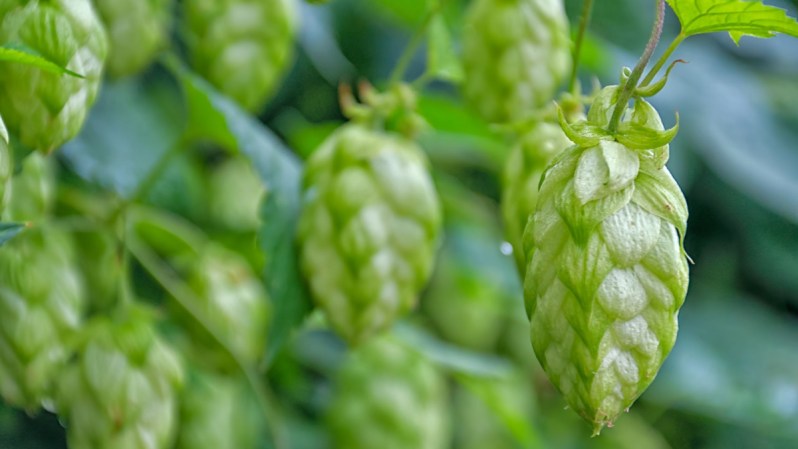
Humulus lupulus — known to Joe Everyman as hops — are the aromatic, bitter, and flavor-enhancing vegetables that add so much deliciousness to beer. If you’ve ever wanted to grow your own hops, now is the perfect time of year to get started.

While growing hops may seem like a no-brainer for home brewers, well-tended hops also make a decorative trellis or screen planting with a personal twist for beer enthusiasts as well. Late spring’s milder temperatures provide the ideal climate to pick up some starter plants and see if your green thumb is as strong as your beer-tasting skills.

To begin your hop journey, you need hop rhizomes, which are short segments of roots from mature hop plants. If you don’t have a local nursery that sells hops, they can easily be mail-ordered in a dormant state. Prices start at around $4 for common plantings like Chinook, Columbus, and Willamette, but expect to pay a little bit extra for rarer varieties.

If you’ll be using the hops for brewing, then choosing which hop to plant depends on your personal preferences. If the plan is to put the hops into different batches, it may be best to go with a mild, all-purpose, bittering hop so that you can use it for many different beer styles. However, if you only crave big, resiny IPAs, growing a more specific hop like Newport may be a better investment.

Stock-Hops-Garden
Image used with permission by copyright holder

The local climate will play a huge part in your growing success. The good news is that hops tend to thrive in the majority of the country where the average annual extreme minimum temperature is between -30 and 20 degrees Fahrenheit. Unless you’re in Alaska, Hawaii, the deep south, or far west, you can probably grow hops in your yard.

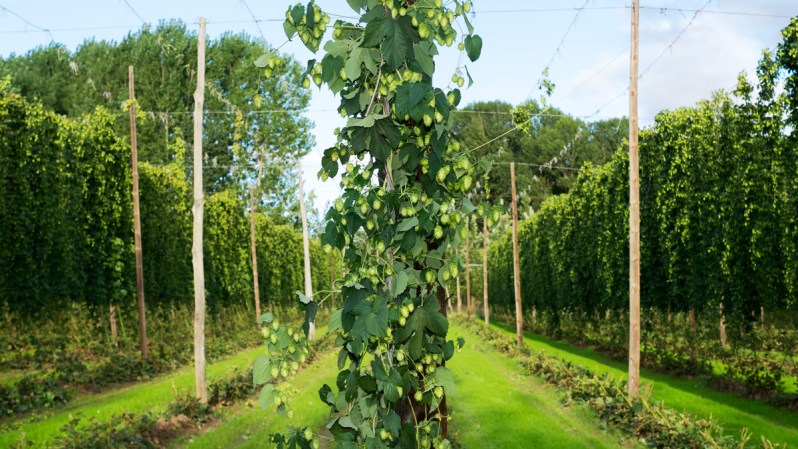
You’ll want to make sure your growing area has lots of space and direct sunlight. Hops grow as climbing vines that, when mature, can reach up to 25 feet tall. Shortly after planting, you can expect a hop vine to grow about a foot per day. A trellis or other support structure is highly recommended to keep the plant from overtaking other vegetation or buildings.  Regular drip irrigation into fertile soil will give the plants a solid head start.

Hops were called a “wild and pernicious weed” by King Henry VIII, in reference to the tenacity of the plant. Once they take off, they are hardy, thriving plants that are easy to maintain and provide not only backyard shade but also one of the most important and delicious ingredients used in brewing.

For more on growing your own hops or other beer ingredients, check out The Homebrewer’s Garden by Dennis and Joe Fisher. Recommended sites to order hop rhizomes include eBrew, Great Lakes Hops, and More Beer

Editors' Recommendations

Lee Heidel
Lee Heidel is the managing editor of Brew/Drink/Run, a website and podcast that promotes brewing your own beer, consuming the…
Why you should stock up on this Costco fan-favorite beer
This beer will get you through the holiday season
Close-up of a glass of beer

This time of year, festive, glittering cocktails are prominent at every at-home celebration, office holiday party, and post-Nutcracker soiree. The more ornate, the better, garnished with everything from crushed candy canes to coconut shavings made to look like freshly fallen snow. They slosh prettily in their frosted glassware and look beautiful paired with sparkling cocktail dresses.

And the wine that flows this time of year is equally exquisite, with many hosts opting to spend a few more dollars on better bottles, blaming their extravagance on festivity. For these libations, we are grateful. And it's because of them we have the patience to make it through Aunt Susan's annual ornament exchange. They are our supportive friends at the party, convincing us with loving encouragement that we're better dancers than we are. And they certainly make it a lot easier to endure Angela in human resources, rambling on about her snow globe collection.

Read more
Here’s why you should be grilling your summer cocktails
We all love a classic summer cocktail, but have you ever thought to grill one?
grilled cocktails guide for summer edward howell 5tf40djyvbm unsplash

Summertime means backyard barbecues, pool parties, and long evenings by the bonfire. It means picnics and beach getaways, and lounging around in chic shades and sandals. As varied as these fun activities can be, not a single one isn't improved by really, truly delicious summer cocktails. There are, of course, the sunshine staples — margaritas, daiquiris, and piña coladas. And while we certainly aren't here to bash the classics, there's a secret weapon for improving these tried-and-true cocktails, and any other adult beverage you can think of, for that matter: the grill.
While the idea of a grilled cocktail may sound a bit strange, we aren't actually recommending you somehow skewer your martini glass and pop it on the coals. That lemon wedge you use for your icy poolside lemon drop, however, would absolutely love a quick trip to the flames before it hits your glass. Or how about that grapefruit wedge in your Seabreeze? Imagine adding a hint of smoke to the perfectly tart slice of sweet. You get the idea. By grilling your cocktail ingredients before mixing and muddling, you can add a whole new level of beautifully smoky, summertime flavor to your favorite fruity drinks.
The smoke you add to your grilled cocktails can be as subtle or as bold as you wish. If it's only a small kiss of smoke you're after, consider charring your drink's garnish; a citrus wedge, a slice of watermelon, or a bit of peach are all beautiful after a trip to the grill grates. By grilling just some of an ingredient, your drink will have a hint of summertime smoke that contrasts beautifully with the sweetness of a fruity drink.
On the other hand, if you're looking to go bananas (which are also wonderful when grilled), feel free to really go all out. If you're making a Bloody Maria, for example, almost every ingredient but the tequila can be grilled or at least smoked — including all of the vegetable garnishes.

Grilled cocktails tips and tricks:

Read more
Why Parmesan isn’t the cheese you should put on your pasta
It may be time to rethink your finishing cheese for your pasta dishes
Parmesan cheese


We know that we say this about a lot of dishes, but truly — is there anything better than a big, rich, steaming bowl of cheesy pasta? Give us your bucatini, your ravioli, your fettuccini Alfredo. We'll take it all. Just always, always, top it with a generous grating of cheese. But which cheese? Of course, in this country, we've gotten very used to that finishing cheese being salty, nutty, delicious Parmesan. And while that's certainly a very adequate choice — is it the best choice? We say no. If you ask us, Pecorino Romano is the superior alternative.
What's the difference between Parmesan cheese and Pecorino Romano?
The two cheeses undoubtedly have their similarities. Both are hard, aged, salty Italian cheeses. The main difference between the two is that Parmesan is a cow's milk cheese, and Pecorino is a sheep's. And while both cheeses are aged, the differences in aging time are significant. Parmesan can be aged anywhere between one and three years, while the more youthful Pecorino is generally only aged a few months.

Read more