Ambitious baking projects consumed the lives of many a quarantined person throughout spring and early summer 2020 … but now that we’re in the true dog days of summer, complete with brutal temperatures and soul-crushing humidity, it can be hard to get excited about the prospect of firing up your oven. For that reason, frozen and refrigerated treats tend to reach their peak appeal during this season, and if you’re keen on enjoying a “cake” without resigning yourself to several hours of oven labor, then get familiar with icebox cake, a mid-century marvel that’s easy, refreshing, and beyond satisfying.
What is “icebox cake”?
We’ll get the biggest question about icebox cake out of the way right now: No, it’s not technically a “cake.” This no-bake dessert has more in common with a trifle or a pudding than with a traditional cake, both from a textural standpoint and in terms of its creation process. Icebox cake, which first gained popularity during the 1920s and 1930s and remained a household hit throughout the 20th century, only requires two ingredients: whipped cream and cookies (or crackers) for layering. Of course, icebox cake makers have full liberty to add flavor agents, mix-ins, and decorations to their hearts’ content, but as long as you have whipped cream and cookies, you’re ready to give this treat a try. “As for making this at home, it just doesn’t get any easier. It’s simple and quick, plus it keeps in the freezer for over a week; it’s a great dessert to make ahead for a dinner party,” says chef/owner David Guas of Bayou Bakery in Arlington, Virginia of this summer-perfect sweet.
Whipped cream is key to this cake’s success … but you can feel free to have fun with it.
My mother frequently made icebox cakes throughout my childhood, and her formula included chocolate wafer cookies and Cool-Whip. Yeah, high-end pastry enthusiasts may scoff at Kraft’s sweetened whipped topping, but it’s an easy and tasty option for a quick icebox cake; this opinion is shared by Chef Ben of Benedetto’s in Tampa, Florida, who uses Cool-Whip as a key ingredient in his legendary no-bake kumquat pie.
If you’d rather make your own whipped cream, then baker and cookbook author Jessie Sheehan (who also prefers the homemade stuff in her icebox cakes) has a few tips for you:
“[First of all,] whipping cream until it forms stiff peaks is the way to go when making an icebox cake, as the more stable the cream is, the better job it will do of holding all your cookies in place while the cake sets up in the fridge. This is particularly true if you are making a ‘free-form’ cake without a pan (like the traditional log-shaped icebox cake; the recipe for which is on the back of the Nabisco Chocolate Wafer Cookie box).
[Also,] flavor your whipped cream with abandon. Heavy cream flavored with vanilla extract is lovely and simple and will always make for a great icebox cake. But what about using a different extract? Peppermint whipped cream layered with chocolate cookies would be fun, as would almond whipped cream with Nilla Wafers and some fresh berries on the side. Or, add fresh lemon juice to your cream, or a tablespoon of citrus or a couple of tablespoons of cocoa powder and/or a handful of toasted sweetened shredded coconut.”
Choose a substantial type of cookie or cracker for layering purposes.
Icebox cakes need to remain in their eponymous refrigerator for a sustained period of time (Sheehan recommends at least 6 hours) in order to fully set. This is because the cookies or crackers in the icebox cake must be in long contact with the whipped cream. It’s important to choose versions with the structural integrity to properly absorb that moisture. “Dry and crisp cookies make for the best icebox cakes, as the cookies absorb the whipped cream (or pudding) while resting in the fridge, and soften, providing an icebox cake with its cake-y feel. If the cookie is is too soft or moist, it won’t absorb the cream as well, and the whole thing might turn to mush,” explains Sheehan.
For a very Southern spin on icebox cake, try replacing your crispy cookies with Ritz crackers. Museum director Karen Amspacher, who makes a lemon icebox pie (same idea as an icebox cake, but in a flatter form) served at the Core Sound Waterfowl Museum and Heritage Center in Harkers Island, North Carolina, tells us that “the secret [to this pie] is the Ritz crackers. That salty buttery crust with the rich tangy filling and the old-fashioned sugar meringue makes the best pie ever.”
Drizzling a warm sauce over a slice of icebox cake provides an appealing temperature contrast.
For an indulgent icebox cake garnish, consider the advice of Shifra and Shlomo Klein, the editors of the New York-based kosher cooking magazine Fleishigs: “[We] often use a warm sauce — like chocolate sauce — on top of our icebox cakes, pouring it on top of each individual piece before serving. The icebox cake and warm sauce allow for an elevated and decadent ice cream sundae-like experience!”
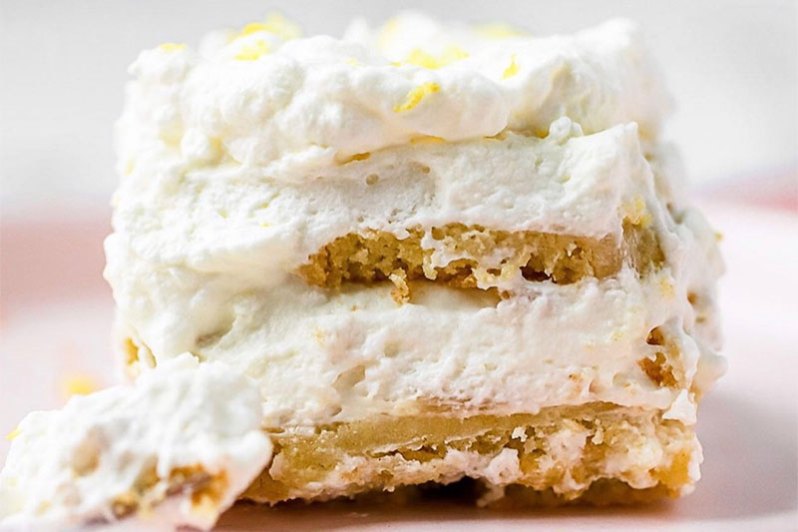
Summer Lemon Icebox Cake
(By Rosalin Siv, founder, The Evercake, New York City)
Ingredients:
- 2 cups heavy cream
- 10 oz mascarpone
- .5 cup powdered sugar
- .5 cup limoncello or lemon liqueur
- 1 tsp Meyer lemon juice
- 1 tsp vanilla extract
- 1 18-oz package lemon wafer cookie
- Zest of 3 Meyer lemons, plus extra for garnish
Method:
- Using a stand mixer or hand mixer with a whisk attachment, combine the heavy cream, mascarpone, sugar, limoncello, lemon zest, lemon juice, and vanilla extract. Mix on low speed, gradually increasing the speed until firm peaks form.
- Use an 8-inch springform pan to assemble the cake, making 4 layers each of wafer cookies and of whipped filling. Begin with a layer of cookies, overlapping to ensure a solid base with no spaces between the cookies. Next, add 1/4 of the filling and smooth with a spatula. Repeat the cookie-filling layers 3 more times, finishing with the cream filling on top. Smooth and refrigerate overnight.
- To serve, run a knife around the sides of the cake and carefully lift the cake off the springform bottom. Garnish with lemon zest.
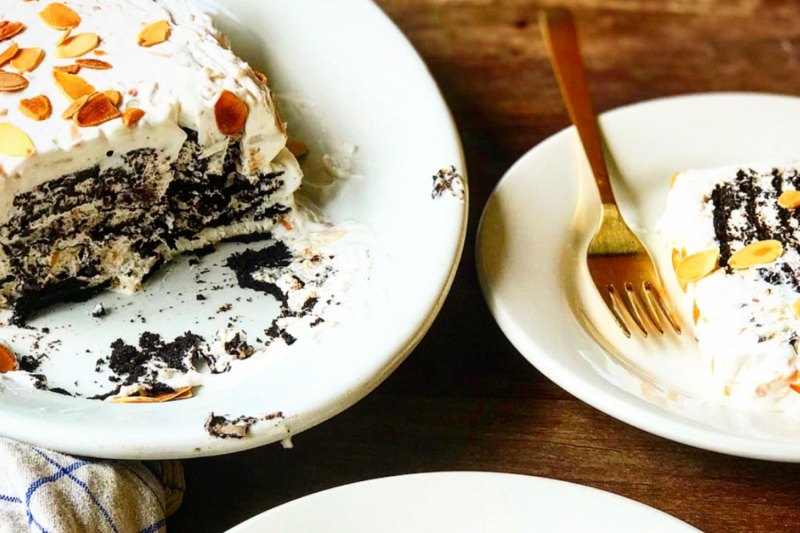
Coconut Chocolate Icebox Cake With Toasted Almonds
(By Jessie Sheehan, recipe developer/cookbook author, The Vintage Baker)
Ingredients:
- 3 cans full-fat coconut milk
- .5 to 1 tsp almond extract
- .75 cup confectioners’ sugar
- 1.5 cups heavy cream
- 1.5 cups sweetened shredded coconut, toasted
- 9 oz crisp chocolate wafer cookies
- .5 cup sliced almonds, toasted
Method:
- Place the cans of coconut milk in the coldest spot in your refrigerator upside-down and leave them there for 24 hours. This will allow the coconut cream in the milk to solidify and separate from the liquid.
- Line a 9-by-5-by-3-in [23-by-12-by-7.5-cm] loaf pan with plastic wrap that hangs slightly over the sides of the pan.
- Flip the cans of coconut milk right-side up, open the cans, and, using a rubber spatula, carefully scrape the solid coconut cream into the bowl of a stand mixer fitted with the whisk attachment. Save the liquid for another purpose. Add the almond extract and confectioners’ sugar and whisk on medium speed until smooth and thick. Add the heavy cream and whisk on medium-high speed until the cream holds stiff peaks, about 2 minutes. Add the toasted coconut and fold it into the cream with a rubber spatula.
- Using a small offset spatula or the back of a spoon, spread a thin layer of the whipped cream on the bottom of the lined pan. Cover as much of the cream as possible with a layer of wafers, filling any gaps with broken wafers, to create a solid layer of wafers.
- Continue layering whipped cream and wafers until you run out or reach the top of the pan, ending with a layer of wafers. Gently cover the surface with plastic wrap and refrigerate for at least 6 to 8 hours, or preferably overnight. If you have whipped cream left over, store this in the refrigerator along with the cake.
- Remove the cake from the refrigerator prior to serving and peel off the plastic wrap. Place a serving plate over the pan and invert the cake onto the plate. Carefully remove the pan and plastic wrap lining and, if using, thinly spread the remaining whipped cream over the sides and top of the cake. Re-whip the cream if it looks too soft to spread. Sprinkle the cake with the toasted almonds, lightly pressing them into the cake.
- Using a serrated knife, cut the cake into slices and serve. The cake will keep, lightly wrapped with plastic wrap, in the refrigerator for up to 3 days.
Editors' Recommendations
- You need to try this easy creamy pesto pasta salad recipe
- The 10 best sweet treats for your Valentine’s Day celebration
- 3 unique Thanksgiving desserts that have nothing to do with pie
- 8 Easy Camping Meals To Eat Anytime, Anywhere
- 5 Simple Super Bowl Desserts for Your Game Day Party


